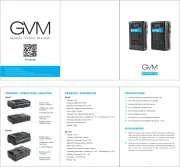
GVM Slider-120 Manual
GVM
Ikke kategoriseret
Slider-120

| Mærke: | GVM |
| Kategori: | Ikke kategoriseret |
| Model: | Slider-120 |
Har du brug for hjælp?
Hvis du har brug for hjælp til GVM Slider-120 stil et spørgsmål nedenfor, og andre brugere vil svare dig
Ikke kategoriseret GVM Manualer
5 November 2025

15 November 2024

7 Oktober 2024

4 Oktober 2024

3 September 2024

6 August 2024

5 August 2024

5 August 2024

4 August 2024

1 August 2024
Ikke kategoriseret Manualer
- SKLZ
- Obsidian
- Max
- HVMLAK
- CyberChill
- Novis
- Profile
- Gagato
- Xomax
- Aeotec
- Petmate
- Mercusys
- PAG
- EM2GO
- Lexmark
Nyeste Ikke kategoriseret Manualer

5 November 2025

5 November 2025

5 November 2025

5 November 2025

5 November 2025

5 November 2025

5 November 2025

5 November 2025

5 November 2025

5 November 2025