Hikvision DS-2DF5274-A Manual


Læs nedenfor 📖 manual på dansk for Hikvision DS-2DF5274-A (106 sider) i kategorien Overvågningskamera. Denne guide var nyttig for 26 personer og blev bedømt med 4.5 stjerner i gennemsnit af 2 brugere

Side 1/106
5-inch High-denion Network
Speed Dome
User Manual
UD.6L0201D1107A01
User Manual of Network Speed Dome
© Hikvision Digital Technology Co., Ltd. All Rights Reserved.
3
Safety Instrucon
These instrucons are intended to ensure that the user can use the product correctly
to avoid danger or property loss.
The precauon measure is divided into ‘Warnings’ and ‘Cauons’:
Warnings: Serious injury or death may be caused if any of these warnings are
neglected.
Cauons: Injury or equipment damage may be caused if any of these cauons are
neglected.
Warnings Follow these safeguards to
prevent serious injury or death.
Cauons Follow these precauons to
prevent potenal injury or material
damage.
Warnings:
Please adopt the power adapter which can meet the safety extra low voltage
(SELV) standard And source with 24VAC 10% or 12VDC 10% (depending on .  
models according to the IEC60950-1 and Limited Power Source standard. The )
power consumpon cannot be less than the required value.
Do not connect several devices to one power adapter as an adapter overload may
cause over-heang and can be a re hazard.
When the product is installed on a wall or ceiling, the device should be rmly
xed.
To reduce the risk of re or electrical shock, do not expose the indoor used
product to rain or moisture.
This installaon should be made by a qualied service person and should
conform to all the local codes.
Please install blackouts equipment into the power supply circuit for convenient
supply interrupon.
If the product does not work properly, please contact your dealer or the nearest
service center. Never aempt to disassemble the product yourself. (We shall not
assume any responsibility for problems caused by unauthorized repair or
maintenance .)
User Manual of Network Speed Dome
© Hikvision Digital Technology Co., Ltd. All Rights Reserved.
5
Table of Contents
Chapter 1 Overview .................................................................................................................... 8
1.1 System Requirement ........................................................................................................... 8
1.2 Appearance ........................................................................................................................ 8
1.3 Funcons ............................................................................................................................ 8
Chapter 2 Network Connection ................................................................................................ 11
2.1 Setng the Network Speed Dome over the LAN ................................................................11
2.1.1 Wiring over the LAN ..................................................................................................... 11
2.1.2 Detecng and Changing the IP Address ......................................................................... 12
2.2 Setng the Network Speed Dome over the WAN ............................................................... 13
2.2.1 Stac IP Connecon ...................................................................................................... 13
2.2.2 Dynamic IP Connecon ................................................................................................. 14
Chapter 3 Access to the Network Speed Dome ......................................................................... 17
3.1 Accessing by Web Browsers ..............................................................................................17
3.2 Accessing by Client Soware ............................................................................................. 19
Chapter 4 Live View .................................................................................................................21
4.1 Power-up Acon ............................................................................................................... 21
4.2 Live View Page .................................................................................................................. 21
4.3 Starng Live View ............................................................................................................. 22
4.4 Recording and Capturing Pictures Manually ......................................................................24
4.5 Operang PTZ Control ....................................................................................................... 25
4.5.1 PTZ Control Panel .........................................................................................................25
4.5.2 Setng / Calling a Preset ............................................................................................... 25
4.5.3 Setng / Calling a Patrol ................................................................................................ 27
4.5.4 Setng / Calling a Pattern .............................................................................................. 29
4.6 Conguring Live View Parameters ..................................................................................... 30
Chapter 5 PTZ Conguraon .....................................................................................................32
5.1 Conguring Inial Posion ................................................................................................ 32
5.2 Conguring Basic PTZ Parameters .....................................................................................33
5.3 Conguring PTZ Limit Stops ............................................................................................... 34
5.4 Conguring Scheduled Tasks ............................................................................................. 35
5.5 Conguring Park Acons ................................................................................................... 37
5.6 Conguring Privacy Mask .................................................................................................. 38
5.7 Conguring Smart Tracking ............................................................................................... 40
5.8 Clearing PTZ Conguraons .............................................................................................. 41
Chapter 6 Speed Dome Conguraon ......................................................................................42
6.1 Conguring Local Parameters ............................................................................................ 42
6.2 Conguring Time Setngs ................................................................................................. 43
6.3 Conguring Network Sengs ............................................................................................ 46
User Manual of Network Speed Dome
© Hikvision Digital Technology Co., Ltd. All Rights Reserved.
6
6.3.1 Conguring TCP/IP Sengs ........................................................................................... 46
6.3.2 Conguring Port Sengs .............................................................................................. 48
6.3.3 Conguring PPPoE Sengs ........................................................................................... 48
6.3.4 Conguring DDNS Sengs ............................................................................................ 49
6.3.5 Conguring SNMP Sengs ...........................................................................................52
6.3.6 Conguring 802.1X Sengs ..........................................................................................53
6.3.7 Conguring QoS Setngs ............................................................................................... 54
6.3.8 Conguring FTP Setngs ...............................................................................................55
6.3.9 Conguring NAT Sengs ............................................................................................... 56
6.3.10 Conguring Email Sengs ........................................................................................ 57
6.4 Conguring Video and Audio Setngs ............................................................................... 60
6.4.1 Conguring Video Sengs ............................................................................................ 60
6.4.2 Conguring Audio Sengs ............................................................................................ 61
6.4.3 Conguring ROI Sengs ...............................................................................................62
6.5 Conguring Image Sengs ...............................................................................................63
6.5.1 Conguring Display Setngs .......................................................................................... 63
6.5.2 Conguring OSD Setngs ..............................................................................................69
6.5.3 Conguring Text Overlay Setngs .................................................................................. 71
6.6 Conguring and Handling Alarms ...................................................................................... 72
6.6.1 Conguring Motion Detection ....................................................................................... 72
6.6.2 Conguring Video Loss Alarm .......................................................................................76
6.6.3 Conguring Tamper-proof Alarm ................................................................................... 77
6.6.4 Conguring External Alarm Input .................................................................................. 78
6.6.5 Conguring Alarm Output ............................................................................................. 80
6.6.6 Handling Exception ....................................................................................................... 81
Chapter 7 Record Sengs ........................................................................................................83
7.1 Conguring NAS Sengs ................................................................................................... 83
7.2 Conguring Recording Schedule ........................................................................................ 84
7.3 Conguring Snapshot Sengs ........................................................................................... 88
Chapter 8 Playback ................................................................................................................... 90
Chapter 9 Log Searching ........................................................................................................... 94
Chapter 10 Others ...................................................................................................................... 96
10.1 Managing User Accounts ..................................................................................................96
10.2 Conguring RTSP Authencaon ....................................................................................... 99
10.3 Conguring Anonymous Visit ............................................................................................ 99
10.4 Conguring IP Address Filter ........................................................................................... 100
10.5 Viewing Device Information ............................................................................................ 100
10.6 Maintenance .................................................................................................................. 101
10.6.1 Reboong the Speed Dome .................................................................................... 101
10.6.2 Restoring Default Setngs ....................................................................................... 101
10.6.3 Imporng/Exporng Conguraon File ................................................................... 102
10.6.4 Upgrading the System ............................................................................................. 103
User Manual of Network Speed Dome
© Hikvision Digital Technology Co., Ltd. All Rights Reserved.
15
Connecng the network speed dome via a modem
Purpose:
This speed dome supports the PPPoE auto dial-up funcon. The speed dome gets a
public IP address by ADSL dial-up aer the speed dome is connected to a modem.
You need to congure the PPPoE parameters of the network speed dome. Refer to
Secon 6.3.3 Conguring PPPoE Sengs for detailed conguration.
Figure 2-6 Accessing the Speed Dome with Dynamic IP
The obtained IP address is dynamically assigned via PPPoE, so the IP address always
changes after reboong the speed dome. To solve the inconvenience of the dynamic IP, you
need to get a domain name from the DDNS provider (E.g. DynDns.com). Please follow
below steps for normal domain name resoluon and private domain name resoluon to
solve the problem.
Normal Domain Name Resoluon
Figure 2-7 Normal Domain Name Resoluon
Steps:
1. Apply a domain name from a domain name provider.
2. Congure the DDNS sengs in the DDNS Seings interface of the network speed
dome Refer to Secon. 6.3.4 Conguring DDNS Sengs for detailed
conguraon.
3. Visit the speed dome via the applied domain name.
User Manual of Network Speed Dome
© Hikvision Digital Technology Co., Ltd. All Rights Reserved.
18
Figure 3-2 Download and Install Plug- in
Figure 3-3 Install Plug- (1) in
Figure 3-4 Install Plug- (2) in
User Manual of Network Speed Dome
© Hikvision Digital Technology Co., Ltd. All Rights Reserved.
19
Figure 3-5 Install Plug- (3) in
You may have to close the web browser to install the plug-in. Please reopen the web
browser and log in again after installing the plug-in.
3.2 Accessing by Client Soware
The product CD contains the client soware. You can view the live video and manage
the speed dome with the client soware.
Follow the installaon prompts to install the client soware and WinPcap. The
conguraon interface and live view interface of client soware are shown bellow.
Figure 3-6 iVMS-4200 PCNVR Control Panel
User Manual of Network Speed Dome
© Hikvision Digital Technology Co., Ltd. All Rights Reserved.
21
Chapter 4 Live View
4.1 Power-up Acon
Aer the power is applied, the speed dome will perform self-test acons. It begins
with lens acons and then pan and lt movement. Aer the power-up self-test
acons, the informaon as shown in Figure 4-1 will be displayed on screen for 40
seconds.
The System Informaon displayed on the screen includes the dome model, address,
protocol, version and other informaon. The COMMUNICATION refers to the baud
rate, parity, ta bit and stop bit of the dome. da e.g., “2400, N, 8, 1” indicates the dome
is congured with the baud rate of 2400, no parity, 8 data bits and 1 stop bit.
Figure 4-1 Power-up informaon
4.2 Live View Page
Purpose:
The live video page allows you to view live video, capture images, realize PTZ control,
set/call presets and congure video parameters.
L the network speed dome enter the live view page, or you can click og in to
on the menu bar of the main page to enter the live view page.
User Manual of Network Speed Dome
© Hikvision Digital Technology Co., Ltd. All Rights Reserved.
23
Figure 4-3 Start Live View
Table 4-1 Descripons of the Toolbar
Icon
Descripon
Icon
Descripon
Live view on
Live view o
Manually capture the pictures
Manual recording o
Manual recording on
Audio and adjust volume on
Mute
T -way audio owo
T -way audio on wo
3D zoom
Manual tracking
Before using the two-way audio or recording with audio funcons, please set the
Stream Type Video & Audio to referring to Section 6.4.1 Conguring Video Sengs.
Full-screen Mode:
You can double-click on the live video to switch the current live view into full-screen
or return to normal mode from the full-screen.
3D Positioning :
Steps:
1. Click on the tool bar of live view interface.
2. Operate the 3D positioning function:
Le click a posion of the live video. The corresponding posion will be
moved to the center of the live video.
Hold down the le mouse button and drag the mouse to the lower right on
User Manual of Network Speed Dome
© Hikvision Digital Technology Co., Ltd. All Rights Reserved.
24
the live video. The corresponding posion will be moved to the center of the live
video and zoomed in.
Hold down the mouse button and drag the mouse to the upper left on le
the live video. The corresponding posion will be moved to the center of the live
video and zoomed out.
Manual Tracking:
Before you star t:
Please enter the Smart Tracking sengs interface and enable smart tracking first.
Conguraon > Advanced Conguraon> PTZ > Smart Tracking
Steps:
1. Click on the tool bar of live view interface.
2. Le click a moving object in the live video.
T eed dome will track the object automacally. he sp
Not all the speed dome models support this function. Please take the browser
interface of the actual product as standard.
Please refer to the following secons for more informaon:
Conguring remote recording in Secon 7.2 Conguring Recording Schedule.
Seng the image quality of the live video i Seconn 6 Conguring Local .1
Parameters and Secon 6 .1 Conguring Video Sengs.4 .
Seng the OSD text on live video i Seconn 6.5.2 Conguring OSD Sengs.
4.4 Recording and Capturing Pictures Manually
In the live view interface, click on the toolbar to capture the live pictures or
click to record the live video The local saving paths the captured pictures . of
and clips can be set i then Conguraon > Local Conguraon interface.
To congure remote automac recording, please refer to Secon 7.2 Conguring
Recording Schedule.
The captured image will be saved as a JPEG le in your computer.


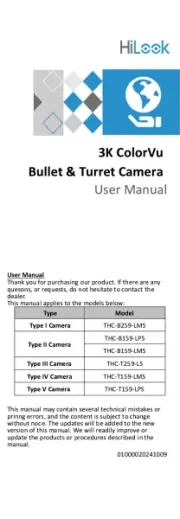
Produkt Specifikationer

Mærke: Hikvision
Kategori: Overvågningskamera
Model: DS-2DF5274-A
Kode for international beskyttelse (IP): IP66
Type: IP-sikkerhedskamera
Vekselstrømsindgangsspænding: 24 V
Højde: 325.5 mm
Vægt: 5000 g
Produktfarve: Hvid
Kompatible hukommelseskort: MicroSD (TransFlash), MicroSDHC
Wi-Fi: Ingen
Formfaktor: Kuppel
Understøttede videotilstande: 720p
Relativ luftfugtighed ved drift (H-H): 0 - 90 %
Ethernet LAN-porte (RJ-45): 1
Ethernet LAN: Ja
Understøttede videoformater: H.264, M-JPEG, MPEG4
Driftstemperatur (T-T): -30 - 65 °C
Maksimal opløsning: 1280 x 960 pixel
Understøttede grafikopløsninger: 1280 x 960,1280 x 720 (HD 720)
Forbindelsesteknologi: Ledningsført
Strømforbrug (maks.): 40 W
Kabelteknologi: 10/100Base-T(X)
Understøttede netværksprotokoller: IPv4/IPv6, HTTP, HTTPS, 802.1x, Qos, FTP, SMTP, UPnP, SNMP, DNS, DDNS, NTP, RTSP, RTP, TCP, UDP, IGMP, ICMP, DHCP, PPPoE
Webbaseret administration: Ja
IP-adresse filtrering: Ja
Monteringstype: Væg
Diameter: 220 mm
Indbygget kortlæser: Ja
Understøttet placering: Udendørs
Mikrofonindgang: Ja
Hvidbalance: ATW, Auto, Indoor, Lamp, Manual, Outdoor
Sensortype: CMOS
Samlet antal megapixels: 1.3 MP
Optisk zoom: 20 x
Digital zoom: 12 x
Fokusindstilling: 1.6 - 3.5
Maksimal størrelse på hukommelseskort: 32 GB
Hældningsvinkelområde: -5 - 90 °
Sammensat videoudgang: 1
Progressiv scanning: Ja
Strøm over Ethernet (PoE): Ingen
Bredt dynamikområde (WDR): Ja
Dag/nat funktion: Ja
Minimumsbelysning: 0.05 Lux
Panoreringsområde: 0 - 360 °
Optisk sensorstørrelse: 1/3 "
Zoom kapacitet: Ja
Synsfelt vinkel (FOV): 58.3 °
Brændviddeområde: - mm
Kameraets lukkerhastighed: 1 - 1/30000 sek./side
Bevægelsessensor: Ja
Signal/støjforhold: 50 dB
PTZ-kontrol: Ja
Hældningshastighed: 400 grader i sekundet
Panoreringshastighed: 540 grader i sekundet
Adgangskodebeskyttelse type: Bruger
Aktiv manipulering af alarm: Ja
Alarmindgang/-udgang: Ja

Har du brug for hjælp?

Hvis du har brug for hjælp til Hikvision DS-2DF5274-A stil et spørgsmål nedenfor, og andre brugere vil svare dig


Overvågningskamera Hikvision Manualer

Overvågningskamera Manualer

Nyeste Overvågningskamera Manualer