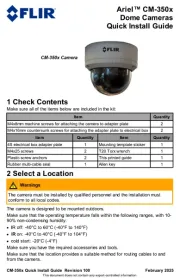
FLIR Ariel CM-3505 Manual

FLIR Overvågningskamera Ariel CM-3505

Læs gratis den danske manual til FLIR Ariel CM-3505 (12 sider) i kategorien Overvågningskamera. Denne vejledning er vurderet som hjælpsom af 2 personer og har en gennemsnitlig bedømmelse på 4.6 stjerner ud af 1.5 anmeldelser. Har du et spørgsmål om FLIR Ariel CM-3505, eller vil du spørge andre brugere om produktet?

Side 1/12
CM-350x Quick Install Guide Revision 100
February 2025
This document does not contain any export-controlled information.
Ariel CM-350x
Dome Cameras
Quick Install Guide
1 Check Contents
Make sure all of the items below are included in the kit:
Item
M4x8mm machine screws for attaching the camera to adapter plate
2
M4x16mm countersunk screws for attaching the adapter plate to electrical box
2
Item
Item
4S electrical box adapter plate
1
Mounting template sticker
1
M4x25 screws
2
T20 Torx wrench
1
Plastic screw anchors
2
This printed guide
1
Rubber multi-cable seal
1
Allen key
1
2 Select a Location
Warnings
The camera must be installed by qualified personnel and the installation must
conform to all local codes.
The camera is designed to be mounted outdoors.
Make sure that the operating temperature falls within the following ranges, with 10-
90% non-condensing humidity:
IR off: -40°C to 60°C (-40°F to 140°F)
IR on: -40°C to 40°C (-40°F to 104°F)
cold start: -20°C (-4°F)
Make sure you have the required accessories and tools.
Make sure that the location provides a suitable method for routing cables to and
from the camera.
CM-350x Quick Install Guide Revision 100
February 2025
This document does not contain any export-controlled information.
Supplying Power to the Camera
The camera can be powered by IEEE 802.3af, Class 3 PoE (Power over Ethernet).
Maximum power consumption with video analytics is 10 W (CM-3505) / 12.95 W
(CM-3508).
For assistance with purchasing a compatible PoE injector, contact Teledyne FLIR.
Tips
Ensure you have a stable, clean working environment. Dust and dirt can get into
components and cause the camera to malfunction.
Adequate lighting and proper tools can prevent accidentally damaging the
camera.
Use your fingers to connect the camera. Teledyne FLIR recommends not using
needle-nose pliers, which can damage connectors.
To support video analytics (VA), mount the camera so that it can accurately
detect and classify objects.
Teledyne FLIR recommends connecting the camera on a bench or in a lab and
configuring it for networking before mounting and aiming it. However,
circumstances can dictate adjusting the sequence of the steps. You can:
oMount the camera before configuring it for networking.
oConnect the camera before mounting it.
3 Remove Dome Cover
Using the T20 Torx wrench included in the kit, loosen and remove the three screws
that secure the dome cover to the camera base. Note the attached anti-drop safety
wire.
4 Connect the Camera
Warning
The camera itself does not have a power on/off switch. Do not
supply power to the camera until you have completely finished
connecting it.


Produkt Specifikationer

Mærke: FLIR
Kategori: Overvågningskamera
Model: Ariel CM-3505

Har du brug for hjælp?

Hvis du har brug for hjælp til FLIR Ariel CM-3505 stil et spørgsmål nedenfor, og andre brugere vil svare dig


Overvågningskamera FLIR Manualer
FLIR

FLIR FH-Series Manual

22 Juli 2025
FLIR

FLIR FXV101-H Manual

4 Juli 2025
FLIR

FLIR M42046 Manual

13 September 2024
FLIR

FLIR PT-117 Manual

8 September 2024
FLIR

FLIR Saros DH-390 Manual

4 September 2024
FLIR

FLIR T4350BN Manual

2 September 2024
FLIR

FLIR M500 Manual

25 August 2024
FLIR

FLIR Cloud N233BE Manual

25 August 2024

Overvågningskamera Manualer

Nyeste Overvågningskamera Manualer