Honeywell HSF600BE4 Manual

Honeywell Ventilator HSF600BE4

Læs gratis den danske manual til Honeywell HSF600BE4 (13 sider) i kategorien Ventilator. Denne vejledning er vurderet som hjælpsom af 75 personer og har en gennemsnitlig bedømmelse på 4.9 stjerner ud af 38 anmeldelser. Har du et spørgsmål om Honeywell HSF600BE4, eller vil du spørge andre brugere om produktet?

Side 1/13
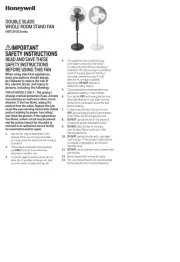
GB OSCILLATING QUIETSET® STAND FAN
Operating Instructions
DE SICH DREHENDER QUIETSET®
STANDVENTILATOR
Betriebsanleitung
DK QUIETSET® STÅENDE VENTILATOR,
DER DREJER
Betjeningsvejledning
ES VENTILADOR DE PIE OSCILANTE
QUIETSET®
Instrucciones de funcionamiento
FI KÄÄNTYVÄ QUIETSET®-
JALUSTATUULETIN
Käyttöohjeet
FR VENTILATEUR OSCILLANT SUR PIED
QUIETSET®
Instructions de mise en marche
IT VENTILATORE OSCILLANTE A
PIANTANA QUIETSET®
Istruzioni per l’uso
NL OSCILLERENDE QUIETSET®-
STATIEFVENTILATOR
Bedieningsinstructies
NO DREIENDE QUIETSET® GULVVIFTE
Driftsinstruksjoner
PL WENTYLATOR OSCYLUJĄCY
QUIETSET®
Instrukcja obsługi
RU ОСЦИЛЛИРУЮЩИЙ НАПОЛЬНЫЙ
ВЕНТИЛЯТОР QUIETSET®
казания по эксплуатации
SE OSCILLERANDE QUIETSET®
TORNFLÄKT
Driftsanvisningar HSF600BE/HSF600WE
4
Insert and tighten the L shaped bolt (2) and washer on
the bottom of the Base (1) (Fig. 4).
Tighten by turning clockwise. (Fig. 4).
B. ASSEMBLING THE UPPER PORTION OF THE FAN
Insert the Motor assembly (8) into the Metal fan pole
(3) (Fig. 5), once both halves are aligned tighten the
Thumb screw (4) by turning it clockwise.
Rear grille locking nut (10) will come attached to the
Motor assembly (8). Remove it by turning COUNTER
CLOCKWISE. You will re-attach the Rear grille locking
nut later (Fig. 6).
Place rear grille (11) on Motor assembly (8) making
sure the 3 pins on motor assembly protrude through
the grille’s openings (Fig. 7).
Replace Rear grille locking nut (10) and turn clockwise
to tighten (Fig. 7).
Slide Fan blade (13) over motor shaft making sure
small slots on rear of Fan blade are aligned with the
small pins on the shaft (Fig. 8).
Place Blade locking nut (14) on shaft and turn
COUNTER CLOCKWISE to tighten (Fig. 8).
Raise the 5 front grille locking clips (12).
Align Front Grille (15) with Rear grille (11) (Fig. 9).
Close locking clips (12) to secure Front and Rear
grilles (Fig. 10).
Place remote control (16) on the back of the Motor
assembly (8) (Fig. 14). NOTE: The remote control will
not work while in the fan housing.
C. DETERMINING THE HEIGHT OF THE FAN
The unique Twist & LockTM height adjustment feature
lets you choose the perfect height for your cooling
needs. Twist the top pole and either pull up or push
down to find your ideal height then twist again to lock in
place. (see label on back of fan pole)
Securely grasp the top portion of the pole and twist
counter clockwise to unlock.
Pull up or push down to adjust height (placing your
foot or hand gently on the base will help with the
height adjustment) (Fig 11).
Once you have selected the desired height, twist
clockwise until you feel the pole lock into place. (Fig 11).
DO NOT USE THE SCREW on the pole for height
adjustment.
REMOTE CONTROL BATTERY INSTALLATION/
REPLACEMENT INSTRUCTIONS (See page 2)
Remove battery door by sliding downward in direction of
arrow (Fig. 12).
Insert 2x 1.5V LR03 AAA batteries (included) into the
remote following the directional guides in the recessed slots.
Replace battery door by sliding upward opposite of arrow
direction until door snaps in place.
NOTE: DO NOT MIX OLD AND NEW BATTERIES. DO
NOT MIX ALKALINE, STANDARD (CARBONZINC) OR
RECHARGEABLE (NICKELCADMIUM) BATTERIES.
SEE RECYCLERS IN YOUR AREA FOR PROPER DISPOSAL
OF BATTERIES.
OPERATION (See page 1)
ON/OFF
To turn fan on, press the Power button ( ) (I) located at
the bottom of the control panel.
SPEED CONTROL
To adjust the speed up or down, press the Fan speed
button ( ) (II) repeatedly to increase level.
TIMER
Choose from 1, 2, 4, or 8 hour settings by performing
the following function:
1 hour:
Press the Timer button ( ) (III) once.
2 hours:
Press the Timer button twice.
4 hours:
Press the Timer button a third time.
8 hours:
Press the Timer button a fourth time.
Press the Timer button a fifth time to turn the Timer
feature off.
AUTO DIM LIGHT FEATURE
Control panel light automatically dims to 50%
brightness after 15 seconds and resumes to 100%
brightness when settings are changed.
OSCILLATION
Oscillation knob is located on the top panel of the
Motor assembly housing.
To START fan oscillation, push the Oscillation Knob (8)
DOWN (Fig. 13).
To STOP fan oscillation, pull the Oscillation Knob (8)
UP (Fig. 13).
REMOTE CONTROL OPERATION (See page 1)
ON/OFF
Remove remote control from the back of the fan. The
remote control will not work while in the fan housing.
Press the Power button ( ) (IV) once to turn the fan on.
Press the Power button a second time to turn the fan off.
SPEED CONTROL
To adjust the speed up or down, press the Fan Speed
button ( ) (V) repeatedly to increase level.
TIMER
Choose from 1, 2, 4, or 8 hour settings by performing
the following function:
ENGLISH (GB)


Produkt Specifikationer

Mærke: Honeywell
Kategori: Ventilator
Model: HSF600BE4

Har du brug for hjælp?

Hvis du har brug for hjælp til Honeywell HSF600BE4 stil et spørgsmål nedenfor, og andre brugere vil svare dig