Size: 700 x 160 mm (unfold), 140 x 160 mm (folded)
Material: 85gsm, WF paper
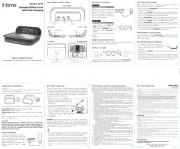
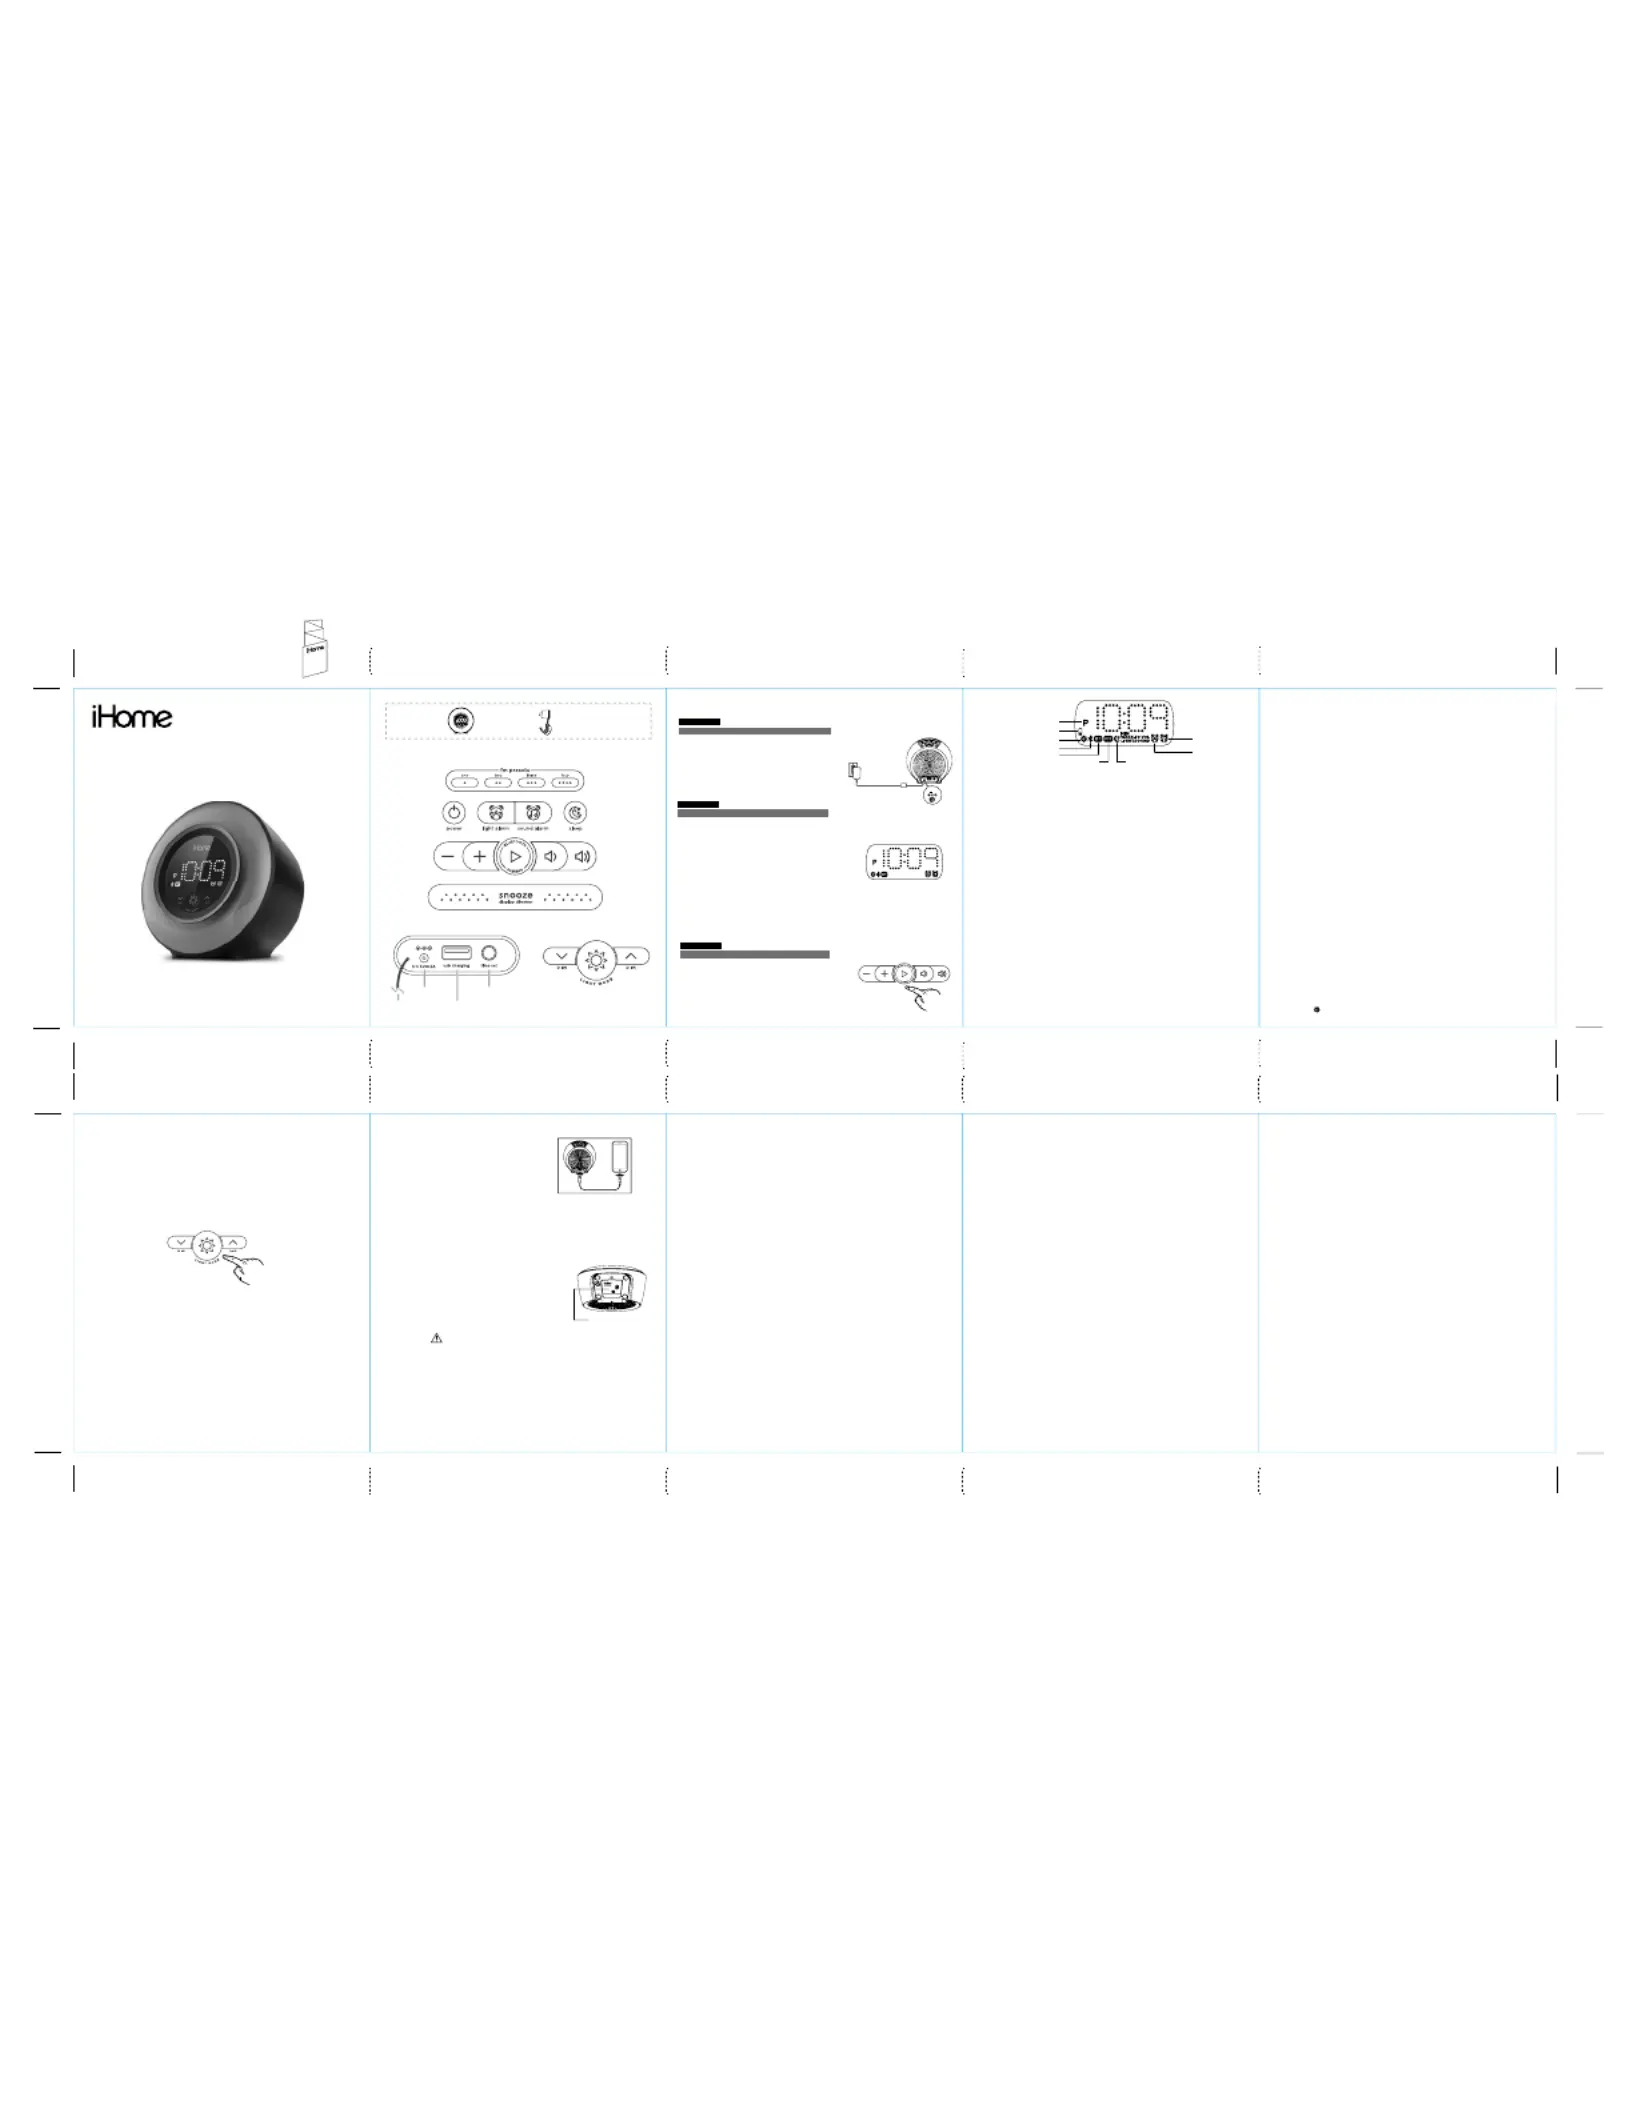
• Remove the battery pull tab from the bottom
• Connect the included AC adapter to the DC
jack located on the back of the unit, and
connect the other end to a working wall
• Press and hold the Time Set Button until the
• Press the to adjust selections – or + Buttons
and tap to confirm (make sure you Time Set
set the correct AM/PM time).
• Do this for time, year, month and date.
By default, the DST Switch on the bottom of
the unit is set to Auto and will automatically
adjust the time in March and November.
Extend the radio antenna for best reception. Press a FM Preset Button (1-4) to turn on the
radio and use the to select a frequency.– or +Buttons
The unit allows you to store up to 4 FM radio station presets.
1. Press the – + or Buttons to tune the radio to the desired station (hold to scan for the next
2. Press and hold a FM Preset Button (1-4). 2 beeps will sound to confirm the preset has
been assigned. Repeat steps 1-2 until you have set up to 4 preset stations.
3. Press an FM Preset Button (1-4) to listen to a preset FM station at any time.
Charging Devices Via USB Port
1. Connect the standard size end of a USB cable (not
included) to the USB port on the back of the unit and
connect the other end to the charging port on your
2. Monitor the charging on your device. Some devices use
a proprietary charging method and will not charge using
the USB port. If this happens, you must charge your
device using the charger that came with it.
The unit uses a CR-2450 back-up battery to provide continuous alarm operation and clock
settings in the event of a temporary power failure. Remove the battery pull tab before use.
When the battery icon on the clock display is flashing, it is time to replace the back-up
battery. The battery compartment is located on the bottom of the unit.
1. Make sure the AC adapter is connected, or you will lose
your time and alarm settings during battery replacement.
2. Use a Phillips screwdriver to open the battery compartment
3. Insert a fresh CR-2450 battery, checking that the polarity
match the markings on the unit. Replace the compartment
door. Do not overtighten.
This equipment complies with FCC RF radiation exposure limits set forth for an uncontrolled environment.
This device complies with Part 15 of the FCC Rules, operation is subject to the following two conditions:
(1) This device may not cause harmful interference, and (2) this device must accept any interference received,
including interference that may cause undesired operation.
• Warning: Changes or modifications to this unit not expressly approved by the party responsible for compliance
could void the user’s authority to operate the equipment.
• NOTE: This equipment has been tested and found to comply with the limits for a Class B digital device, pursuant
to Part 15 of the FCC Rules.
These limits are designed to provide reasonable protection against harmful interference in a residential installation.
This equipment generates, uses and can radiate radio frequency energy and, if not installed and used in accordance
with the instructions, may cause harmful interference to radio communications.
However, there is no guarantee that interference will not occur in a particular installation. If this equipment does
cause harmful interference to radio or television reception, which can be determined by turning the equipment o
and on, the user is encouraged to try to correct the interference by one or more of the following measures:
• Reorient or relocate the receiving antenna.
• Increase the separation between the equipment and receiver.
• Connect the equipment into an outlet on a circuit dierent from that to which the receiver is connected.
• Consult the dealer or an experienced radio/TV technician for help.
This equipment should be installed and operated with minimum distance 20cm between the radiator & your body.
This equipment complies with IC RSS-102 radiation exposure limits set forth for an uncontrolled environment.
This device contains licence-exempt transmitter(s)/receiver(s) that comply with Innovation, Science and Economic
Development Canada’s licence-exempt RSS(s). Operation is subject to the following two conditions:
(1) This device may not cause interference.
(2) This device must accept any interference, including interference that may cause undesired operation of the device.
The device meets the exemption from the routine evaluation limits in section 2.5 of RSS 102 and compliance with
RSS-102 RF exposure, users can obtain Canadian information on RF exposure and compliance.
This equipment should be installed and operated with a minimum distance of 20 cm between the radiator and
Any Changes or modifications not expressly approved by the party responsible for compliance could void the user’s
authority to operate the equipment.
Cet équipement est conforme aux limites d'exposition aux radiations IC CNR-102 établies pour un environnement
L’émetteur/récepteur exempt de licence contenu dans le présent appareil est conforme aux CNR d’Innovation,
Sciences et Développement économique Canada applicables aux appareils radio exempts de licence. L’exploitation
est autorisée aux deux conditions suivantes :
(1) L’appareil ne doit pas produire de brouillage;
(2) L’appareil doit accepter tout brouillage radioélectrique subi, même si le brouillage est susceptible d’en
compromettre le fonctionnement.
Le dispositif rencontre l'exemption des limites courantes d'évaluation dans la section 2.5 de RSS 102 et la
conformité à l'exposition de RSS-102 rf, utilisateurs peut obtenir l'information canadienne sur l'exposition et la
Cet équipement doit être installé et utilisé avec une distance minimale de 20 cm entre le radiateur et votre corps.
Tout changement ou modification non expressément approuvé par la partie responsable de la conformité peut
annuler l'autorité de l'utilisateur à utiliser l'équipement.
CAN ICES-3 (B) / NMB-3(B)
IMPORTANT SAFETY INSTRUCTIONS
Please heed all warnings, read and follow all instructions and keep these instructions handy
1. Do not use this product near water, and clean only with dry cloth.
2. Do not block any ventilation openings. Install in accordance with the manufacturer’s
3. Heat – This product should be situated away from heat sources such as radiators, heat
registers, stoves or other appliances (including amplifiers) that produce heat.
4. Only use attachments/accessories specified by the manufacturer.
5. Unplug this product during lightning storms or when unused for long periods of time.
6. Damage Requiring Service – This product should be serviced by qualified service personnel
- Objects have fallen into or liquid has been spilled into the enclosure.
- The unit has been exposed to rain. The unit has been dropped or the enclosure damaged.
- The unit exhibits a marked change in performance or does not operate normally.
7. No naked flame sources, such as lighted candles, should be placed on this product.
8. Attention should be drawn to the environmental aspects of battery disposal.
9. This product is suitable for use in tropical and/or moderate climates.
10. WARNING: To reduce the risk of fire or electric shock, do not expose this product to rain
11. Do not dispose of batteries in the household trash or fire.
12. The mains plug of power adaptor is used as the disconnect device, it shall remain readily
• Place the unit on a level surface away from sources of direct sunlight or excessive heat.
• Remove the plastic protective film from the clock display.
• Protect your furniture when placing your unit on a natural wood and lacquered finish.
A cloth or other protective material should be placed between it and the furniture.
• Clean your unit with a soft cloth moistened only with mild soap and water. Stronger cleaning
agents such as thinner or similar materials can damage the surface of the unit.
1. Press and hold the for 2 seconds until the alarm time display and alarm Sound Alarm Button
icon flash. A beep sounds.
2. Press the – + or Buttons to adjust the alarm time to the desired time (hold for rapid setting).
Make sure you set the correct AM/PM alarm time. The PM indicator appears to the left of the display.
3. Press the Sound Alarm Button to confirm the alarm time setting. The alarm schedule will flash:
7 (every day), 5 (weekdays) or 2 (weekend only). Press the – or + Buttons to select the desired
4. Press the to confirm the alarm schedule. The wake-to source will flash.Sound Alarm Button
5. Press the or– + Buttons to select a wake-to alarm source: Bluetooth, FM Radio, or Tone:
Wake to Bluetooth: Press the Sound Alarm Button to confirm.
Wake to FM Radio: Press the to confirm. Press the or the Sound Alarm Button – or + Buttons
FM Presets Buttons to select the desired FM frequency to wake to.
Wake to Tone: Press the to confirm. Press the to select a Sound Alarm Button – or + Buttons
6. Press the Sound Alarm Button to confirm wake-to source. The alarm volume will flash.
7. Press the or– + Buttons to adjust the alarm volume.
8. Press the Sound Alarm Button to confirm alarm volume and exit alarm setting mode.
2 beeps will confirm alarm setting is complete. The alarm icon on the display indicates alarm is armed.
1. Press and hold the Light Alarm Button for 2 seconds until the alarm time display and alarm icon
2. Press the – + or Buttons to adjust the alarm time to the desired time (hold for rapid setting).
Make sure you set the correct AM/PM alarm time. The PM indicator appears to the left of the display.
3. Press the to confirm the alarm time setting. The alarm schedule will flash:Light Alarm Button
7 (every day), 5 (weekdays) or 2 (weekend only). Press the – or + Buttons to select the desired
4. Press the to confirm the alarm schedule. The wake-to source will flash.Light Alarm Button
5. Press – +or Buttons to select a wake-to light mode: Dawn, Fade, Fast, Stop, Beat, Sky, or Nite.
6. Press the to confirm alarm settings and exit alarm setting mode. 2 beeps will Light Alarm Button
confirm alarm setting is complete. The alarm icon on the display indicates alarm is armed.
Press and release the to view the current Light Alarm Button or Sound Alarm Button
Programmable Snooze and Dimmer
Adjust the snooze duration and set a schedule for your clock backlight to automatically
dim and brighten at certain times of the day.
1. Press and hold the Snooze/Dimmer Button until the display starts to flash.
2. Use the + or - Buttons to adjust the snooze duration from 1-29 minutes. Press the
Snooze/Dimmer Button again to confirm.
Now it’s time to set the display dimmer schedule:
3. Use the + or - Buttons to set the AUTO dimmer to ON or OFF. Press Snooze/Dimmer
Button to confirm. (Note: Choosing OFF will simply exit the setting.)
4. Use the + or - Buttons to choose the BRIGHTNESS level for daytime hours. Press
Snooze/Dimmer Button again to confirm.
5. Use the +/- Buttons to set the TIME you want the daytime dimmer to take eect.
Press Snooze/Dimmer Button again to confirm.
6. Use the +/- Buttons to choose the BRIGHTNESS level for nighttime hours. Press
Snooze/Dimmer Button again to confirm.
7. Use the +/- Buttons to set the TIME you want the nighttime dimmer to take eect.
Press Snooze/Dimmer Button again to confirm.
8. Done! The icon will appear on the display when Dimmer Schedule is active.
Snooze: When the alarm is sounding, press the Snooze/Dimmer Button to snooze for 9
Dimmer: Press the Snooze/Dimmer Button (when alarm is NOT sounding) to adjust
ONE YEAR LIMITED WARRANTY
iHome Products, a division of SDI Technologies Inc. (hereafter referred to as SDI), warrants
this product to be free from defects in workmanship and materials, under normal use and
conditions, for a period of 90 days from the date of original purchase. Should this product
fail to function in a satisfactory manner, it is best to first return it to the store where it was
originally purchased. Should this fail to resolve the matter and service still be required by
reason of any defect or malfunction during the warranty period, SDI will repair or, at its
discretion, replace this product without charge. This decision is subject to verification of
the defect or malfunction upon delivery of this product to the Factory Service Center
authorized by Customer Service.
If service is required, please contact Customer Service at ihomeaudio.com/support/con-
tact to obtain a Return Authorization Number and shipping instructions. A copy of the
sales receipt is required to validate in-warranty coverage. If proof of purchase cannot be
produced, the product will be deemed out-of-warranty. The date of purchase, vendor,
product model number, and purchase price must be legible and verifiable.
NOTE: This warranty is valid only if the product is used for the purpose for which it was
designed. It does not cover (i) products which have been damaged by negligence or
willful actions, misuse or accident, or which have been modified or repaired by unautho-
rized persons; (ii) cracked or broken cabinets, or units damaged by excessive heat; (iii)
damage to digital media players, CD’s or tape cassettes (if applicable); (iv) the cost of
shipping this product to the Factory Service Center and its return to the owner. This
warranty is valid only in the United States of America and does not extend to owners of
the product other than to the original purchaser. In no event will SDI or any of its aliates,
contractors, resellers, their ocers, directors, shareholders, members or agents be liable
to you or any third party for any consequential or incidental damages, any lost profits,
actual, exemplary or punitive damages.
(Some states do not allow limitations on implied warranties or exclusion of consequential
damages, so these restrictions may not apply to you.) This warranty gives you specific
legal rights, and you may also have other rights which vary from state to state. Your
acknowledgment and agreement to fully and completely abide by the above mentioned
disclaimer of warranty is contractually binding to you upon your transfer of currency
(money order, cashier's check, or credit card) for purchase of your SDI product.
© 2020 SDI Technologies, Inc. All rights reserved.
Questions? Visit www.ihome.com
Questions? Visit ihome.com
Bluetooth Speaker + USB Charging
• Press the Power Button.
• Press and hold the Play/Bluetooth Pairing
Button until the display flashes.
• Select ‘iHome iBT295’ from your Bluetooth
device’s menu to connect.
Note: Unit must be plugged into working
outlet in order to charge devices.
• Do not ingest the battery, Chemical Burn Hazard. This product contains a coin/button cell
battery. If the coin/button cell battery is swallowed, it can cause severe internal burns in just
2 hours and can lead to death.
• Keep new and used batteries away from children. If the battery compartment does not
close securely, stop using the product and keep it away from children. If you think batteries
mtight have been swallowed or placed inside any part of the body, seek immediate medical
• CAUTION - RISK OF EXPLOSION IF BATTERY IS REPLACED BY AN INCORRECT TYPE.
DISPOSE OF USED BATTERIES ACCORDING TO THE INSTRUCTIONS.
1. Press the Sleep Button as needed to cycle to the desired sleep timer duration: 120, 90,
60, 30, 15 minutes, or OFF.
2. Press and release the during Sleep Mode to review the remaining sleep Sleep Button
Rear Controls Light Modes
Use to adjust the brightness.DIM Buttons
Press Light Mode to cycle through colors.
1. Press and release the corresponding Alarm Button (Light or Sound) twice within 5
seconds to toggle the alarm ON and OFF, indicated by the related white alarm indicator
2. When the alarm sounds, press the corresponding Alarm Button (Light or Sound) or the
Power Button to disable the alarm and reset it to come on at the same time the next
Press the Light Mode Button repeatedly to cycle through 6 dierent modes:
Use DIM Buttons to adjust the brightness.
*Beat Light Mode will pulse to music only when the unit is in Bluetooth mode.