Intellinet 711951 Manual
Intellinet
Ikke kategoriseret
711951
| Mærke: | Intellinet |
| Kategori: | Ikke kategoriseret |
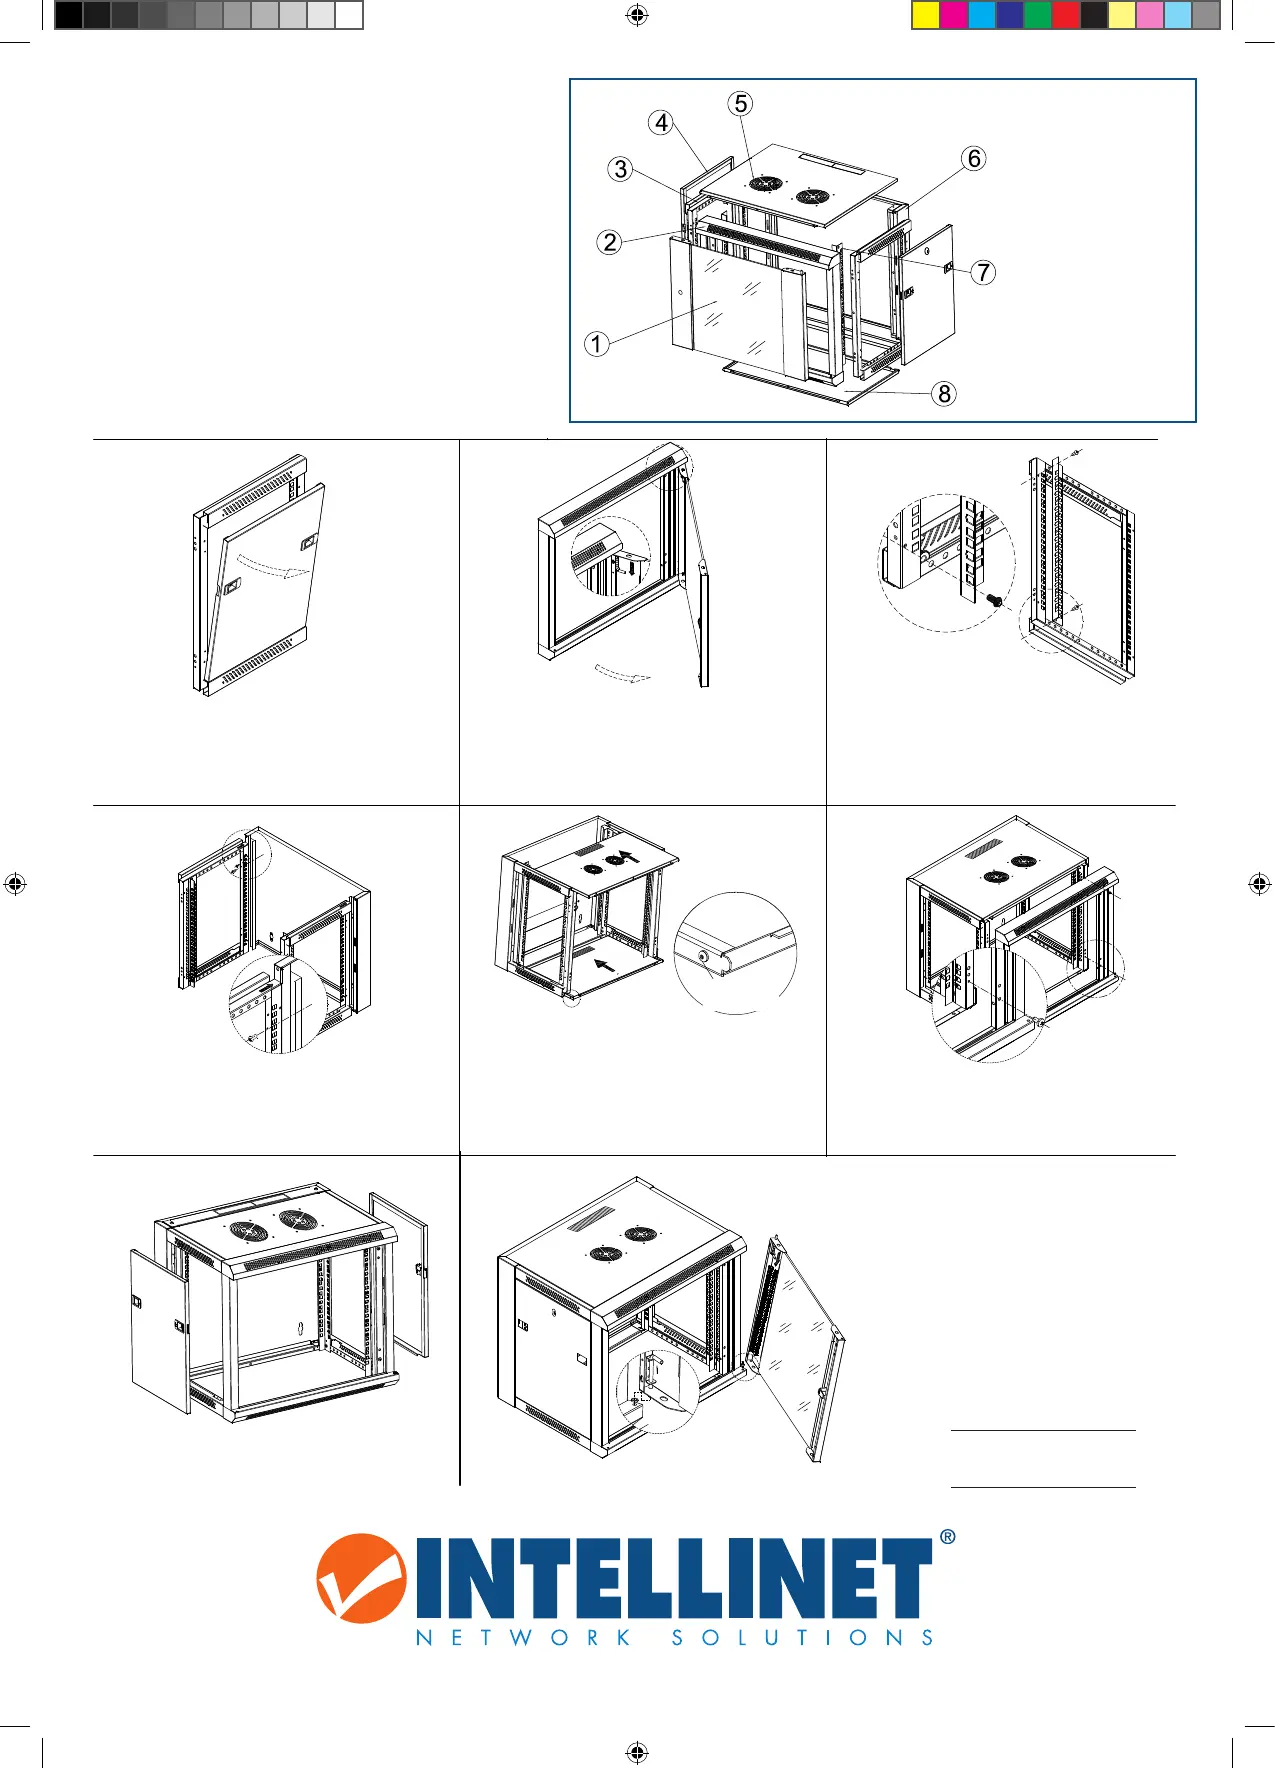
| Model: | 711951 |
| Type: | Vægmonteret stativ |
| Bredde: | 570 mm |
| Dybde: | 600 mm |
| Højde: | 770 mm |
| Vægt: | 30000 g |
| Produktfarve: | Sort |
| Materiale: | SPCC |
| Certificering: | ANSI/EIA RS-310-D; IEC60297-2; DIN41494, Part 1; DIN41494, Part 7 |
| Maksimal vægtkapacitet: | 60 kg |
| Rammetype: | Lukket |
| Størrelse: | 19 " |
| Rackkapacitet: | 15U |
| Justerbar dybde: | Ja |
| Dørkonstruktion: | Glas |
| Aftagelige sidepaneler: | Ja |
| Sidepaneler medfølger: | Ja |
| Justerbare monteringsskinner: | Ja |
Har du brug for hjælp?
Hvis du har brug for hjælp til Intellinet 711951 stil et spørgsmål nedenfor, og andre brugere vil svare dig
Ikke kategoriseret Intellinet Manualer
16 September 2025
11 September 2025
31 Juli 2025

31 Juli 2025
31 Juli 2025

31 Juli 2025
30 Juli 2025

30 Juli 2025

30 Juli 2025
30 Juli 2025
Ikke kategoriseret Manualer
- WOOOD
- PolarPro
- FeinTech
- Crucial
- Momo Design
- Mauser Sitzkultur
- Waterstone
- Vivotek
- HT Instruments
- Ergobaby
- Lanzar
- Tecnoinox
- Bopita
- MEPROLIGHT
- Rothenberger
Nyeste Ikke kategoriseret Manualer

4 December 2025

4 December 2025

4 December 2025

4 December 2025

4 December 2025

4 December 2025

4 December 2025

4 December 2025

4 December 2025

4 December 2025