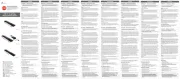
Quick Installation Guide
If you have any problems with
this product, please contact our
technical support team for
assistance.
JCD543
Quick Installation Guide
E
N
:
Guía de Instalación Rápida
E
S
:
Guide d'installation rapide
FR :
Snelle installatiegids
N
L
:
Guia de instalação rápida
P
T
:
Snabbinstallationsguide
S
DK: Startvejledning
NO:
Hurtiginstallasjonsveiledning
FI: Pika-asennusopas
E
:
Guida rapida all'installazione
I
T
:
Kurzinstallationsanleitung
D
E
:
クイックインストールガイド
HU:
Gyors telepítési útmutató
RU :
Руководство по быстрой установке
日本語 :
快速安裝手冊
繁中文 :
快速安装手册
简中文 :
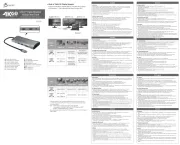
JCD542
JCD543P
● Microsoft® Windows® 10
● macOS® 10.11 ou mais recente
● Intel® HD Graphics 4000/ ATI™ HD 7xxx/ NVIDIA® 5XXM or higher
● Modo USB-C® DisplayPort™Alt disponível
● Suporta a resolução 4K através da placa gráfica interna do PC.
● Entrega de energia USB™ (USB™ Power Delivery, PD) disponível através de
USB-C® para suportar o carregamento a montante
Requisitos do sistema
Português
● Antes de atualizar o seu sistema operativo, atualize previamente o controlador
do seu produto j5create para evitar problemas de compatibilidade
●
Ao usar um dispositivo de alto consumo de energia, é recomendável usar um
adaptador de energia para obter o desempenho ideal. O adaptador de energia
para esta estação de acoplamento pode ser adquirido separadamente (JUP2290) ou a
estação de acoplamento e o adaptador de energia podem ser adquiridos juntos
(JCD543P).
Windows
®
- Instalação do controlador
Passos de instalação manual
Passos 1
Para efetuar a instalação manual, deverá manter a estação de ancoragem
desligada. Transfira o controlador mais recente a partir de www.j5cre-
ate.com em Suporte > Transferências/Controladores e, em seguida,
procure o produto introduzindo o número de modelo ou desloque a
página para baixo até ao seu produto e clique no botão do Controlador
Windows®.
Passo 2
Clique no ficheiro "j5create" que deverá ser exibido próximo do canto
inferior esquerdo ou superior direito do navegador web para iniciar a
instalação e, em seguida, siga as instruções apresentadas (Poderá ser
necessário aceder à sua pasta de Transferências para abrir o ficheiro
j5create para iniciar a instalação. Para aceder à pasta Transferências, clique
no ícone do Windows® no canto inferior esquerdo do ecrã e, em seguida,
procure Transferências e abra o ficheiro j5create).
* Se possível, abra o ficheiro j5create como administrador clicando com o
botão direito no ficheiro j5create e selecione "Executar como
administrador".
Passo 3
Quando a instalação inicial terminar, clique em "Reiniciar" para concluir a
instalação do software. Após o reinício do computador, ligue a estação de
ancoragem j5create ao computador e, em seguida, ligue os seus
monitores, periféricos e/ou adaptador de corrente (opcional) à estação de
ancoragem j5create. Estará assim preparado para utilizar a sua estação de
ancoragem j5create!
Passo 4. Definições de visualização
Pode configurar e reorganizar os seus ecrãs através das definições de
visualização do Windows®. Para aceder às definições de visualização,
clique com o botão direito no ambiente de trabalho/imagem de fundo e
selecione "Definições de visualização" no menu apresentado.
macOS®- Instalação do controlador
Passo 1.
Certifique-se de que a estação de ancoragem j5create está desligada do Mac®,
e transfira o controlador mais recente a partir de www.j5create.com em Suporte
> Transferências/Controladores e, em seguida, procure o produto introduzindo
o número de modelo ou desloque a página para baixo até ao seu produto e
clique no botão Controlador macOS® que corresponde à versão do macOS®
do seu Mac® (para encontrar a sua versão do macOS®, clique no ícone da
Apple® no canto superior esquerdo e, em seguida, clique em "Acerca deste
Mac®").
Passo 2
Abra o Finder e selecione "Transferências", localize e faça duplo clique no
ficheiro "J5Create_USB_Video_Adapter_Driver_(Version).dmg". Clique com o
botão direito ou com 2 dedos no ficheiro .pkg (com o ícone de uma caixa
aberta). Será exibida a janela de instalação. Continue a executar os passos
indicados na janela. Durante a instalação será exibida a mensagem "Extensão
do sistema bloqueada" para "Magic Control Technology". Aceda a Preferências
do sistema > Segurança e privacidade > Geral, clique no cadeado para efetuar
alterações e permitir o programador "Magic Control Technology" e, em
seguida, volte à janela de instalação e clique em reiniciar quando a instalação
terminar.
Passo 3
Após o reinício do computador, ligue os monitores, periféricos, e/ou adaptador
de corrente (opcional) à estação de ancoragem e, em seguida, ligue a estação
de ancoragem ao computador. A sua estação de ancoragem estará assim
pronta a ser utilizada. Contudo, se o seu Mac® estiver a utilizar o sistema
operativo macOS® 11 ou mais recente, será exibida a notificação "DISPOSITIVO
DE VISUALIZAÇÃO USB™" no canto superior direito. Clique no ícone e selecione
"Permitir". A aplicação "Dispositivo de visualização USB™" deverá abrir
automaticamente. Se a aplicação não abrir, execute-a através do Launchpad ou
da Dock do macOS® na parte inferior do ecrã. Clique no botão "Controlador
de monitor USB™ ativo" na aplicação. Ser-lhe-á solicitado que conceda
permissão à aplicação. Aceda a Preferências do sistema > Segurança e
privacidade > Geral e conceda permissão a "Dispositivo de visualização USB™".
Desligue a estação de ancoragem do computador e volte a ligá-la. Ser-lhe-á
solicitado que conceda permissão a "DJTVirtualDisplayDriver". Certifique-se de
que a função está ativada em Preferências do sistema > Segurança e
privacidade > Privacidade > Gravação do ecrã e, em seguida, desligue a
estação de ancoragem e volte a ligá-la. Os seus monitores deverão estar assim
prontos a ser utilizar!
Passo 4
Aceda a e, em seguida a Preferências do sistema e selecione as opções
Saída de som e altifalante. Aqui poderá selecionar o dispositivo que reproduzirá
o som.
* Para obter instruções detalhadas, abra o ficheiro README.pdf incluído no
ficheiro J5Create_USB_Video_Adapter_Driver.dmg transferido do nosso website.
● O controlador será automaticamente transferido e instalado em
dispositivos com Windows® 10 quando a estação de ancoragem for
ligada ao computador. (a funcionalidade Plug & Play requer
acesso à Internet)
● NÃO ligue o adaptador de monitor USB™ j5create ao computador antes
de instalar completamente o controlador
Monitor expandido
Uma reprodução de vídeo em ecrã inteiro a 2K (2048 x 1152 a 60 Hz)
● CPU: Intel® Core™ i5 Quad Core
● RAM: 4 GB de memória ou mais
Dois reproduçoes de vídeo em ecrã inteiro a 2K (2048 x 1152 a 60 Hz)
● CPU: Intel® Core™ i7 Quad Core
● RAM: 8 GB de memória ou mais
Recomenda-se um processador mais potente para utilização de vários monitores
e para obter um desempenho ideal.
● Microsoft® Windows® 10
● macOS® 10.11 eller senare
● Intel® HD Graphics 4000/ ATI™ HD 7xxx/ NVIDIA® 5XXM or higher
● Tillgängliga USB-C® DisplayPort™Alt läge
● Stöder 4K-upplösning via det interna grafikkortet på datorn.
● Tillgänglig USB™-strömförsörjning via USB-C® för att stödja
laddning uppström
Systemkrav
Svenska
● Innan du uppgraderar ditt operativsystem, uppdatera först drivrutinen för din
j5create-produkt för att undvika kompatibilitetsproblem.
● När du använder en hög strömförbrukningsenhet rekommenderas att du
använder en nätadapter för optimal prestanda. Nätadaptern för denna
dockningsstation kan köpas separat (JUP2290) eller dockningsstationen och
nätadaptern kan köpas tillsammans (JCD543P).
Windows
®
- Installation av drivrutin
Steg för manuell installation
Steg 1
Vid manuell installation ska du hålla dockningsstationen urkopplad. Du
kan hämta den senaste drivrutinen från www.j5create.com under Support
> Downloads/Drivers, sök sedan efter produkten genom att ange
modellnumret eller bläddra ner till din produkt och klicka på Windows®
Driver-knappen.
Steg 2
Klicka på filen"j5create" som bör visas längst ner till vänster eller uppe till
höger i din webbläsare för att påbörja installationen och följ sedan
anvisningarna som visas (du kan behöva gå till mappen Hämtade filer för
att öppna filen j5create och påbörja installationen). Gå till mappen
Hämtade filer genom att klicka på Windows®-ikonen i det nedre vänstra
hörnet av skärmen och sedan söka efter Hämtade filer och öppna filen
j5create).
* Öppna om möjligt j5create-filen som administratör genom att
högerklicka på j5create-filen och välja "Kör som administratör".
Steg 3
När den initiala installationen har slutförts, klicka på "Starta" om för att
slutföra installationen av programvaran. När datorn har startat om
ansluter du j5create-dockningsstationen till datorn och ansluter sedan
skärmar, kringutrustning och/eller nätadapter (tillval) till
j5create-dockningsstationen. Nu är du redo att använda din
j5create-dockningsstation!
Steg 4. Bildskärmsinställningar
Du kan konfigurera och ordna om dina skärmar genom Windows®
skärminställningar. För att komma åt bildskärmsinställningarna
högerklickar du på skrivbordet/bakgrunden och väljer
"Bildskärmsinställning" i menyn som visas.
macOS® - Installation av drivrutin
Steg 1.
Se till att j5create-dockningsstationen är bortkopplad från din Mac® och
hämta den senaste drivrutinen från www.j5create.com under Support >
Downloads/Drivers och sök sedan efter produkten genom att ange
modellnumret eller bläddra ner till din produkt och klicka på knappen för
macOS®-drivrutinen som motsvarar den macOS®-version som din Mac®
kör (för att hitta din macOS®-version klickar du på Apple®-ikonen längst
upp till vänster och sedan på "Om denna Mac®").
Steg 2
Öppna Finder, välj "Hämtade filer", leta upp och dubbelklicka på filen som
heter"J5Create_USB_Video_Adapter_Driver_(Version).dmg". Högerklicka eller
2-fingerklicka på .pkg-filen (den kommer att p1-ha en ikon som föreställer en
öppnad låda). Installationsfönstret visas, fortsätt genom stegen i fönstret.
Under installationen kommer du att få ett meddelande om att
"Systemtillägget är blockerat" för"Magic Control Technology", navigera till
Systeminställningar > Säkerhet och sekretess > Allmänt, klicka på hänglåset
för att göra ändringar och tillåt utvecklaren "Magic Control Technology",
återgå sedan till installationsfönstret och klicka på Starta om när
installationen är klar.
Steg 3
När datorn har startat om ansluter du bildskärmar, kringutrustning och/eller
nätadapter (tillval) till dockningsstationen och ansluter sedan dockningssta-
tionen till datorn, så att du kan använda din dockningsstation. Om din Mac®
kör macOS® 11 eller senare kommer du att få ett meddelande om "USB™
DISPLAY DEVICE" i det övre högra hörnet, klicka på ikonen och välj "Tillåt".
Programmet "USB™ Display device" bör öppnas automatiskt, om det inte
öppnas startar du programmet via launchpad eller macOS®-dockan längst
ner. Klicka på knappen "Aktivera USB™ Display Driver" i programmet. Du
kommer att uppmanas att tillåta programmet, gå till Systeminställningar >
Säkerhet och sekretess > Allmänt och tillåt "USB™ Display Device". Koppla ur
dockningsstationen från datorn och koppla sedan in den igen, du kommer
att få en uppmaning att tillåta"DJTVirtualDisplayDriver", du bör se till att det
är markerat via Systeminställningar > Säkerhet och sekretess > Sekretess >
Skärminspelning, koppla sedan ur dockningsstationen och koppla in den
igen. Dina skärmar bör nu vara redo att användas!
Steg 4
Gå till och sedan till Systeminställningar och välj alternativ för ljud och
högtalarutgång. Här kan du välja vilken enhet som ska mata ut ljud.
* För mer detaljerade instruktioner, öppna filen README.pdf i filen
J5Create_USB_Video_Adapter_Driver.dmg som laddades ner från vår
webbplats.
● Drivrutinen hämtas och installeras automatiskt på
Windows® 10-enheter när dockningsstationen är ansluten till datorn.
(Plug & Play kräver tillgång till internet)
● Anslut INTE j5create USB™ Display Adapter till datorn förrän
drivrutinens installation har slutförts helt
Utökade för skärm
En 2K (2048 x 1152 vid 60 Hz) för videouppspelning i helskärmsläge
● Processor: Intel
®
Core™ i5 Quad Core
● RAM-minne: 4 GB eller mer
Två 2K (2048 x 1152 vid 60 Hz) för videouppspelning i helskärmsläge
● Processor: Intel
®
Core™ i7 Quad Core
● RAM-minne: 8 GB eller mer
Högre processor rekommenderas för multiskärmar och optimal
prestanda.
Français
Configuration Recommandée
● Microsoft® Windows® 10
● macOS® 10.11 ou plus tard
● Intel® HD Graphics 4000/ ATI™ HD 7xxx/ NVIDIA® 5XXM ou plus
● Port USB-C® disponible avec le mode Alt DisplayPort™
● Carte graphique interne avec prise en charge 4K pour la sortie 4K
● Power Delivery USB™ disponible sur USB-C® pour la prise en charge du
chargement en amont
● Après avoir mis à jour votre système d’exploitation, mettez à jour
d’abord votre pilote du produit j5create pour éviter les problèmes de
compatibilité.
● Lors de l’utilisation d’un appareil à consommation d’énergie élevée,
il est recommandé d’utiliser un adaptateur secteur pour des
performances optimales. L’adaptateur secteur de cette station
d’acceuil peut être acheté séparément (JUP2290) ou la station d’acceuil
et l’adaptateur secteur peuvent être acheté ensemble (JCD543P).
Windows
®
- Installation du pilote
Étapes manuelles d’installation
Étapes 1
Pour l’installation manuelle, vous voudrez garder la station d’acceuil
débranchée. Vous pouvez télécharger le dernier pilote à partir de
www.j5create.com sous support > Téléchargements / Pilotes, puis rechercher
le produit en entrant le numéro de modèle ou faire défiler vers le bas jusqu’
à votre produit et cliquez sur le bouton Windows® Driver.
Étape 2
Cliquez sur le fichier « j5create » qui doit apparaître près du bas à gauche ou
en haut à droite de votre navigateur Web pour commencer à installer, puis
suivez les invitations qui apparaissent (Vous devrez peut-être naviguer vers
votre dossier Téléchargements pour ouvrir le fichier j5create pour
commencer l’installation. Pour naviguer dans le dossier Téléchargements,
cliquez sur l’icône Windows en bas à gauche de votre écran, puis recherchez
les téléchargements, et ouvrez le fichier j5create).
* Si possible, ouvrez le fichier j5create en tant qu’administrateur en cliquant
à droite sur le fichier j5create et sélectionnez " Exécuter en tant
qu’administrateur ".
Étape 3
Une fois l’installation initiale terminée, cliquez sur « Redémarrer » pour
terminer l’installation du logiciel. Une fois que votre ordinateur a redémarré,
connectez la station d’acceuil j5create à l’ordinateur, puis connectez vos
écrans, périphériques et/ou prise d'alimentation (facultatif) à la station
d’acceuil j5create. Vous êtes maintenant prêt à utiliser votre station d’acceuil
j5create!
Étape 4 Paramètres d’Affichage
Vous pouvez configurer et réorganiser vos écrans à travers les paramètres
Windows®. Pour accéder aux paramètres d’affichage, cliquez à droite sur le
fond d’écran et sélectionnez « Affichage » à partir du menu qui apparaît.
Étape 1
Assurez-vous que la station d’acceuil j5create est débranchée du Mac®, et
téléchargez le dernier pilote de www.j5create.com sous Support >
Téléchargement/Pilote puis recherchez le produit en entrant le numéro de
modèle ou faites défiler vers le bas jusqu’à votre produit et cliquez sur le
bouton macOS® Driver qui correspond à la version macOS® que votre
Mac® possède en cours d’exécution ( pour trouver votre version de
macOS®, cliquez sur l’icône Apple® en haut à gauche, puis cliquez sur " A
propos de ce Mac® " ).
Étape 2
Ouvrez Finder, puis sélectionnez « Téléchargements », localisez et cliquez
deux fois sur le fichier nommé « J5Create_USB_Video_Adapter_Driver_
(Version).dmg ». S’il vous plaît veuillez faire un clic droit ou un clic a 2 doigts
sur le fichier.pkg (il aura une icône de boîte ouverte). La fenêtre d’installation
apparaîtra, et continuera à travers les étapes à l’intérieur de la fenêtre. Lors
de l’installation, vous recevrez un message bloqué « Extension du Système
Blocké » pour « Magic Control Technology », naviguer vers les préférences
du système > Sécurité & Confidentialité > Général, cliquez sur le cadenas
pour apporter des modifications, et permettre le développeur « Magic
Control Technology », puis revenir à la fenêtre d’installation et cliquez
redémarrer après l’installation terminé.
Étape 3
Une fois que l’ordinateur a redémarré, connectez vos écrans, périphériques
et/ou prise d'alimentation (facultatif) à la station d’accueil puis connectez la
à l’ordinateur, vous pourrez alors utiliser votre station d’accueil. Toutefois,
si votre Mac® est en cours d’exécution macOS® 11 ou plus tard, vous
recevrez une Notification « Appareil D’affichage USB™» en haut à droite,
s’il vous plaît cliquez sur l’icône et sélectionnez « Autoriser ». L’application
Appareil d’Affichage USB™ devrait s’ouvrir automatiquement, si elle se
n’ouvre pas veuillez faire le lancement de l'application via launchpad ou le
dock macOS® en bas. Cliquez sur le bouton « Pilote d’Affichage USB™
Actif » dans l’application. Vous serez invité à autoriser l'application.
Veuillez naviguer vers les préférences du système > Sécurité &
Confidentialité > Général et permettre « Appareil d’Affichage USB™».
Débrancher la station d’accueil de l’ordinateur, puis reconnecter-la, vous
recevrez une invitation pour permettre « DJTVirtualDisplayDriver », vous
voudrez vous assurer qu’il est vérifié via les préférences du système >
Sécurité & Confidentialité > Confidentialité > Enregistrement de l’écran,
ensuite débrancher la station d’accueil, puis reconnectez-là. Vos écrans
devraient être prêts à utiliser!
Étape 4
Allez à , puis Préférences de Système et sélectionnez les options de
sortie du Son et du Haut-parleur. Ici, vous pouvez sélectionner quel appareil
aura la sortie sonore
* Pour des instructions plus détaillées, s’il vous plaît veuillez ouvrir le fichier
README.pdf à l’intérieur du fichier J5Create_USB_Video_Adapter_
Driver.dmg qui a été téléchargé à partir de notre site Web.
● Le pilote se téléchargera et s’installera automatiquement sur les
appareils Windows® 10 lorsque la station d’accueil est branchée sur
l’ordinateur. (Plug & Play nécessite un accès Internet)
macOS® - Installation du pilote
● Ne branchez pas l'adaptateur d'affichage j5create USB™ dans l’ordina-
teur avant que le logiciel soit complètement installé.
Moniteur Etendu
Une lecture vidéo en plein écran 2K (2048 x 1152 @ 60 Hz)
● Processeur: Intel® Core™ i5 Quad Core
● RAM : 4 GB de mémoire ou plus
Deux 2K (2048x 1152 @ 60 Hz) pour lecture vidéo plein écran
● Processeur : Intel® Core™ i7 Quad Core
● RAM : 8 GB de mémoire ou plus
Un processeur haut de gamme pour les multi-écrans et des performances
optimales.
English
System Requirements
● Microsoft® Windows® 10
● macOS® 10.11 or later
● Intel® HD Graphics 4000/ ATI™ HD 7xxx/ NVIDIA® 5XXM or higher
● Available USB-C® port with DisplayPort™ Alt mode
● Internal graphics card with 4K support for 4K output
● Available USB™ power delivery over USB-C® to support upstream charging
● After you upgrade your operating system, update your j5create
product driver before using to avoid compatibility issues.
●
When using a high-power consumption device it is recommended that you
use a power adapter for optimal performance. The power adapter for this
docking station can be purchased separately (JUP2290) or the docking
station and the power adapter can be purchased together (JCD543P).
Windows
®
- Driver Installation
Manual Installation Steps
Step 1
For manual installation, keep the docking station unplugged. You can
download the latest driver from www.j5create.com under Support >
Downloads/Drivers, then search for the product by entering the model
number or by scrolling down to your product and clicking on the
Windows® driver button.
Step 2
Click on the "j5create" file that should appear near the bottom left or
top right of your web browser to begin installation, then follow the
prompts that appear (You may have to navigate to your Downloads
folder to open the j5create file to begin installation. To navigate to the
Downloads folder, click on the Windows® icon at the bottom left
corner of your screen then search for Downloads, and open the
j5create file).
* If possible, open the j5create file as an administrator by right-clicking
the j5create file and selecting "Run as administrator."
Step 3
Once initial installation has completed, click "Restart" to finish
installing the software. After your computer has restarted, connect the
j5create docking station to the computer, then connect your displays,
peripherals, and/or power adapter (optional) to the j5create docking
station. Now you are ready to use your j5create docking station!
Step 4 Display Settings
You can configure and rearrange your displays through the Windows®
display settings. To access the display settings, right-click on the
desktop/wallpaper and select "Display Setting" from the menu that
appears.
macOS®- Driver Installation
Step 1
Make sure the j5create docking station is unplugged from the Mac®, and
download the latest driver from www.j5create.com under Support >
Downloads/Drivers then search for the product by entering the model
number or by scrolling down to your product and clicking on the macOS®
Driver button that corresponds to the macOS® version your Mac® is
running (to find your macOS® version, click on the Apple® icon at the top
left, then click "About this Mac®").
Step 2
Open Finder, then select "Downloads", locate and double click the file
named "J5Create_USB_Video_Adapter_Driver_(Version).dmg". Please
right-click or 2-finger click the .pkg file (it will have an icon of an opened
box). The installation window will appear, continue through the steps within
the window. During installation you will receive a "System Extension
Blocked" message for "Magic Control Technology", navigate to System
Preferences > Security & Privacy > General, click on the padlock to make
changes, and allow developer "Magic Control Technology", then return back
to the installation window and click restart after the installation has finished.
Step 3
After the computer has restarted, connect your displays, peripherals, and/or
power adapter (optional) to the docking station then connect the docking
station to the computer, you will then be able to use your docking station.
However if your Mac® is running macOS® 11 or later, you will receive a
"USB™ Display Device" notification in the upper right corner, please click on
the icon and select "Allow". The "USB™ Display Device" application should
open automatically, if it does not open launch the application via launchpad
or the macOS® dock at the bottom. Click on the "Active USB™ Display
Driver" button within the application. You will be prompted to allow the
application. Navigate to System Preferences > Security & Privacy > General
and allow "USB™ Display Device". Unplug the docking station from the
computer then reconnect it. You will receive a prompt to allow
"DJTVirtualDisplayDriver", you will want to make sure it's checked via System
Preferences > Security & Privacy > Privacy > Screen Recording, afterwards
unplug the docking station then reconnect it again, your displays should be
ready to use!
Step 4
Go to , and then System Preferences and select the Sound and Speaker
Output options. Here you can select which device has sound output.
* For more detailed instructions, please open the README.pdf file inside the
J5Create_USB_Video_Adapter_ Driver.dmg file that was downloaded
from our website.
● The driver will automatically download & install on Windows® 10
devices when the docking station is plugged into the computer.
(Plug & Play requires Internet access)
● Do NOT plug the j5create USB™ display adapter into the computer
until the driver is completely installed
Extended Monitor
One 2K (2048 x 1152 @ 60 Hz) full-screen video playback
● CPU: Intel
®
Core™ i5 Quad Core
● RAM: 4 GB memory or higher
Two 2K (2048 x 1152 @ 60 Hz) full-screen video playback
● CPU: Intel
®
Core™ i7 Quad Core
● RAM: 8 GB memory or higher
A high-end processor is recommended for multi-displays and optimal
performance.
Español
Requisitos del sistema
● Microsoft® Windows® 10
● macOS® 10.11 o posterior
● Intel® HD Graphics 4000/ ATI™ HD 7xxx/ NVIDIA® 5XXM or higher
● Modo USB-C® DisplayPort™Alt disponible
● Admite la salida de resolución 4K mediante una tarjeta gráfica interna en la PC.
● Suministro de energía USB™ (USB™ Power Delivery, PD) disponible a través de
USB-C® para soportar la carga ascendente
● Despues de actualizar su sistema operativo, actualice su j5create controlador
primero antes de usar para evitar problemas de compatibilidad.
●
Cuando use un dispositivo de alto consumo de energía, se recomienda que use un
adaptador de energía para un rendimiento óptimo. El adaptador de energía para esta
estación de acoplamiento se puede comprar por separado (JUP2290) o la estación de
acoplamiento y el adaptador de energía se pueden comprar juntos (JCD543P).
Windows
®
- Instalación del controlador
Paso 2
Haga clic en el archivo "j5create" que debe aparecer cerca de la parte
inferior izquierda o en la parte superior derecha del explorador web para
comenzar la instalación, siga las instrucciones que aparecen (es posible que
deba ir a su carpeta Descargas para abrir el archivo j5create y comenzar la
instalación. Para ir a la carpeta de Descargas, haga clic en el icono Windows
ubicado en la esquina inferior izquierda de la pantalla y, a continuación,
busque la carpeta Descargas y abra el archivo j5create).
* Si es posible, abra el archivo j5create como administrador haciendo clic
con el botón derecho en el archivo j5create y seleccione "Ejecutar como
administrador".
Pasos de instalación manual
Paso 1
Para la instalación manual, mantener la estación de acoplamiento
desconectada. Puede descargar el controlador más reciente desde el sitio
web www.j5create.com en Soporte > Descargas/Controladores y, a
continuación, busque el producto especificando el número de modelo o
desplácese hacia abajo hasta que encuentre su producto y haga clic en el
botón Controlador de Windows®.
Paso 3
Una vez que se haya completado la instalación inicial, haga clic en
"Reiniciar" para finalizar la instalación del software. Después de reiniciar el
equipo, conecte la estación de acoplamiento j5create al equipo y, a
continuación, conecte las pantallas, los periféricos o el adaptador de
alimentación (opcional) a la estación de acoplamiento j5create. ¡Ahora está
listo para usar la estación de acoplamiento j5create!
Paso 4 Configuración de las pantallas
Puede configurar y reorganizar sus pantallas a través de la configuración de
pantallas de Windows®. Para acceder a la configuración de la las pantallas,
haga clic con el botón derecho en el escritorio/fondo de pantalla y
seleccione "Configuración de pantalla" en el menú que aparece.
macOS® - Instalación del controlador
Paso 1
Asegúrese de que la estación de acoplamiento j5create esté desconectada
del equipo Mac® y descargue el controlador más reciente desde el sitio
www.j5create.com en Soporte > Descargas/Controladores y, a continuación,
busque el producto especificando el número de modelo o desplácese hacia
abajo hasta que encuentre su producto y haga clic en el botón Controlador
de macOS® que corresponde a la versión de macOS® que está ejecutando
su Mac® (para encontrar su versión de macOS®, haga clic en el icono de la
manzana ubicado en la parte superior izquierda y, a continuación, haga clic
en "Acerca de este Mac®").
Paso 2
Abra Finder y, a continuación, seleccione "Descargas", busque y haga doble
clic en el archivo llamado "J5Create_USB_Video_Adapter_Driv-
er_(versión).dmg". Haga clic con el botón derecho o haga clic con dos dedos
en el archivo .pkg (tendrá un icono de un cuadro abierto). Aparecerá la
ventana de instalación. Continúe con los pasos dentro de la ventana.
Durante la instalación, recibirá el mensaje "Extensión del sistema bloqueada"
para "Magic Control Technology". Vaya a Preferencias del Sistema >
Seguridad y privacidad > General, haga clic en el candado para realizar
cambios y permita al desarrollador la "Magic Control Technology". Por
último, vuelva a la ventana de instalación y haga clic en Reiniciar una vez
finalizada dicha instalación.
Paso 3
Después de que el equipo se haya reiniciado, conecte sus pantallas,
periféricos y/o adaptador de alimentación (opcional) a la estación de
acoplamiento. A continuación, conecte la estación de acoplamiento al
equipo. A partir de aquí, podrá usar la estación de acoplamiento. Sin
embargo, si su Mac® tiene instalado macOS® 11, o posterior, recibirá la
notificación "Dispositivo de visualización USB™" en la esquina superior
derecha. Haga clic en el icono y seleccione "Permitir". La aplicación
"Dispositivo de visualización USB™" debe abrirse automáticamente; si no se
abre, inicie la aplicación a través de Launchpad o la base de acoplamiento
de macOS® en la parte inferior. Haga clic en el botón "Activar el controlador
de pantalla USB™" dentro de la aplicación. Se le pedirá que dé permiso a la
aplicación; vaya a Preferencias del Sistema > Seguridad y privacidad >
General y permita "Dispositivo de visualización USB™". Desconecte la
estación de acoplamiento del equipo y, a continuación, vuelva a conectarla.
Recibirá un mensaje para permitir "DJTVirtualDisplayDriver". debe
asegurarse de que esté activado a través de Preferencias del Sistema >
Seguridad y privacidad > Privacidad > Grabación de pantalla. Después,
desconecte la estación de acoplamiento y vuelva a conectar. Las pantallas
deberían estar listas para usarse.
Paso 4
Vaya a y, a continuación, elija Preferencias del Sistema y seleccione las
opciones Salida de sonido y altavoz. Aquí puede seleccionar qué dispositivo
tiene salida de sonido.
* Para obtener instrucciones más detalladas, abra el archivo README.pdf
que se encuentra dentro del archivo J5Create_USB_Video_Adapter_
Driver.dmg que se descargó desde nuestro sitio web.
● El controlador se instalará automáticamente en dispositivos
Windows® 10 cuando la estación de acoplamiento este conectada
a la computadora. (Plug & Play requiere acceso a Internet)
● No conecte el j5create USB™ multi-monitor Adaptador en el equipo
hasta que el conductor esté completamente instalado.
Monitor extendido
Una reproducción de video en pantalla completa de 2K (2048 x 1152 @ 60 Hz)
● CPU: Intel® Core™ i5 Quad Core
● RAM: 4 GB de memoria o superior
Dos reproducciones de video en pantalla completa de 2K (2048 x 1152 @ 60 Hz)
● CPU: Intel® Core™ i7 Quad Core
● RAM: 8 GB de memoria o superior
Se recomienda un procesador superior para pantallas múltiples y un rendimiento óptimo.
USB-C® Dual/Triple
Display Docking Station
Deutsch
● Microsoft® Windows® 10
● macOS® 10.11 oder höher
● Intel® HD Graphics 4000/ ATI™ HD 7xxx/ NVIDIA® 5XXM or higher
● Verfügbarer USB-C® DisplayPort™Alt-Modus
● Unterstützung der Ausgabe von 4K-Auflösung durch die interne
Grafikkarte am PC.
● Verfügbare USB™ Stromversorgung über USB-C® zur Unterstützung des
Upstream-Ladevorgangs
Systemanforderungen
Windows
®
- Treiberinstallation
Schritt 1
Für die manuelle Installation müssen Sie die Docking-Station vom Stromnetz
trennen. Wenn Sie über einen Internetanschluss verfügen, empfehlen wir,
dass Sie den neuesten Treiber von www.j5create.com unter Support
herunterladen – scrollen Sie in der Liste nach unten, bis Sie den Treiber für
Ihr Produkt gefunden haben. Downloaden Sie dann den neuesten Treiber für
Ihr Betriebssystem. (Hinweis: Wenn möglich, sollten Sie diesen Vorgang als
Administrator durchführen.)
Schritt 2
Klicken Sie auf die "j5create"-Datei, die unten links oder oben rechts in Ihrem
Webbrowser erscheinen sollte, um die Installation zu starten, und folgen Sie
dann den angezeigten Aufforderungen (Gegebenenfalls müssen Sie auf
(Mein) Computer > Downloads klicken und dann zum Starten der Installation
j5Usb3.0MultiAdapter wählen.) Um zum Ordner "Downloads" zu kommen,
klicken Sie auf das Windows-Symbol in der linken unteren Ecke Ihres
Bildschirms, suchen Sie dann nach "Downloads" und öffnen Sie die Datei
"j5create").* Wenn möglich, öffnen Sie die Datei "j5create" als Administrator,
indem Sie mit der rechten Maustaste auf die Datei "j5create" klicken und "Als
Administrator ausführen" wählen.
Schritt 3
Sobald die erste Installation beendet ist, klicken Sie auf „Neustart“ um die
Installation der Software abzuschließen. Nachdem Ihr Computer neugestartet
wurde, verbinden Sie zuerst die j5create Docking Station mit ihrem
Stromadapter, HDMI™, VGA, Ethernet, Audio, etc. und dann mit Ihrem
Computer. Nun sind Sie bereit, um Ihre j5create Docking Station zu
benutzen.
Schritt 4 Display Settings
Sie können Ihre Anzeigen über die Windows® -Einstellungen konfigurieren
und neu anordnen. Um auf die Einstellungen zuzugreifen, klicken Sie mit der
rechten Maustaste auf den Desktop/Hintergrund und wählen Sie im
angezeigten Menü "Einstellungen".
macOS®- Treiberinstallation
Schritt 1
Vergewissern Sie sich, dass die j5create-Dockingstation vom Mac®
abgesteckt ist. Wenn Sie über einen Internetanschluss verfügen, empfehlen
wir, dass Sie den neuesten Treiber von www.j5create.com unter Support
herunterladen – scrollen Sie in der Liste nach unten, bis Sie den Treiber für
Ihr Produkt gefunden haben. Downloaden Sie dann den neuesten Treiber für
Ihr Betriebssystem. (Hinweis: Wenn Sie Probleme beim Downloaden dieses
Treibers haben, ist ggf. eine Anpassung der Sicherheitseinstellungen
erforderlich; wählen Sie bei „Download von Programmen erlauben“ die
Option „Überall“.)
Schritt 2
Öffnen Sie den Finder, wählen Sie dann "Downloads", suchen Sie die Datei
"J5Create_USB_Video_Adapter_Driver_(Version).dmg" und doppelklicken Sie
darauf. Bitte klicken Sie mit der rechten Maustaste oder mit 2 Fingern auf die
.pkg-Datei (sie hat dann das Symbol eines geöffneten Kastens). Es erscheint
das Installationsfenster, fahren Sie mit den Schritten innerhalb des Fensters
fort. Während der Installation erhalten Sie die Meldung "System Extension
Blocked" (Systemerweiterung blockiert) für "Magic Control Technology",
navigieren Sie zu Systemeinstellungen > Sicherheit & Datenschutz >
Allgemein, klicken Sie auf das Vorhängeschloss, um Änderungen
vorzunehmen, und lassen Sie den Entwickler "Magic Control Technology" zu,
kehren Sie dann zum Installationsfenster zurück und klicken Sie auf Neustart,
nachdem die Installation abgeschlossen ist.
Schritt 3
Schließen Sie nach dem Neustart des Computers Ihre Displays,
Peripheriegeräte und/oder das Netzteil (optional) an die Dockingstation an
und verbinden Sie dann die Dockingstation mit dem Computer, dann können
Sie Ihre Dockingstation verwenden. Wenn auf Ihrem Mac® jedoch macOS®
11 oder höher läuft, erhalten Sie in der oberen rechten Ecke eine USB™
DISPLAY DEVICE"-Benachrichtigung, bitte klicken Sie auf das Symbol und
wählen Sie "Zulassen". Die Anwendung "USB™-Display-Gerät" sollte sich
automatisch öffnen, falls sie sich nicht öffnet, starten Sie die Anwendung
über das Launchpad oder das macOS® -Dock am unteren Rand. Klicken Sie
innerhalb der Anwendung auf die Schaltfläche "Active USB™ Display Driver".
Sie werden aufgefordert, die Anwendung zuzulassen, gehen Sie zu
Systemeinstellungen > Sicherheit & Datenschutz > Allgemein und lassen Sie
"USB™-Anzeigegerät" zu. Ziehen Sie die Dockingstation vom Computer ab
und schließen Sie sie wieder an. Sie werden aufgefordert, "DJTVirtualDisplay-
Driver" zuzulassen, stellen Sie sicher, dass dies über Systemeinstellungen >
Sicherheit & Datenschutz > Datenschutz > Bildschirmaufzeichnung aktiviert
ist, ziehen Sie anschließend die Dockingstation ab und schließen Sie sie
wieder an.
Schritt 4
Rufen Sie und dann Systemeinstellungen auf, wählen Sie Ton gefolgt
von den Ausgabe-Optionen für die Lautsprecher. Sie können das Gerät für
die Tonausgabe durch Anklicken wählen.
* Für genauere Anweisungen öffnen Sie bitte die Datei README.pdf in der
J5Create_USB_Video_Adapter_ Driver.dmg-Datei, die Sie von unserer
Website heruntergeladen haben.
● Der Treiber wird automatisch heruntergeladen und auf Geräten mit
Windows® 10 installiert, wenn die Dockingstation an den Computer
angeschlossen ist. (Plug-and-Play erfordert Internetzugang)
● Verbinden Sie NICHT den j5create USB™ Display Adapter mit Ihrem
Computer, solange der Treiber nicht vollständig installiert ist
Erweitern Sie Monitorumgebungen
Eine 2K (2048 x 1152 @ 60 Hz) Vollbild-Videowiedergabe
● CPU: Intel® Core™ i5 Quad Core
● RAM: 4 GB Speicher oder mehr
Zwei 2K (2048 x 1152 @ 60 Hz) Vollbild-Videowiedergabe
● CPU: Intel® Core™ i7 Quad Core
● RAM: 8 GB Speicher oder mehr
Höherer Prozessor empfohlen für Multi-Displays und optimale Leistung.
● Bevor Sie Ihr Betriebssystem aktualisieren, aktualisieren Sie zunächst Ihre
j5create Produkt Treiber, um Kompatibilitätsprobleme zu vermeiden.
●
Bei Verwendung eines Geräts mit hohem Stromverbrauch wird empfohlen, ein
Netzteil zu verwenden, um eine optimale Leistung zu erzielen. Das Netzteil für
diese Dockingstation kann separat erworben werden (JUP2290) oder die
Dockingstation und das Netzteil können zusammen erworben werden (JCD543P).
● Microsoft® Windows® 10
● macOS® 10.11 o versione successiva
● Intel® HD Graphics 4000/ ATI™ HD 7xxx/ NVIDIA® 5XXM or higher
● Modalità DisplayPort™Alt USB-C® DisplayPort™ disponibile
● Supporta uscita con risoluzione 4K tramite scheda grafica interna sul PC.
● Alimentazione USB™ disponibile su USB-C® per il supporto della carica
upstream
Requisiti di sistema
Italiano
Windows
®
- Installazione del driver
Procedura di installazione manuale
Passo 1
Per l'installazione manuale, si consiglia di mantenere la docking station
scollegata. È possibile scaricare il driver più recente da www.j5create.com
in Supporto > Download/Driver, quindi cercare il prodotto inserendo il
numero di modello o scorrere verso il basso fino al prodotto e fare clic sul
tasto Driver Windows®.
Passo 2
Fare clic sul file "j5create" che dovrebbe apparire in basso a sinistra o in
alto a destra del browser per avviare l'installazione, quindi seguire le
istruzioni visualizzate (potrebbe essere necessario accedere alla cartella
Download per aprire il file j5create per avviare l'installazione. Per accedere
alla cartella Download, fare clic sull'icona di Windows nell'angolo in basso
a sinistra dello schermo, quindi cercare Download e aprire il file j5create).
* Se possibile, aprire il file j5create come amministratore facendo clic con
il tasto destro del mouse sul file j5create e selezionare "Esegui come
amministratore".
Passo 3
Una volta completata l'installazione, fare clic su "Riavvia" per terminare
l'installazione del software. Dopo il riavvio del computer, collegare la
docking station j5create al computer, quindi collegare i display, le
periferiche e/o l'adattatore di alimentazione (opzionale) alla docking
station j5create. Quindi, si è pronti per utilizzare la docking station
j5create!
Passo 4. Impostazioni di visualizzazione
È possibile configurare e riorganizzare i display tramite le impostazioni
dello schermo di Windows®. Per accedere alle impostazioni di
visualizzazione, fare clic con il tasto destro del mouse sul desktop/sullo
sfondo e selezionare "Impostazione schermo" dal menu che appare.
macOS®- Installazione del driver
Passo 1.
Assicurarsi che la docking station j5create sia scollegata dal Mac® e
scaricare il driver più recente da www.j5create.com in Supporto >
Download/Driver, quindi cercare il prodotto inserendo il numero del
modello o scorrere verso il basso fino al prodotto e fare clic sul tasto
Driver macOS® che corrisponde alla versione macOS® del Mac® in
esecuzione (per trovare la propria versione macOS®, fare clic sull'icona
della mela in alto a sinistra, quindi faere clic su "Informazioni sul Mac®").
Passo 2
Aprire Finder, quindi selezionare "Download", individuare e fare doppio
clic sul file denominato "J5Create_USB_Video_Adapter_Driver_(Ver-
sion).dmg". Fare clic con il tasto sinistro o fare clic con 2 dita sul file .pkg
(avrà un'icona di una scatola aperta). Quando appare la finestra di
installazione, continuare con i passi all'interno della finestra. Durante
l'installazione riceverai un messaggio di blocco "Estensione di sistema
bloccata" per "Magic Control Technology", navigare a Preferenze di
Sistema > Sicurezza e Privacy > Generale, fare clic sul lucchetto per
apportare modifica e consentire "Magic Control Technology" dello
sviluppatore, quindi tornare alla finestra di installazione e fare clic su
Riavvio al termine dell’installazione.
Passo 3
Dopo il riavvio del computer, collegare i display, le periferiche e/o
l'adattatore di alimentazione (opzionale) alla docking station, quindi
collegare la docking al computer per poter utilizzare la docking station.
Tuttavia, se il Mac® esegue macOS® 11 o versioni successive, si riceverà
una NOTIFICA "DISPLAY USB™" nell'angolo in alto a destra, fare clic
sull'icona e selezionare "Consenti". L’applicazione "Display USB™"
dovrebbe aprirsi automaticamente. In caso contrario, avviare
l'applicazione tramite launchpad o il dock del macOS® in basso. Fare clic
sul tasto "Attiva driver display USB™" all’interno dell’applicazione. Viene
richiesto di consentire l’applicazione, navigare a Preferenze di Sistema >
Sicurezza e Privacy > Generale e consentire "Display USB™". Scollegare e
ricollegare la docking station dal computer. Si riceverà una richiesta per
consentire "DJTVirtualDisplayDriver". Assicurarsi che sia selezionata
tramite Preferenze di Sistema > Sicurezza e Privacy > Privacy >
Registrazione schermo, quindi scollegare e ricollegare la docking station. I
display dovrebbero essere pronti per l'uso!
Passo 4
Andare su , quindi su Preferenze di Sistema e selezionare le opzioni
Suono e Uscita altoparlante. Qui è possibile selezionare il dispositivo che
presenta uscita audio.
* Per istruzioni più dettagliate, aprire il file README.pdf all'interno del file
J5Create_USB_Video_Adapter_Driver.dmg scaricato dal nostro sito web.
● Il driver viene scaricato e installato automaticamente sui dispositivi
Windows® 10 quando la docking station è collegata al computer.
(Plug & Play richiede l'accesso a Internet)
● NON inserire la scheda video USB™ j5create nel computer fino all
'installazone completa del driver instalar completamente o
controlador
Monitor esteso
Una riproduzione video a schermo intero di 2K (2048 x 1152 a 60 Hz)
● CPU: Intel® Core™ i5 Quad Core
● RAM: 4 GB di memoria o superiore
Due riproduzioni video a schermo intero di 2K (2048 x 1152 a 60 Hz)
● CPU: Intel® Core™ i7 Quad Core
● RAM: 8 GB di memoria o superiore
Si consiglia un processore superiore per multidisplay e prestazioni ottimali.
Systeemvereisten
● Microsoft® Windows® 10
● macOS® 10.11 of later
● Intel® HD Graphics 4000/ ATI™ HD 7xxx/ NVIDIA® 5XXM of hoger
● Beschikbare USB-C® DisplayPort™ DisplayPort™Alt-modus
●
Ondersteunt de uitvoer van 4K-resolutie via de interne grafische kaart op de pc.
● USB™ stroomtoevoer via USB-C® ter ondersteuning van stroomopwaarts
opladen
Nederlands
● Nadat u uw besturingssysteem hebt bijgewerkt, moet u eerst uw j5create
stuurprogramma bijwerken om compatibiliteitsproblemen te voorkomen.
● Als u een apparaat met hoog stroomverbruik gebruikt, is het aanbevolen
een voedingsadapter te gebruiken voor optimale prestaties.
De voedingsadapter voor dit docking station kan afzonderlijk worden
gekocht (JUP2290) of het docking station en de voedingsadapter kunnen
samen worden gekocht (JCD543P).
Windows
®
- Stuurprogramma installeren
Stappenplan handmatige installatie
Stap 1
Voor handmatige installatie moet u het docking station losgekoppeld houden. U
kunt de meest recente stuurprogramma downloaden via www.j5create.com onder
Support > Downloads/Drivers en zoek vervolgens naar het product door het
modelnummer in te voeren of scroll omlaag naar uw product en klik op de knop
Windows®-driver
Stap 2
Klik op het "j5create”-bestand dat linksonder of rechtsboven in uw webbrowser
moet worden weergegeven om de installatie te starten. Volg vervolgens de
aanwijzingen op het scherm (mogelijk moet u naar uw map "Downloads" navigeren
om het j5create-bestand te openen om de installatie te starten. Om naar de map
"Downloads” te navigeren, klikt u op het Windows®-pictogram linksonder in het
scherm, zoekt u naar "Downloads” en opent u het bestand "j5create”). * Open
indien mogelijk het bestand "j5create" als administrator door met de
rechtermuisknop op het bestand "j5create" te klikken en "als administrator
uitvoeren" te selecteren.
Stap 3
Nadat de eerste installatie is voltooid, klikt u op "opnieuw opstarten” om de
installatie van de software te voltooien. Nadat uw computer opnieuw is opgestart,
sluit u het j5create docking station aan op de computer en sluit u vervolgens uw
beeldschermen, randapparatuur en/of voedingsadapter (optioneel) aan op het
j5create docking station. U bent nu klaar om uw j5create docking station te
gebruiken!
Stap 4. Weergave-instellingen
U kunt uw beeldschermen configureren en herschikken via de weergave-in-
stellingen van Windows®. Voor toegang tot de weergave-instellingen klikt u met
de rechtermuisknop op het bureaublad/de bureaubladachtergrond en selecteert u
"weergave-instelling” in het menu dat verschijnt.
macOS®- Stuurprogramma installeren
Stap 1.
Zorg ervoor dat het j5create docking station is losgekoppeld van de Mac®,
en download de meest recente driver van www.j5create.com onder Support
> Downloads/Drivers en zoek vervolgens naar het product door het
modelnummer in te voeren of scroll omlaag naar uw product en klik op de
knop macOS®-driver die overeenkomt met de macOS®-versie van uw
Mac® (voor het vinden van uw macOS®-versie, klikt u op het Apple-picto-
gram linksboven, en klik vervolgens op "Over deze Mac®").
Stap 2
Open Finder en selecteer vervolgens "Downloads", zoek en dubbelklik op het
bestand met de naam "J5Create_USB_Video_Adapter_Driver_(Version).dmg".
Klik met de rechtermuisknop of klik met 2 vingers op het .pkg-bestand (het
heeft een pictogram van een geopende doos). Het installatievenster wordt
weergegeven. Volg de stappen in het venster. Tijdens installatie ontvangt u
een blokkeringsbericht "Systeemuitbreiding geblokkeerd" voor "Magic
Control Technology", navigeer naar Systeemvoorkeuren > Beveiliging &
Privacy > Algemeen, klik op het hangslot om wijzigingen aan te brengen, en
sta ontwikkelaar "Magic Control Technology" toe. Keer vervolgens terug naar
het installatievenster en klik op Opnieuw starten wanneer de installatie is
voltooid.
Stap 3
Nadat de computer opnieuw is opgestart, sluit u uw beeldschermen,
randapparatuur en/of voedingsadapter (optioneel) aan op het docking
station en sluit u vervolgens het docking station aan op de computer, waarna
u uw docking station kunt gebruiken. Als uw Mac® echter macOS® 11 of
hoger gebruikt, ontvangt u een melding "USB™ Display Device" in de
rechterbovenhoek. Klik op het pictogram en selecteer "Toestaan". De
toepassing "USB™ Display Device" zou automatisch moeten openen. Als deze
niet wordt geopend, start u de toepassing via launchpad of het
macOS®-dock onderaan. Klik op de knop "Active USB™ Display Driver" in de
applicatie. U wordt gevraagd om de toepassing toe te staan. Navigeer naar
Systeemvoorkeuren > Beveiliging en privacy > Algemeen en sta "USB™
Display Device" toe. Koppel het docking station los van de computer en sluit
het vervolgens opnieuw aan. U zult een prompt ontvangen om
"DJTVirtualDisplayDriver" toe te staan. U moet ervoor zorgen dat het is
aangevinkt via Systeemvoorkeuren > Beveiliging & privacy > Privacy >
Schermrecorder, daarna koppelt u het docking station los en sluit u het weer
aan. Uw beeldschermen zouden klaar moeten zijn voor gebruik!
Stap 4
Ga naar , en vervolgens naar Systeemvoorkeuren en selecteer de opties
Geluid en Luidsprekeruitvoer. Hier kunt u selecteren welk apparaat
geluidsuitvoer heeft.
* Voor meer gedetailleerde instructies kunt u het bestand README.pdf
openen in het J5Create_USB™_Video_Adapter_Driver.dmg bestand dat u hebt
gedownload via onze website.
● De driver wordt automatisch gedownload & geïnstalleerd op
Windows® 10-apparaten wanneer het docking station is aangesloten
op de computer. (Voor Plug & Play is internettoegang nodig)
● Sluit de j5create USB™-beeldschermadapter NIET aan op de
computer totdat het stuurprogramma volledig is geïnstalleerd
Uitgebreide monitor
Een 2K (2048 x 1152 bij 60 Hz) full-screen video-weergave
● CPU : Intel® Core™ i5 Quad Core
● RAM: 4 GB geheugen of meer
Twee 2K (2048 x 1152 bij 60 Hz) full-screen video-weergave
● CPU : Intel® Core™ i7 Quad Core
● RAM: 8 GB geheugen of meer
Een high-end processor wordt aanbevolen voor meerdere beeldschermen en
optimale prestaties.
● Prima di aggiornare il sistema operativo, aggiornare il driver del
prodotto j5create per evitare problemi di compatibilità
● Quando si utilizza un dispositivo ad alto consumo energetico, si
consiglia di utilizzare un adattatore di alimentazione per prestazioni
ottimali. L'adattatore di alimentazione per questa docking station può
essere acquistato separatamente (JUP2290) oppure la docking station
e l'adattatore di alimentazione possono essere acquistati insieme
(JCD543P).