- 1 -
Dokument Nr.
AS5050
Greenhouse 16'x8'ft
Assembly Instructions
AS510
size: 510Lx245Wx230Hcm 12.5m²
IMPORTANT
You must read these instructions carefully before you start to assemble this greenhouse.Please
ensure that you find all parts in the carton box in the correct type and quantity as mentioned in
the list illustrated in every page accordingly.
Please carry out the steps in the order set out in these instructions.
Do not tighten the steps in the greenhouse until completing on the assembly of the poly carbon
ate panels.Keep these instructions in a safe place for future reference.
22/08/2018
IT
Istruzioni di montaggio
GB
Assembly instructions
D
Montageanleitung
NL
Montagehandleiding
F
Notice de montage
GEWÄCHSHAUS
AS5050 SET
D
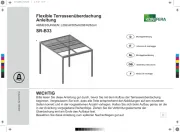
SR-B33
Flexible Terrassenüberdachung
Anleitung
ABMESSUNGEN: L292xW305xH208/H262cm
6OLGLQJURRIFDQRS\
,QVWUXFWLRQPDQXDO
SR-B43
SIZE:L392xW305xH208/H262cm
IMPORTANT
<RXPXVWUHDGWKHVHLQVWUXFWLRQVFDUHIXOO\EHIRUH\RXVWDUWWRDVVHPEOHWKLV6OLGLQJURRIFDQRS\3OHDVHHQVXUH
WKDW\RXILQGDOOSDUWV
LQWKHFDUWRQER[LQWKHFRUUHFWW\SHDQGTXDQWLW\DVPHQWLRQHGLQWKHOLVWLOOXVWUDWHGLQHYHU\SDJHDFFRUGLQJO\
3OHDVHFDUU\RXWWKHVWHSVLQWKHRUGHUVHWRXWLQWKHVHLQVWUXFWLRQV
'RQRWWLJKWHQWKHVWHSVLQWKH6OLGLQJURRIFDQRS\XQWLOFRPSOHWLQJRQWKHDVVHPEO\
.HHSWKHVHLQVWUXFWLRQVLQDVDIHSODFHIRUIXWXUHUHIHUHQFH
09/06/2020
Dokument Nr: SR-B43
WICHTIG
Bitte lesen Sie diese Anleitung gut durch, bevor Sie mit dem Aufbau der
Terrassenüberdachung
beginnen. Vergewissern Sie sich, dass alle Teile entsprechend der Abbildungen auf den einzelnen
Seiten korrekt und in der vorgesehenen Anzahl vorliegen. Halten Sie sich beim Aufbau genau an die
in der Anleitung vorgegebene Reihenfolge. Ziehen Sie die Verbindungselemente der
Überdachung erst am Ende des Aufbaus fest.
Bewahren Sie diese Anleitung zum späteren Nachschlagen gut auf.
C
M
Y
CM
MY
CY
CMY
K
01156_SRB43_druck.pdf 1 11.08.20 10:03