Kramer CL-8P-SUB Manual

Kramer Højttaler CL-8P-SUB

Læs gratis den danske manual til Kramer CL-8P-SUB (4 sider) i kategorien Højttaler. Denne vejledning er vurderet som hjælpsom af 2 personer og har en gennemsnitlig bedømmelse på 4.3 stjerner ud af 1.5 anmeldelser. Har du et spørgsmål om Kramer CL-8P-SUB, eller vil du spørge andre brugere om produktet?

Side 1/4
CL SUB-8P- Quick Start
P/N:
2900- 301850QS
REV:
1
Scan to go to website
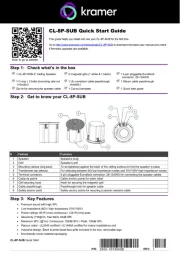
CL- -SUB Start 8P Quick Guide
This guide helps you install and use your CL-8P-SUB for the first time.
Go to http://www.kramerav.com/downloads/CL 8P- -SUB to download the latest user manual and check
if firmware upgrades are available.
Step 1: Check whats in the box
1 CL SUB- -8P 8 Ceiling Speaker
2 magnetic girls (1 white & 1 black)
1 pin 4- pluggable Euroblock
connector, 28-12AWG
1 C ring + 2 bolts (mounting rails not -
included)
1 UL-compliant cable passthrough
(metallic)
1 Silicon cable passthrough
Zip tie for securing the speaker cable
1 Cut-out template
1 Quick start guide
Step 2: -8P- Get to know your CL SUB
# ction Feature Fun
1
Speaker
Speakers body
2
Grill
Speakers grill
3
Mounting clamps (dog ears)
To be tightened against the back of the ceiling surface to hold the speaker in place
4
Transformer tap selector
For selecting between 8Ω low-impedance modes and 70V/100V high-impedance modes
5
Terminal connector
4-pin pluggable Euroblock connector, 28-12AWG for connecting the speaker cables
6
Cable tie points
Cable anchor points for strain relief
7
Grill securing hook
Hook for securing the magnetic grill
8
Cable passthrough
Passthrough hole for speaker cable
9
Safety anchor point
Safety anchor points for securing a seismic restraint cable
Step 3: Key Features
Premium sound with high SPL
-Low impedance (8Ω) / high-impedance (70V/100V)
Power ratings: 80 W (rms) continuous / 120 W (rms) peak
Sensitivity (1W@1m, free field): 84dB SPL
Maximum SPL (@1m): Continuous: 103dB SPL / Peak: 105dB SPL
Plenum rated UL2043 certified / - UL1480A certified for indoor installations and
Industrial design: Black & white bezel less grills included in the box- , removable logo
Eco-friendly mono- material packaging
Step 4: Achieving the Best Performance
To achieve the best performance:
Use only good quality speaker cables (we recommend Kramer high-performance low smoke halogen free cables,
BC-2Sxx/LSHF).
Do not secure the cables in tight bundles or roll the slack into tight coils
Avoid interference from neighboring electrical appliances that may adversely influence signal quality
Step 5: Choosing the Best Location
Plan the location of the speakers based on the designated listening area.
Ceiling Type Suitability: Ensure the ceiling is appropriate for mounting the speaker weight.
Obstruction Check: Verify the mounting location is free of obstructions like electrical piping, AC ducts, or water lines.
Ceiling Clearance: ensure you have sufficient ceiling clearance for installing the speaker.
Step 6: Unpacking
1. Carefully remove the speaker and mounting accessories from the packaging.
2. Inspect all components for damage before proceeding.
3. Dispose of the packaging materials according to regulations.
Step 7: Mounting the Speaker
Step 1: Mark and Cut the Ceiling Tile
Use the supplied cutting template to mark the speaker hole on the ceiling tile, then carefully cut along the line.
Step 2: Place the C-Ring and Mounting Rails
Position the C ring above the ceiling tile, aligned with the cutout. Slide the mounting rails into the C- -ring slots, but do
not tighten the screws yet.
Step 3: Place the Tile into the Ceiling Grid
Place the tile (with the C-ring and mounting rails loosely in place) in the ceiling grid.
Step 4: Adjust and Secure the Mounting Rails
Slide the mounting rails so they rest securely on the ceiling grid framework. Once in place, fasten them to the C-ring
using the supplied screws.
Step 5: Insert the Speaker
Insert the speaker into the cutout, making sure it fits properly through the C- . ring
Step 6: Tighten the Mounting Clamps (Dog Ears)
Gently tighten the mounting clamps so they swing out and secure the speaker to the ceiling tile. Do not overtighten.
Step 7: Pass the Speaker Cable
Route the speaker cable through the passthrough hole and the supplied grommet.
Step 8: Connect the Wires
Connect the speaker wires to the front access terminal block, ensuring correct polarity- .
Step 9: Secure the Cable & passthrough gromet
Use the provided zip tie and cable support ears to secure the cable to the speaker and relieve strain.
Step : 10 Set the Transformer Tap
Use the selector to set the appropriate power tap for your installation.
Step : 11 Place the magnetic grill
Connect the safety wire of the magnetic grill to the grill securing hook and place the grill in place
T-channel Grid
Support Ring
Screws
Ceiling Tile
Tile Rails
C-ring


Produkt Specifikationer

Mærke: Kramer
Kategori: Højttaler
Model: CL-8P-SUB

Har du brug for hjælp?

Hvis du har brug for hjælp til Kramer CL-8P-SUB stil et spørgsmål nedenfor, og andre brugere vil svare dig