Metra SPY-NVR165MP1 Manual

Metra Overvågningskamera SPY-NVR165MP1

Læs gratis den danske manual til Metra SPY-NVR165MP1 (7 sider) i kategorien Overvågningskamera. Denne vejledning er vurderet som hjælpsom af 3 personer og har en gennemsnitlig bedømmelse på 4.6 stjerner ud af 2 anmeldelser. Har du et spørgsmål om Metra SPY-NVR165MP1, eller vil du spørge andre brugere om produktet?

Side 1/7
SPY
CL
@
ps
·
SURVEILLANCE
SYSTEMS
SPY-NVR45MP1/SPY-NVR45MPND
SPY-NVR85MP1
/
SPY-NVR85MPND
SPY-NVR165MP1
/
SPY-NVR165MPND
Tips: For user manual and future firmware updates, please go to
https://metrahometheater.com/spyclops-surveillance-systems.html
for download.
,a
iUtiM•h~ht•II.,
________________ _
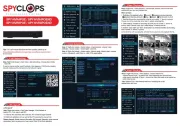
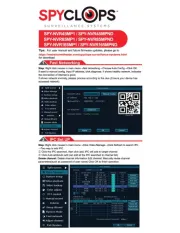
Step: Right click mouse in main
menu---->fast
networking---->Choose Auto
Config---->Click
OK
.
If want to manual config, input IP address, click diagnose. If shows healthy network, indicates
the connection
of
Internet is good.
If shows network anomaly, please process according to the clue .(Ensure your device has
accessed network)
Step: Right click mouse in main
menu---->Click
Video Manage---->Click Refresh to search IPC
---->
Two
way
to add IPC
Q) Click the IPC searched, then click add, IPC will add to target channel
® Click Auto add(Auto add can add all the IPC searched to channel list)
Delete channel: Delete channel information Edit channel: Manually revise channel
parameters(such as password
of
user name) Click
OK
to finish operation.
A
""'l
.t4d•U•IWt4•II-.
___________________
_
Record video is very easy on camera system.
Time Recording: Setup period
of
time
of
recording on NVR GUI. Right click mouse
->System Setup->Record Setup->Record Plan. Click "Time" and put mouse icon on the
upper left corner (for example
"1
" as picutre shows), press and drag the mouse to the right
to choose the time. The list will turn to red.
Motion Recording: Only detect motion and then start recording. Right click mouse
->System Setup->Record Setup->Record Plan. Click "Motion" and put mouse icon on the
upper left corner (for example "1" as picutre shows), press and drag the mouse to the right
to choose the time. The list will turn to green.
Alarm Recording: Right click mouse->System Setup->Record Setup->Record Plan. Click
"Alarm" and put mouse icon on the upper left corner (for example "1" as picutre shows),
press and drag the mouse to the right to choose the time. The list will turn to yellow.
Note: Users can setup any period
of
time they want, for example 0:00:00-23:59:59, That's 24
hours*? days recording. When NVR detects hard disk, the default setting will be 24 hours*?
days recording.
Steps: Right click mouse
in
main menu->Video playback->choose date, channel, record
mode->click Search->then can view playback file.
Warm prompt:
1.illustration for playback button:
ICI
rewind,
IC)
playback previous seconds:
C)
playback following seconds,
l]
play,
m pause:
!Jl
fast forward x2,x4,x8
2.play file:Choose the recording file
in
file list, as number "1" shown
in
picture. Choose one
of
the recording, click "play" to play to recording file;
3.video backup: Choose the recording file
in
file list, as number "1" shown
in
picture. Insert
the U flash disk, click "video backup" to backup the file;
4.timeline: click "date" and "time" at left bottom to check the timeline
of
recording, show
number "2" shown in picture;
5.on the timeline with recording file, left click the mouse, then can playback the file.


Produkt Specifikationer

Mærke: Metra
Kategori: Overvågningskamera
Model: SPY-NVR165MP1

Har du brug for hjælp?

Hvis du har brug for hjælp til Metra SPY-NVR165MP1 stil et spørgsmål nedenfor, og andre brugere vil svare dig


Overvågningskamera Metra Manualer
Overvågningskamera Manualer

Nyeste Overvågningskamera Manualer