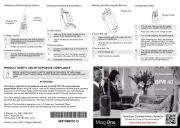
Midland BTEva Manual
Midland
Walkie-talkies
BTEva

| Mærke: | Midland |
| Kategori: | Walkie-talkies |
| Model: | BTEva |
Har du brug for hjælp?
Hvis du har brug for hjælp til Midland BTEva stil et spørgsmål nedenfor, og andre brugere vil svare dig
Walkie-talkies Midland Manualer
1 Januar 2025
1 Januar 2025
1 Januar 2025
1 Januar 2025
1 Januar 2025

31 August 2024

24 August 2024

20 August 2024

19 August 2024

15 August 2024
Walkie-talkies Manualer
- Denver
- Motorola
- Nedis
- MAAS
- Stabo
- DeTeWe
- AKAI
- Alecto
- GME
- IMC Toys
- Rocktrail
- Dickie
- Brondi
- Yaesu
- Olympia
Nyeste Walkie-talkies Manualer
13 Januar 2025
3 Januar 2025
13 Oktober 2024

13 Oktober 2024

4 Oktober 2024

30 September 2024

27 September 2024
24 September 2024

20 September 2024

17 September 2024