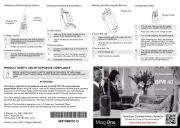
PRODUCT SAFETY AND RF EXPOSURE COMPLIANCE
This radio is restricted to occupational use only to satisfy FCC RF energy exposure
requirements. Before using this product, read the RF energy awareness information and operating
instructions in the Product Safety and RF Exposure booklet enclosed with your radio (Motorola
Publication part number 6881095C98) to ensure compliance with RF energy exposure limits.
For a list of Motorola-approved antennas, batteries, and other accessories, visit the following web
site which lists approved accessories: http://www.motorola.com/governmentandenterprise
by Motorola is registered in the U.S. Patent and Trademark Office.
All other products and service names are the property of their own respective owners.
© Motorola, Inc. 2005, 2006, 2007
Schaumburg, IL 60196-1078, U.S.A.
Printed in China. 02/07. All Rights Reserved.
Before using this product, read the operating instructions for safe usage
contained in the Product Safety and RF Exposure booklet enclosed with your
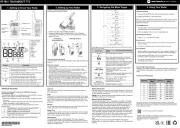
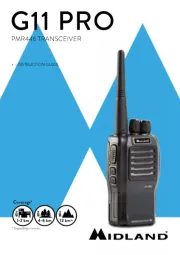
Attaching and moving the tenna Re An
1. Fasten e antenna to e radio by placing th th
the threaded en of he antenna into d t the
2. Rotate the antenna clockwise until tight.
Tu the nte in unter-clockwisern a nna a co
direction until it sengages from the di
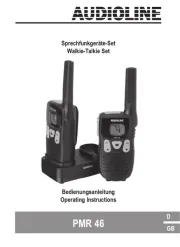
Attaching and Removing e Battery th
1. Align a fit battery ton into hend the gue t
groove of e chassis of the radio. th
2. Secure the latch at the bottom of the
1. Unlatch battery clasp at t bottom of the he
2. Gently lift he hilt of battery nearest to t the
the batt latch away r the housing.ery f om
3. Slide batt downwards to remove.ery
Attaching and Removing the Belt Clip
1. Align mounting rails of the radio with the
groo of he lt lip.ves t be c
2. Slide the belt p wnwards until icks cli do it cl
1. Lift e release tab. th
2. Slide the belt clip upwards.
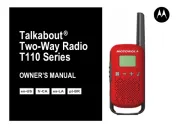
1. Turn off your radi and th A/C power o e
supply to your charger (if they are on).
2. Place your radi in he charger pocket.o t
3. Turn on the charger’s A/C power supply.
4. Whil charging ur radio, the arger’se yo ch
LE shows a steady red light. The radioD
should be harged east 6 ours initially c at l 1 h
before decreasing arging i 12 ch t me to
5. Turn off charger’s power supply, the A/C
and remove the radi from th chargero e
6. For more details, refer to your Tri-Chem
Charge User Guide (6871916T01).r