Nutri Ninja Ultima BL810UK Manual

Nutri Ninja Blender Ultima BL810UK

Læs gratis den danske manual til Nutri Ninja Ultima BL810UK (16 sider) i kategorien Blender. Denne vejledning er vurderet som hjælpsom af 66 personer og har en gennemsnitlig bedømmelse på 4.6 stjerner ud af 33.5 anmeldelser. Har du et spørgsmål om Nutri Ninja Ultima BL810UK, eller vil du spørge andre brugere om produktet?

Side 1/16
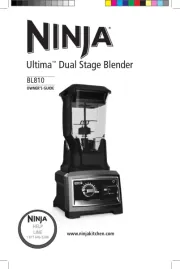
Ultima
Dual Stage Blender
OWNER’S GUIDE
BL810
®
www.ninjakitchen.com
®
HELP
LINE
1 877 646-5288
1
TOLL FREE: 1-877-646-5288
IMPORTANT SAFETY INSTRUCTIONS
For Household Use Only
WHEN USING ELECTRICAL
APPLIANCES, BASIC SAFETY
PRECAUTIONS SHOULD ALWAYS
BE FOLLOWED, INCLUDING THE
FOLLOWING:
READ ALL INSTRUCTIONS BEFORE
USING YOUR NINJA ULTIMA
DUAL
STAGE BLENDER.
POLARIZED PLUG
WARNING: To reduce the risk of electric
shock, this appliance has a polarized
plug (one blade is wider than the other).
This plug will fit into a polarized outlet
only one way. If the plug does not fit
fully into the outlet, reverse the plug. If
it still does not fit, contact a qualified
electrician to install the proper outlet.
DO NOT modify the plug in any way.
WARNING:
The top blades are not affixed to
the pitcher. They are removable and
very sharp. Handle with care!
WARNING:
TO REDUCE THE RISK OF FIRE, ELECTRIC
SHOCK OR INJURY:
1. To protect against electrical shock, do
not submerge the appliance or allow the
power cord to come into contact with
water or any other liquid.
2. DO NOT allow young children to
operate the appliance or use as a toy.
Close supervision is necessary when any
appliance is used by or near children.
3. Never leave an appliance unattended
when in use.
4. Turn the appliance off and remove the
power cord from the electrical outlet
when not in use, before assembling or
disassembling parts and before cleaning.
To unplug, grasp the plug and pull from
the electrical outlet. Never pull from the
power cord.
5. DO NOT abuse the power cord. Never
carry the appliance by the power cord
or yank it to disconnect from electrical
outlet; instead grasp the plug and pull to
disconnect.
6. DO NOT operate any appliance with
a damaged cord or plug, or after the
appliance malfunctions, has been
dropped or damaged in any manner.
This appliance has no serviceable parts.
Return the appliance to EURO-PRO
Operating LLC for examination, repair or
adjustment.
7. DO NOT let the power cord hang over
the edge of table or counter or touch
hot surfaces such as the stove.
2
www.ninjakitchen.com
SAVE THESE
INSTRUCTIONS
19. CAUTION: DO NOT process hot foods
or hot liquids. Allow hot ingredients to
cool before processing.
20. DO NOT overfill.
21. DO NOT operate the appliance empty.
22. To reduce the risk of burns, always allow
the appliance to cool before taking off
parts and before cleaning.
23. If the appliance overheats, a thermal
switch will become activated and
shut off the motor. To reset, unplug
the appliance and let it cool down for
approximately 15 minutes before using
again.
24. In the event that the unit overloads, the
control panel lights will flash and the
unit will shut down. Unplug the unit and
wait 15 minutes to reset.
25. THIS PRODUCT IS INTENDED FOR
HOUSEHOLD USE ONLY. Do not use
this appliance for anything other than its
intended use. Do not use outdoors.
26. The maximum rating is based without
the top blades inserted into the pitcher.
This drives the greatest power. Other
recommended attachments may draw
significantly less power or current.
27. To reduce the risk of injury, never
assemble the top blades in the pitcher
without the pitcher properly attached to
the motor base.
WARNING: Extension cords
are not recommended for use with this
product.
8. Always use the appliance on a dry, level
surface.
9. Keep hands, hair, clothing, as well as
utensils out of container while processing
to reduce the risk of severe injury to
persons or damage to the appliance. A
scraper may be used but only when the
appliance is off.
10. CAUTION: The top blades are not
affixed to the pitcher, they are removable
and extremely sharp. When handling the
top blades do not hold blades, but rather
always hold by the shaft. Blades are
sharp. Handle carefully!
11. Avoid contact with moving parts.
12. DO NOT attempt to sharpen blades.
13. DO NOT use the appliance if either set
of blades are bent or damaged.
14. DO NOT operate this appliance on or
near any hot surfaces (such as gas or
electric burner or in a heated oven).
15. The use of attachments or accessories
including canning jars, not
recommended by the manufacturer, may
result in fire, electric shock or personal
injury.
16. DO NOT remove the container from
the motor base while the appliance is in
operation. Always unplug the unit when
not in use.
17. To reduce the risk of injury, NEVER
operate the appliance without the lid in
place; DO NOT try to defeat or bypass
the interlock mechanism. When using
the top blades, make sure they are
properly installed before operating the
appliance.
18. DO NOT expose containers to extreme
temperature changes.
3
TOLL FREE: 1-877-646-5288
THIS BOOK COVERS MODEL NUMBERS:
BL810 30
TECHNICAL SPECIFICATIONS
Voltage: 120V., 60Hz.
Power: 1500 Watts
Pitcher Capacity: 72 ounces (9 cups) (2.15 Liters)
Single Serve Capacity: 16 ounces (2 cups) (.473 Liters)
Euro-Pro, Ninja, Ultima and Ninja Ultima are trademarks of Euro-Pro Operating LLC.
4
www.ninjakitchen.com
Contents
Thank you for
purchasing the
Ninja Ultima
Dual Stage
Blender.
Getting to Know Your Ninja
Ultima
Dual Stage Blender ........................5
Using the Ninja Ultima
Dual Stage Blender ......................................... 7
Assembly and Use for the 72 oz. Pitcher ................................................. 8
Assembly and Use for the Single Serve Cup .. ......................................... 10
Usage, Blade Selection & Speed Settings ................................................ 11
Care & Maintenance ............................................................................... 12
Troubleshooting Guide ............................................................................13
Replacement Parts .................................................................................. 13
Warranty & Registration..........................................................................14
5
TOLL FREE: 1-877-646-5288
Getting To Know Your Ninja Ultima
Dual Stage Blender
a
d
e
b
c
f
g
h
i
f Single Serve Drink Cup (x2)
g Single Serve Blade
h Motor Base
i Control Panel
j Power Cord (not shown)
a Pitcher Lid with Locking Handle
b Top Blades (Removable)
c 72 oz. Pitcher
d Bottom Blades (Fixed)
e Sip & Seal To-Go Lids (x2)
7
TOLL FREE: 1-877-646-5288
Using the Ninja Ultima
Dual Stage Blender
PLEASE KEEP THESE IMPORTANT
SAFEGUARDS IN MIND WHEN USING
THE APPLIANCE:
IMPORTANT: When using the top blades,
always add the ingredients into the
blender AFTER inserting the top blades.
CAUTION: Blades are sharp! Use extreme
caution when handling the top blades.
Always hold them by the shaft.
IMPORTANT: DO NOT attempt to
operate the appliance without the lid on.
IMPORTANT: Never run the appliance
empty.
CAUTION: DO NOT process food or
liquids that are hot. Allow hot ingredients
to cool before processing.
WARNING: Secure the appliance while in
use by pressing down on the lid with one
hand.
CAUTION: Never remove either container
or try to remove the lid from the pitcher
while the appliance is still running.
WARNING: Never leave the appliance
unattended while in use.
BEFORE FIRST USE
1 Remove all packaging material and labels from the
appliance.
2 Wash the lids, pitcher, single serve cups and top
blades in warm, soapy water with a soft cloth.
Use caution when washing the removable top
blades as the blades are very sharp. Rinse and
dry thoroughly.
OR
3 All accessories are dishwasher safe except the
motor base. When using the dishwasher, place the
pitcher and single serve cups in the dishwasher.
Place the lids and attachments on the top rack.
Use caution when washing the removable top
blades as the blades are very sharp. Always
hold the top blades from the shaft.
4 Wipe the motor base clean with a damp cloth. Do
not submerge the motor base in water or any other
liquid.
9
TOLL FREE: 1-877-646-5288
best leverage. Turn the pitcher counter clockwise
and then lift off the base. Do not pour out
ingredients without first carefully removing the top
blades. (Fig. 8)
CAUTION: Never insert your hands in the pitcher
as the blades are sharp. Always use a spatula to
dislodge food that has stuck to the sides of the
pitcher.
12 Make sure that the unit is unplugged when not in
use.
TIPS:
Use low speed settings (1-3) when blending
drinks and other blended items.
Use medium speed settings (4-6) when
frozen blending, ice crushing or grinding dry
ingredients.
Use high speed settings (7-10) when creating
purees such as sauces, dips and restaurant
quality glazes. Top blades are needed to power
through tough ingredients like ice, solid fruits
and vegetables. If silky smooth results are
desired, push down on the power toggle to turn
off the power, carefully remove the top blades,
replace the lid and continue processing.
For softer ingredients, the bottom fixed blades
are enough to fully process in one step.
7 Plug the motor base in for use.
8 Turn the Variable Speed Dial to speed 1.
(Fig. 6) The power indicator light ( ) will now turn
on.
To start the blender, press the “Start/Stop/Pulse”
toggle up to start processing. Slowly increase to
desired speed.
NOTE: As a safety feature, the power
indicator light ( ) will flash and the motor
will not work if the pitcher and lid are not
installed correctly.
NOTE: If you need to Pulse ingredients press down
on the toggle in short intervals.
9 When you have reached your desired consistency,
reduce speed slowly and stop the unit by pressing
up on the Start/Stop/Pulse toggle. (Fig. 7)
10 Use the convenient pour spout when serving
smoothies, juices and other beverages you have
created! Push the pour spout back as far as it
will go before pouring. For thicker consistencies,
remove the lid and the top blades carefully (by the
shaft), then empty the contents from the pitcher.
NOTE: The pour spout has a built-in pressure
release system to ensure a tight seal. DO NOT try
to force this open. To snap pour spout shut, lift up
gently on the inner piece and push down to lock.
11 To remove the lid, press the release button on the
lid, pull the lid handle up to a 90° angle and lift
the lid off. Holding the pitcher with one hand while
removing the lid with the other will provide the
Assembly and Use for the 72 oz. Pitcher - cont.
Fig. 7
USE
REMOVAL
Fig. 6 Fig. 8
WARNING: Never leave the appliance unattended while in use.
10
www.ninjakitchen.com
IMPORTANT: Make sure that the motor base is
plugged in for use.
1 Place the motor base on a clean, dry, level surface
such as a counter or table top.
2 Add ingredients to the single serve cup.
NOTE: Do not overll! To avoid spilling, do not
add ingredients past the “Max” fill line.
3 Place the single serve blade onto the cup and
screw it on tightly until you have a good seal.
(Fig. 9)
4 Turn the single serve cup upside down and place it
onto the motor base, aligning the tabs on the cup
with the motor base. (Fig. 10) Turn clockwise until
the cup locks in place, the unit is ready for use.
(Fig. 11)
5 Turn the Variable Speed Dial to the Single Serve
icon. The single serve cup only operates at one
speed regardless of which number is chosen on the
dial. Press down on the “Start/Stop/Pulse” toggle
in short intervals to pulse, or push up on the toggle
to run continuously for 1 minute, both at high
speed. (Fig. 11)
If additional blending is desired, push up on the
“Start/Stop/Pulse” toggle for another minute of
blending.
Fig. 9
Fig. 10
Assembly and Use for the Single Serve Cup
Fig. 11 Fig. 12 Fig. 13
ASSEMBLY PULSE REMOVAL
For best results, use short “P ULSES”... Practice makes perfect!!
6 When you have reached your desired consistency,
stop the appliance by pressing up on the Start/
Stop/Pulse toggle. Then turn the single serve cup
counter-clockwise (Fig. 12) and pull straight up to
remove. (Fig. 13)
7 Turn the cup upright and remove the single serve
blade by twisting the blade assembly counter
clockwise.
8 Place the Sip & Seal To-Go drinking lid onto the
single serve drink cup, screw on to seal and enjoy!
9 Make sure that the motor base is unplugged when
not in use.
11
TOLL FREE: 1-877-646-5288
Speed Setting & Uses
Top blades are needed to power through tough ingredients like ice, solid fruits and
vegetables. If silky smooth results are desired, carefully remove the top blades and continue
processing.
For softer ingredients, the bottom fixed blades are enough to fully process in one step.
Use the single serve cup for great results when making individual portions of smoothies or
other drinks.
The single serve cup is also great for chopping and creating salad dressings!
The single serve cup only operates at one speed regardless of which number is chosen on
the dial. Press down on the “Start/Stop/Pulse” toggle in short intervals to pulse, or push up
on the toggle to run continuously for 1 minute, both at high speed.
*TIPS:
Function Type of Food Suggested Blade(s) Speed Settings
Juices / Smoothies
Fruits
Vegetables
Top blades & bottom blades Pulse then 5 - 10
Ice Crushing /
Frozen Blending
Ice
Frozen fruit
Ice cream
Top blades & bottom blades Pulse then 5 - 10
Pureeing
Smooth soups
Milkshakes
Nut milks
Top blades & bottom blades*
Bottom blades only*
1 - 10
Emulsifying
Salad dressings
Sauces
Bottom blades only 1 - 5
Chopping
Salsa
Vegetables
Nuts
Top blades & bottom blades Pulse
Mixing
Batters
Dips
Bottom blades only 1 - 3
Grinding Meat Top blades & bottom blades Pulse
Nut Butters
Sunflower butter
Peanut butter
Almond butter
Top blades & bottom blades 1 - 8
Milling
Flours
Rice
Quinoa
Garbanzo Beans
Top blades & bottom blades 5 - 8


Produkt Specifikationer

Mærke: Nutri Ninja
Kategori: Blender
Model: Ultima BL810UK

Har du brug for hjælp?

Hvis du har brug for hjælp til Nutri Ninja Ultima BL810UK stil et spørgsmål nedenfor, og andre brugere vil svare dig


Blender Nutri Ninja Manualer
Blender Manualer

Nyeste Blender Manualer

Philips

Philips HR3040 Manual

15 August 2025
Philips

Philips HR2765 Manual

15 August 2025
Philips

Philips HR2764 Manual

15 August 2025
Philips

Philips HR3041 Manual

15 August 2025
Philips

Philips HR3032 Manual

15 August 2025
Philips

Philips HR2766 Manual

15 August 2025
Philips

Philips HR2767 Manual

15 August 2025
Philips

Philips HR2683 Manual

15 August 2025