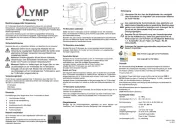
Olympia TK 100 Manual


Læs gratis den danske manual til Olympia TK 100 (5 sider) i kategorien Overvågningskamera. Denne vejledning er vurderet som hjælpsom af 28 personer og har en gennemsnitlig bedømmelse på 4.7 stjerner ud af 14.5 anmeldelser. Har du et spørgsmål om Olympia TK 100, eller vil du spørge andre brugere om produktet?

Side 1/5
Bestimmungsgemäße Verwendung
Ihre Türkralle dient zur Sicherung von Türen und ist für die Verwen-
dung an normalen Türklinken wie etwa an einer Hauseingangstür
und an Schiebetüren wie etwa an einer Terrassentür geeignet. Ihre
Türkralle besteht aus massivem Stahl und widersteht Belastungen
von mehr als 175 kg.
Voraussetzung für eine bestimmungsgemäße Verwendung ist die
sachgemäße Installation sowie die Beachtung und Einhaltung der
Hinweise dieser Bedienungsanleitung. Jede andere Verwendung
als in der bestimmungsgemäßen Verwendung beschrieben gilt als
nicht bestimmungsgemäß. Eigenmächtige Veränderungen oder
Umbauten sind nicht zulässig.
Übersicht
Die Abbildung zeigt Ihnen Ihre Türkralle im Detail.
1
2
3
4
5
6
8
9
7
Teleskopfunktion nutzen
Mithilfe der Teleskopfunktion können Sie die Türkralle auf die be-
nötigte Länge (zwischen 73 und 130 cm) einstellen. So können Sie
Ihre Türkralle für unterschiedlich hohe Türklinken oder unterschied-
lich breite Schiebetüren einstellen.
1. Drücken Sie den Federstift herein.
2. Stellen Sie das Teleskopelement auf die gewünschte Länge
ein und sichern Sie das Teleskopelement in einer passenden
Arretierung.
Ein über dem gummierten Fuß angebrachtes Kugelgelenk sorgt da-
für, dass die Türkralle in unterschiedlichen Winkeln platziert werden
kann.
Türkralle unter Türklinke platzieren
Stellen Sie Ihre Türkralle zunächst auf die ungefähre Länge ein,
sodass Sie die Türkralle einfach mit dem Gabelkopf unter der
Türklinke einklemmen können. Die Rückseite des Gabelkopfs ist
gepolstert, um Beschädigungen an der Türklinke zu vermeiden.
1. Setzen Sie den Gabelkopf in das Teleskopelement und xieren
Sie den Gabelkopf mit dem Siche-
rungsstift in der Arretierung.
2. Platzieren Sie den gummierten Fuß
der Türkralle unterhalb der Türklinke
ca. 30 cm von der Tür entfernt auf
dem Fußboden.
3. Kippen Sie die Türkralle in Richtung
Tür und passen Sie mithilfe des
Teleskopelements die Länge an, bis
der Gabelkopf die Türklinke sicher
umschließt (siehe nebenstehende
Abbildung).
Achten Sie darauf, dass der Federstift
für das Teleskopelement korrekt in einer
Arretierung eingerastet ist.
4. Überprüfen Sie, ob die Türkralle
optimal platziert ist. Falls erforderlich
passen Sie die Länge und Position
der Türkralle an.
Türkralle im Rahmen einer Schiebetür platzieren
Der Gabelkopf darf bei der Verwendung in Schiebetüren nicht
montiert sein. Das obere Ende des Teleskopelements besteht aus
Kunststo, um Schiebetür und Rahmen nicht zu beschädigen.
1. Ziehen Sie den Sicherungsstift heraus und entnehmen Sie den
Gabelkopf aus dem Teleskopelement.
2. Platzieren Sie die Türkralle zwischen Schiebetür und Rahmen.
3. Stellen Sie mithilfe des Teleskopelements die Länge so ein,
dass die Türkralle festen Halt zwischen Schiebetür und Rah-
men hat.
Achten Sie darauf, dass der Federstift für das Teleskopelement
korrekt in einer Arretierung eingerastet ist.
4. Überprüfen Sie, ob die Türkralle optimal platziert ist. Falls erfor-
derlich passen Sie die Länge und Position der Türkralle an.
Entsorgung
Helfen Sie, die Umwelt zu schonen und entsorgen Sie das
Gerät und die Verpackungsmaterialien entsprechend den
lokalen Vorschriften.
Pfl egehinweise
Reinigen Sie die Türkralle mit einem weichen und fusselfreien
Tuch. Verwenden Sie keine Reinigungs- oder Lösungsmittel.
Garantie
Die Garantiezeit beträgt 24 Monate. Die Garantiezeit beginnt ab
Kaufdatum. Bitte bewahren Sie den Kaufbeleg und die Original-
verpackung auf. Sollte ein Problem auftreten, besuchen Sie unser
Retouren-Portal (RMA) Support im Bereich auf unserer Internet-
seite www.olympia-vertrieb.de.
Bei weiteren Fragen steht Ihnen unsere Hotline unter der Nummer
0180 5 007514 (Kosten aus dem dt. Festnetz bei Drucklegung:
14 ct/Min., maximal 42 ct/Min. aus dem Mobilfunknetz) zur Verfü-
gung.
Ihre Olympia Business Systems Vertriebs GmbH
Zum Kraftwerk 1
45527 Hattingen
Technische Daten
Gewicht ca. 1000 g
Abmessungen (H x Ø) 73 bis 130 cm x 4 cm
Türkralle TK 100
Sicherheitshinweise
Bewahren Sie sich vor körperlichen Schäden und beachten Sie die
Hinweise!
WARNUNG! Erstickungsgefahr und Gefährdung der
Gesundheit! Kinder können Kleinteile, Verpackungs- oder
Schutzfolien verschlucken. Halten Sie Kinder vom Produkt
und dessen Verpackung fern. Falls etwas verschluckt
wurde, ist umgehend ein Arzt aufzusuchen.
VORSICHT! Klemmgefahr durch bewegliche Elemente.
Achten Sie bei der Arretierung und Platzierung der Türkral-
le auf Ihre Finger.
Verpackungsinhalt
Prüfen Sie den Verpackungsinhalt Ihrer Türkralle, bevor Sie Ihre
Türkralle verwenden. Sollte etwas fehlen oder beschädigt sein,
wenden Sie sich an unseren Service.
Türkralle TK 100
Bedienungsanleitung
1Gabelkopf
2 Arretierung für Gabelkopf
3Teleskopelement
4Sicherungsstift
5Korpus
6Arretierungen für
Teleskopelement
7Federstift
8Kugelgelenk
9gummierter Fuß
TK 100 Door Jammer
Intended Use
The door jammer serves to secure doors and is designed for use on
standard door handles such as used on house entrance doors and
sliding doors for a terrace. The door jammer is made of solid steel
and can withstand loads in excess of 175 kg.
A condition for complying with the intended use is that the equip-
ment is installed correctly and the information in the manual is
observed and maintained. Any use other than that described in
Section “Intended Use” is considered unintended use. Unauthorised
modifi cations or reconstructions are not permitted.
General View
The illustration below depicts the door jammer in detail.
1
2
3
4
5
6
8
9
7
1Fork head
2 Catch for fork head
3Telescopic element
4Locking pin
5Body
6Catches for telescopic
element
7Spring pin
8Ball joint
9Rubberised base
Safety Instructions
Avoid any personal injury by paying attention to the following
information!
WARNING! Risk of suocation and health hazard! Children
can swallow small parts, packaging and protective foils.
Keep the product and packaging out of reach of children. If
anything is swallowed, seek medical attention immediately.
CAUTION! Risk of crushing through moving elements. Be
careful of your fi ngers when locking and positioning the
door jammer.
Package Contents
Check the package contents of the door jammer before starting to
use the door jammer. If anything is missing or damaged, please
contact our Service department.
TK 100 door jammer
Operating manual
Using the Telescopic Function
The telescopic function can be used to adjust the door jammer to
the required length (between 73 and 130 cm). This enables you
to adapt the door jammer to the dierent heights of various door
handles or the dierent widths of sliding doors.
1. Press the spring pin in.
2. Adjust the telescopic element to the required length and fi x the
telescopic element in place in the appropriate lock.
A ball joint mounted above the rubberised base enables the door
jammer can be positioned at various angles.
Positioning the Door Jammer Under the Door Han-
dle
Firstly, adjust the length of the door jammer roughly so that you can
t the fork head of the door jammer easily under the door handle.
The rear side of the fork head is padded to prevent damage to the
door handle.
1. Fit the fork head in the telescopic element and x the fork head
in place by fi tting the locking pin in
the appropriate catch.
2. Position the rubberised base of the
door jammer on the oor under the
door handle approx. 30 cm away from
the door.
3. Tip the door jammer towards the door
and use the telescopic element to
adapt the length until the fork head
holds the door handle securely (refer
to the adjacent illustration).
Pay attention that the spring pin for the
telescopic element is fi xed properly in one
of the catches.
4. Check that the door jammer is posi-
tioned optimally. Adapt the length and
position the door jammer as neces-
sary.
Positioning the Door Jammer in
the Frame of a Sliding Door
The fork head must not be assembled when using the jammer in
sliding doors. The top end of the telescopic element is made of
plastic to ensure that the sliding door and frame are not damaged.
1. Pull the locking pin out and remove the fork head from the
telescopic element.
2. Position the door jammer between the sliding door and frame.
3. Use the telescopic element to adjust the length until the door
jammer is fi rmly fi xed between the sliding door and frame.
Pay attention that the spring pin for the telescopic element is fi xed
properly in one of the catches.
4. Check that the door jammer is positioned optimally. Adapt the
length and position the door jammer as necessary.
Disposal
Help protect the environment and dispose of the equipment
and packaging materials according to the applicable local
regulations.
Care Instructions
Clean the door jammer with a soft, lint-free cloth. Do not use any
solvents or cleaning agents.
Guarantee
Dear Customer,
we are pleased that you have chosen this equipment.
In the case of a defect, please return the device together with the
receipt and original packing material to the point-of-sale.
Technical Data
Weight Approx. 1000 g
Dimensions (H x Ø): 73 to 130 cm x 4 cm
Barre de porte anti-eraction TK 100
Utilisation conforme à l’usage prévu
La barre de porte anti-eraction sert à sécuriser vos portes ; elle
s’adapte sur des poignées standard telles que celles posées sur
les portes d’entrée et sur des portes coulissantes, comme par ex.
celles donnant sur la terrasse. Elle est en acier massif et résiste à
des charges supérieures à 175 kg.
L’utilisation conforme à l’usage prévu requiert un montage appro-
prié ainsi que l’observation des indications mentionnées dans le
présent mode d’emploi. Toute utilisation autre que celle décrite au
point Utilisation conforme à l’usage prévu est considérée comme
non conforme. Des modifi cations ou changements effectués d’un
propre gré sont interdits.
Vue d’ensemble
La fi gure suivante vous montre la barre de porte anti-effraction en
détail.
1
2
3
4
5
6
8
9
7
1Tête de fourche
2 Positionneur de la tête de
fourche
3Tube télescopique
4Goupille de sécurité
5Corps
6Positionneurs du
tube télescopique
7Goupille élastique
8Articulation sphérique
9Pied en caoutchouc
Consignes de sécurité
Préservez-vous de dommages corporels et tenez compte des
remarques !
AVERTISSEMENT ! Risque d’étouement et mise en danger
de la santé ! Les enfants peuvent avaler de petits objets,
des fi lms d’emballage ou de protection. Tenez-les à l’écart
du produit et de son emballage. Consultez immédiatement
un médecin en cas d’ingestion d’un objet quelconque.
P RUDENCE ! Risque de pincement dû à des éléments
mobiles. Faites attention à vos doigts lorsque vous
bloquez la barre de porte et la positionnez.
Contenu du coret
Contrôlez le contenu de l’emballage de la barre de porte avant d’uti-
liser celle-ci. Veuillez vous adresser à notre service après-vente au
cas où une pièce manquerait ou serait endommagée.
Barre de porte anti-eraction TK 100
Mode d’emploi
Utiliser la fonction télescope
Extensible de 73 à 130 cm. Vous pouvez ainsi régler la barre sur
des hauteurs de poignées ou des largeurs de portes coulissantes
diérentes.
1. Introduisez la goupille élastique.
2. Réglez le tube télescopique à la longueur voulue et bloquez-le
dans un positionneur adéquat.
Une articulation sphérique posée sur le pied en caoutchouc permet
de positionner la barre sur des angles diérents.
Placer la barre sous la poignée d’une porte
Réglez tout d’abord la barre à une longueur approximative de sorte
que vous puissiez la coincer facilement avec la tête de fourche
sous la poignée. La face arrière de la tête de fourche est rembour-
rée pour éviter d’endommager la poignée.
1. Introduisez la tête de fourche dans le
tube télescopique et fi xez-la avec la
goupille de sécurité dans le position-
neur.
2. Placez le pied en caoutchouc de la
barre en dessous de la poignée de la
porte sur le sol à une distance d’envi-
ron 30 cm de la porte.
3. Basculez la barre en direction de
la porte et adaptez la longueur à
l’aide du tube télescopique jusqu’à
ce que la tête de fourche enserre
correctement la poignée (voir fi gure
ci-contre).
Assurez-vous que la goupille élastique
du tube est bien enclenchée dans un
positionneur.
4. Contrôlez si la barre est idéalement
placée. Si nécessaire, adaptez la
longueur et la position de la barre.
Placer une barre de porte anti-eraction dans le
cadre d’une porte coulissante
Si vous utilisez la barre dans des portes coulissantes, ne pas poser
la tête de fourche. L’extrémité supérieure du tube télescopique est
en plastique pour ne pas endommager la porte coulissante ni le
cadre.
1. Retirez la goupille de sécurité et enlevez la tête de fourche du
tube.
2. Placez la barre entre la porte coulissante et le cadre.
3. Réglez-la sur la longueur correcte à l’aide du tube télescopique
pour qu’elle soit bien fi xée entre la porte et le cadre.
Assurez-vous que la goupille élastique du tube est bien enclenchée
dans un positionneur.
4. Contrôlez si la barre est idéalement placée. Si nécessaire,
réglez sa longueur et sa position.
Élimination
Faites preuve d’un souci écologique et éliminez l’appareil
et les fournitures d’emballage conformément aux règle-
ments locaux.
Conseils d’entretien
Nettoyez la barre de porte anti-effraction avec un chiffon doux
et non pelucheux. N’utilisez pas de produits d’entretien ni de
solvants.
Garantie
Cher client,
nous sommes très heureux que vous ayez choisi cet appareil.
En cas de défaut, veuillez retourner l’appareil dans son emballage
d’origine et accompagné du bon d’achat au magasin où vous l’avez
acheté.
Caractéristiques techniques
Poids env. 1 000 g
Dimensions (H x Ø) 73 à 130 cm x 4 cm
Sbarra telescopica blocca-porta
TK 100
Impiego conforme agli usi previstiw
La sbarra telescopica blocca-porta consente di proteggere le pro-
prie porte ed è utilizzabile su maniglie convenzionali come quelle
del portone d’ingresso o di porte nestra scorrevoli. La sbarra tele-
scopica blocca-porta è realizzata in acciaio massiccio ed è in grado
di resistere a sollecitazioni di oltre 175 kg.
Requisito per un impiego conforme è la corretta installazione come
anche l’osservanza delle indicazioni fornite nelle presenti istruzioni
d’uso. Qualsiasi impiego diverso da quanto descritto è ritenuto non
conforme agli usi previsti. Non sono ammesse modifi che o variazio-
ni arbitrarie.
Panoramica
La seguente fi gura illustra la sbarra telescopica blocca-porta in
dettaglio.
1
2
3
4
5
6
8
9
7
1Estremità biforcata
2 Arresto per estremità biforcata
3Elemento telescopico
4Perno di blocco
5Corpo
6Arresto per
elemento telescopico
7Perno a molla
8Giunto snodato
9Base gommata
Indicazioni di sicurezza
Evitare lesioni fi siche e osservare le indicazioni!
AVVERTENZA! Pericolo di soocamento e di danni alla
salute! I bambini possono ingerire parti piccole, materiali
d’imballo o pellicole protettive. Tenere il prodotto e la
confezione lontani dalla portata dei bambini! In caso di
ingestione di componenti, consultare immediatamente un
medico.
ATTENZIONE! Pericolo di incastro dovuto a componenti
mobili. Durante il posizionamento e successivo blocco
della sbarra telescopica blocca-porta fare attenzione alle
dita.


Produkt Specifikationer

Mærke: Olympia
Kategori: Overvågningskamera
Model: TK 100

Har du brug for hjælp?

Hvis du har brug for hjælp til Olympia TK 100 stil et spørgsmål nedenfor, og andre brugere vil svare dig


Overvågningskamera Olympia Manualer

Olympia

Olympia OC 1280P Manual

11 Januar 2025
Olympia

Olympia 5939 Manual

11 Januar 2025
Olympia

Olympia TV 200 Manual

28 August 2024
Olympia

Olympia BMD 210 Manual

15 August 2024
Olympia

Olympia T300 Manual

15 August 2024
Olympia

Olympia WL 100 Manual

13 August 2024
Olympia

Olympia RS 50 Manual

12 August 2024
Olympia

Olympia DC300 Manual

11 August 2024

Overvågningskamera Manualer

Nyeste Overvågningskamera Manualer