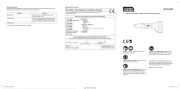
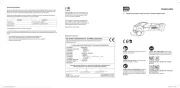
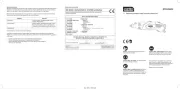
No Load Speed: 8,000 - 35,000/min
Collet Chuck Size: ø 1.5 - 3.2mm
Flexible Shaft Length: 1.05m
• Keep the ventilation vents of the rotary tool clean at all times, if possible,
prevent foreign matter from entering the vents.
• After each use, blow air through the rotary tool housing to ensure it is free
from all dust particles which may build up. Build up of dust particles may
cause the rotary tool to overheat and fail.
• If the enclosure of the rotary tool requires cleaning, do not use solvents but
a moist soft cloth only. Never let any liquid get inside the rotary tool; never
immerse any part of the rotary tool into a liquid.
• If the replacement of the supply cord is necessary, this has to be done by the
manufacturer or his agent in order to avoid a safety hazard.
When the carbon brushes wear out, the rotary tool will spark and/or stop.
Discontinue use as soon as this happens. They should be replaced prior to
recommencing use of the rotary tool. Carbon brushes are a wearing component
of the rotary tool therefore not covered under warranty. Continuing to use the
rotary tool when carbon brushes need to be replaced may cause permanent
damage to the rotary tool. Carbon brushes will wear out after many uses but
when the carbon brushes need to be replaced,
take the rotary tool to an electrician or a power tool
repairer for a quick and low cost replacement. Always
replace both carbon brushes at the same time.
Note: Ozito Industries will not be responsible for any
damage or injuries caused by the repair of the rotary
tool by an unauthorised person or by mishandling of
Sparking visible through the housing air vents
A small amount of sparking may be visible through the housing vents.
This is normal and does not indicate a problem.
Excessive sparking visible through the housing air vents
and/or the rotary tool failing to operate
May indicate the carbon brushes have worn out and need to be
replaced. Carbon brushes should only be replaced by a qualied
electrician or power tool repairer.
WARNING! When using mains-powered tools, basic safety precautions,
including the following, should always be followed to reduce risk of
re, electric shock, personal injury and material damage.
Read the whole manual carefully and make sure you know how to switch the tool off
in an emergency, before operating the tool.
Save these instructions and other documents supplied with this tool for future
Before you connect the equipment to the mains supply make sure that the data on
the rating plate are identical to the mains data.
This tool is double insulated therefore no earth wire is required.
If the supply cord is damaged, it must be replaced by an electrician or a power tool
repairer in order to avoid a hazard.
Note: Double insulation does not take the place of normal safety precautions when
operating this tool. The insulation system is for added protection against injury
resulting from a possible electrical insulation failure within the tool.
Always use an approved extension lead suitable for the power input of this tool.
Before use, inspect the extension lead for signs of damage, wear and ageing.
Replace the extension lead if damaged or defective.
When using an extension lead on a reel, always unwind the lead completely. Use of
an extension lead not suitable for the power input of the tool or which is damaged or
defective may result in a risk of re and electric shock.
TYPE QTY/ SIZES INCLUDED APPLICATIONS
different shank sizes, to your rotary tool.
A mandrel is a shank to which polishing
accessories, cutting wheels and sanding
A shank which screws into the felt
polishing tip and wheels.
A shank used with sanding paper drums.
Regular Cut-off Wheels 8x
slicing and cutting applications. Use them
for cutting off frozen bolt heads and nuts
Made for intricate work on ceramics, wood
carvings, jewelry and scrimshaw. Available
in a wide variety of shapes and sizes.
Dressing Stone 1 grinding accessories after they have been x
Suitable for various kinds of grinding and
sharpening applications. Available in a
wide range of sizes and shapes - round,
25.4mm x 6.7mm Felt Wheel 1x
12.7mm x 6mm Felt Wheel x 1
Used to drill through all types of plastic
Sanding discs in fine, medium and coarse
grades are made for use on nearly any
The steel wire brush is good for general
Useful for cleaning silverware, jewellery
and antiques. Use with polishing
compound for faster cleaning or polishing.
Used for bringing metal surfaces to a
smooth finish. Use with polishing
compound to bring a high shine to the
OZITO UK Unit 9 Stadium Court, Wirral International Business Park, Plantation Road, Bromborough, Wirral, CH62 3QG
All of our products undergo strict quality checks to ensure that they reach
you in perfect condition. In the unlikely event that your device develops a
fault, please contact our service department at the address shown on this
guarantee card. You can also contact us by telephone using the customer
service number shown. Please note the following terms under which
guarantee claims can be made:
1. These warranty terms regulate additional warranty services, which the
manufacturer mentioned below promises to buyers of its new products
in addition to their statutory guarantee claims are not affected by this
guarantee. Our guarantee is free of charge to you.
2. The warranty services only covers defects due to material or
manufacturing faults on a product which you have bought from the
manufacturer mentioned below are limited to either the rectication of said
defects on the product or the replacement of the product, whichever we
Please note that our devices are not designed for use in commercial, trade
or professional applications. A guarantee contract will not be created if the
device has been used by commercial, trade or industrial business or has
been exposed to similar stresses during the guarantee period.
3. The following are not covered by our guarantee:
- Damage to the device caused by a failure to follow the assembly
instructions or due to incorrect installation, a failure to follow the operating
instructions (for example connecting it to an incorrect mains voltage or
current type) or a failure to follow the maintenance and safety instructions
or by exposing the device to abnormal environmental conditions or by lack
- Damage to the device caused by abuse or incorrect use (for example
overloading the device or the use or unapproved tools or accessories),
ingress of foreign bodies into the device (such as sand, stones or dust,
transport damage), the use of force or damage caused by external forces
(for example by dropping it).
- Damage to the device or parts of the device caused by normal or natural
wear or tear or by normal use of the device.
4. Your Product is guaranteed for a period of 36 months from the original
date of purchase and is intended for DIY (Do It Yourself) use only. Lithium
Ion batteries and chargers are covered by a 12 month warranty. Warranty
excludes consumable parts. Guarantee claims should be submitted
before the end of the guarantee period within two weeks of the defect
being noticed. No guarantee claims will be accepted after the end of the
guarantee period. The original guarantee period remains applicable to the
device even if repairs are carried out or parts are replaced. In such cases,
the work performed or parts tted will not result in an extension of the
guarantee period, and no new guarantee will become active for the work
performed or parts tted. This also applies if an on-site service is used.
IN ORDER TO MAKE A CLAIM UNDER THIS WARRANTY YOU MUST
RETURN THE PRODUCT TO THE PLACE OF PURCHASE WITH YOUR
Please refer to the restrictions of this warranty concerning wearing parts,
consumables and missing parts as set out in the service information in
these operating instructions.
CUSTOMER SERVICE HELPLINE
Spare parts can be ordered from the Special Orders Desk
at your local Bunnings Warehouse or Homebase store.
For further information, or any parts visit
www.ozito-diy.co.uk or contact Ozito Customer Service:
Great Britain: 0151 294 4488
E-mail: info@ozito-diy.co.uk
~ Alternating current W Watts
ROTARY TOOL SAFETY WARNINGS
GENERAL POWER TOOL SAFETY WARNINGS - PERSONAL SAFETY
This appliance is not intended for use by young or inrm persons unless supervised by a responsible
person to ensure that they can use the appliance safely. Young children should be supervised to
ensure that they do not play with the appliance.
Safety Warnings Common for Grinding, Sanding, Wire Brushing, Polishing or Abrasive
a) This power tool is intended to function as a grinder, sander, wire brush, polisher or cut-off tool. Read all
safety warnings, instructions, illustrations and specications provided with this power tool. Failure to follow all
instructions listed below may result in electric shock, re and/or serious injury.
b) Do not use accessories which are not specically designed and recommended by the tool manufacturer. Just
because the accessory can be attached to your power tool, it does not assure safe operation.
c) The rated speed of the accessory must be at least equal to the maximum speed marked on the power tool.
Accessories running faster than their rated speed can break and y apart.
d) The outside diameter and the thickness of your accessory must be within the capacity rating of your power
tool. Incorrectly sized accessories cannot be adequately guarded or controlled.
e) The arbour size of wheels, sanding drums or any other accessory must properly t the spindle or collet of the
power tool. Accessories that do not match the mounting hardware of the power tool will run out of balance, vibrate
excessively and may cause loss of control.
f) Mandrel mounted wheels, sanding drums, cutters or other accessories must be fully inserted into the collet
or chuck. If the mandrel is insufciently held and/or the overhang of the wheel is too long, the mounted wheel may
become loose and be ejected at high velocity.
g) Do not use a damaged accessory. Before each use inspect the accessory such as abrasive wheels for chips
and cracks, backing pad for cracks, tear or excess wear, wire brush for loose or cracked wires. If power
tool or accessory is dropped, inspect for damage or install an undamaged accessory. After inspecting and
installing an accessory, position yourself and bystanders away from the plane of the rotating accessory and
run the power tool at maximum no-load speed for one minute. Damaged accessories will normally break apart
h) Wear personal protective equipment. Depending on application, use face shield, safety goggles or safety
glasses. As appropriate, wear dust mask, hearing protectors, gloves and workshop apron capable of stopping
small abrasive or workpiece fragments. The eye protection must be capable of stopping ying debris generated by
various operations . The dust mask or respirator must be capable of ltrating particles generated by your operation.
Prolonged exposure to high intensity noise may cause hearing loss.
i) Keep bystanders a safe distance away from work area. Anyone entering the work area must wear personal
protective equipment. Fragments of workpiece or of a broken accessory may y away and cause injury beyond
immediate area of operation.
j) Hold the power tool by insulated gripping surfaces only, when performing an operation where the cutting
accessory may contact hidden wiring or its own cord. Cutting accessory contacting a “live” wire may make
exposed metal parts of the power tool “live” and could give the operator an electric shock.
k) Always hold the tool rmly in your hand(s) during the start-up. The reaction torque of the motor, as it accelerates
to full speed, can cause the tool to twist.
l) Use clamps to support workpiece whenever practical. Never hold a small workpiece in one hand and the tool
in the other hand while in use. Clamping a small workpiece allows you to use your hand(s) to control the tool. Round
material such as dowel rods, pipes or tubing have a tendency to roll while being cut, and may cause the bit to bind or
m) Position the cord clear of the spinning accessory. If you lose control, the cord may be cut or snagged and your
hand or arm may be pulled into the spinning accessory.
n) Never lay the power tool down until the accessory has come to a complete stop. The spinning accessory may
grab the surface and pull the power tool out of your control.
o) After changing the bits or making any adjustments, make sure the collet nut, chuck or any other adjustment
devices are securely tightened. Loose adjustment devices can unexpectedly shift, causing loss of control, loose
rotating components will be violently thrown.
p) Do not run the power tool while carrying it at your side. Accidental contact with the spinning accessory could snag
your clothing, pulling the accessory into your body.
q) Regularly clean the power tool’s air vents. The motor’s fan will draw the dust inside the housing and excessive
accumulation of powdered metal may cause electrical hazards.
r) Do not operate the power tool near ammable materials. Sparks could ignite these materials.
s) Do not use accessories that require liquid coolants. Using water or other liquid coolants may result in electrocution
Kickback and Related Warnings
Kickback is a sudden reaction to a pinched or snagged rotating wheel, backing pad, brush or any other accessory.
Pinching or snagging causes rapid stalling of the rotating accessory which in turn causes the uncontrolled power tool to
be forced in the direction opposite of the accessory’s rotation at the point of the binding.
For example, if an abrasive wheel is snagged or pinched by the workpiece, the edge of the wheel that is entering into the
pinch point can dig into the surface of the material causing the wheel to climb out or kick out. The wheel may either jump
toward or away from the operator, depending on direction of the wheel’s movement at the point of pinching. Abrasive
wheels may also break under these conditions.
Kickback is the result of power tool misuse and/or incorrect operating procedures or conditions and can be avoided by
taking proper precautions as given below.
a) Maintain a rm grip on the power tool and position your body and arm to allow you to resist kickback forces.
The operator can control kickback forces, if proper precautions are taken.
b) Use special care when working corners, sharp edges etc. Avoid bouncing and snagging the accessory.
Corners, sharp edges or bouncing have a tendency to snag the rotating accessory and cause loss of control or
c) Do not attach a toothed saw blade. Such blades create frequent kickback and loss of control.
d) Always feed the bit into the material in the same direction as the cutting edge is exiting from the material
(which is the same direction as the chips are thrown). Feeding the tool in the wrong direction causes the cutting
edge of the bit to climb out of the work and pull the tool in the direction of this feed.
e) When using rotary les, cut-off wheels or high-speed cutters, always have the work securely clamped. These
wheels will grab if they become slightly canted in the groove, and can kickback. When a cut-off wheel grabs, the wheel
itself usually breaks. When a rotary le or high-speed cutter grabs, it may jump from the groove and you could lose
Safety Warnings Specic for Grinding and Abrasive Cutting-Off Operations:
a) Use only wheel types that are recommended for your power tool and only for recommended applications. For
example: do not grind with the side of a cut-off wheel. Abrasive cut-off wheels are intended for peripheral grinding, side
forces applied to these wheels may cause them to shatter.
b) For threaded abrasive cones and plugs use only undamaged wheel mandrels with an unrelieved shoulder
ange that are of correct size and length. Proper mandrels will reduce the possibility of breakage.
c) Do not “jam” a cut-off wheel or apply excessive pressure. Do not attempt to make an excessive depth of cut.
Overstressing the wheel increases the loading and susceptibility to twisting or snagging of the wheel in the cut and the
possibility of kickback or wheel breakage.
d) Do not position your hand in line with and behind the rotating wheel. When the wheel, at the point of operation, is
moving away from your hand, the possible kickback may propel the spinning wheel and the power tool directly at you.
e) When wheel is pinched, snagged or when interrupting a cut for any reason, switch off the power tool and
hold the power tool motionless until the wheel comes to a complete stop. Never attempt to remove the cut-off
wheel from the cut while the wheel is in motion otherwise kickback may occur. Investigate and take corrective action to
eliminate the cause of wheel pinching or snagging.
f) Do not restart the cutting operation in the workpiece. Let the wheel reach full speed and carefully re-enter the
cut. The wheel may bind, walk up or kickback if the power tool is restarted in the workpiece.
g) Support panels or any oversized workpiece to minimize the risk of wheel pinching and kickback. Large
workpieces tend to sag under their own weight. Supports must be placed under the workpiece near the line of cut and
near the edge of the workpiece on both sides of the wheel.
h) Use extra caution when making a “pocket cut” into existing walls or other blind areas. The protruding wheel
may cut gas or water pipes, electrical wiring or objects that can cause kickback.
Additional Safety Warnings Specic for Abrasive Cutting-Off Operations:
a) Do not “jam” the cut-off wheel or apply excessive pressure. Do not attempt to make an excessive depth of cut.
Over stressing the wheel increases the loading and susceptibility to twisting or binding of the wheel in the cut and the
possibility of kickback or wheel breakage.
b) Do not position your body in line with and behind the rotating wheel. When the wheel, at the point of operation, is
moving away from your body, the possible kickback may propel the spinning wheel and the power tool directly at you.
c) When wheel is binding or when interrupting a cut for any reason, switch off the power tool and hold the power
tool motionless until the wheel comes to a complete stop. Never attempt to remove the cut-off wheel from the
cut while the wheel is in motion otherwise kickback may occur. Investigate and take corrective action to eliminate
the cause of wheel binding.
d) Do not restart the cutting operation in the workpiece. Let the wheel reach full speed and carefully re-enter the
cut. The wheel may bind, walk up or kickback if the power tool is restarted in the workpiece.
e) Support panels or any oversized workpiece to minimize the risk of wheel pinching and kickback. Large
workpieces tend to sag under their own weight. Supports must be placed under the workpiece near the line of cut and
near the edge of the workpiece on both sides of the wheel.
f) Use extra caution when making a “pocket cut” into existing walls or other blind areas. The protruding wheel may
cut gas or water pipes, electrical wiring or objects that can cause kickback.
Safety Warnings Specic for Sanding Operations:
a) Do not use excessively oversized sanding disc paper. Follow manufacturers recommendations, when
selecting sanding paper. Larger sanding paper extending beyond the sanding pad presents a laceration hazard and
may cause snagging, tearing of the disc or kickback.
Safety Warnings Specic for Polishing Operations:
a) Do not allow any loose portion of the polishing bonnet or its attachment strings to spin freely. Tuck away or
trim any loose attachment strings. Loose and spinning attachment strings can entangle your ngers or snag on the
Safety Warnings Specic for Wire Brushing Operations:
a) Be aware that wire bristles are thrown by the brush even during ordinary operation. Do not overstress the wires
by applying excessive load to the brush. The wire bristles can easily penetrate light clothing and/or skin.
b) Allow brushes to run at operating speed for at least one minute before using them. During this time no one is to
stand in front or in line with the brush. Loose bristles or wires will be discharged during the run-in time.
c) Direct the discharge of the spinning wire brush away from you. Small particles and tiny wire fragments may be
discharged at high velocity during the use of these brushes and may become imbedded in your skin.
WARNING! Read all safety warnings and all instructions. Failure to follow the warnings and
instructions may result in electric shock, re and/or serious injury.
Save all warnings and instructions for future reference. The term “power tool” in the warnings refers
to your mains-operated (corded) power tool or battery-operated (cordless) power tool.
a. Keep work area clean and well lit. Cluttered or dark areas invite accidents.
b. Do not operate power tools in explosive atmospheres, such as in the presence of ammable
liquids, gases or dust. Power tools create sparks which may ignite the dust or fumes.
c. Keep children and bystanders away while operating a power tool. Distractions can cause you to
a. Power tool plugs must match the outlet. Never modify the plug in any way. Do not use any
adapter plugs with earthed (grounded) power tools. Unmodied plugs and matching outlets will
reduce risk of electric shock.
b. Avoid body contact with earthed or grounded surfaces, such as pipes, radiators, ranges and
refrigerators. There is an increased risk of electric shock if your body is earthed or grounded.
c. Do not expose power tools to rain or wet conditions. Water entering a power tool will increase the
d. Do not abuse the cord. Never use the cord for carrying, pulling or unplugging the power tool.
Keep cord away from heat, oil, sharp edges or moving parts. Damaged or entangled cords increase
the risk of electric shock.
e. When operating a power tool outdoors, use an extension cord suitable for outdoor use. Use of a
cord suitable for outdoor use reduces the risk of electric shock.
f. If operating a power tool in a damp location is unavoidable, use a residual current device (RCD)
protected supply. Use of an RCD reduces the risk of electric shock.
a. Stay alert, watch what you are doing and use common sense when operating a power tool. Do
not use a power tool while you are tired or under the inuence of drugs, alcohol or medication. A
moment of inattention while operating power tools may result in serious personal injury.
b. Use personal protective equipment. Always wear eye protection. Protective equipment such as dust
mask, non-skid safety shoes, hard hat, or hearing protection used for appropriate conditions will reduce
c. Prevent unintentional starting. Ensure the switch is in the off-position before connecting to
power source and/or battery pack, picking up or carrying the tool. Carrying power tools with your
nger on the switch or energising power tools that have the switch on invites accidents.
d. Remove any adjusting key or wrench before turning the power tool on. A wrench or a key left
attached to a rotating part of the power tool may result in personal injury.
e. Do not overreach. Keep proper footing and balance at all times. This enables better control of the
power tool in unexpected situations.
f. Dress properly. Do not wear loose clothing or jewellery. Keep your hair, clothing and gloves away
from moving parts. Loose clothes, jewellery or long hair can be caught in moving parts.
g. If devices are provided for the connection of dust extraction and collection facilities, ensure
these are connected and properly used. Use of dust collection can reduce dust-related hazards.
h. Do not let familiarity gained from frequent use of tools allow you to become complacent and
ignore tool safety principles. A careless action can cause severe injury within a fraction of a second.
4. Power tool use and care
a. Do not force the power tool. Use the correct power tool for your application. The correct power tool
will do the job better and safer at the rate for which it was designed.
b. Do not use the power tool if the switch does not turn it on and off. Any power tool that cannot be
controlled with the switch is dangerous and must be repaired.
c. Disconnect the plug from the power source and/or the battery pack from the power tool before
making any adjustments, changing accessories, or storing power tools. Such preventive safety
measures reduce the risk of starting the power tool accidentally.
d. Store idle power tools out of the reach of children and do not allow persons unfamiliar with the
power tool or these instructions to operate the power tool. Power tools are dangerous in the hands
e. Maintain power tools. Check for misalignment or binding of moving parts, breakage of parts and
any other condition that may affect the power tool’s operation. If damaged, have the power tool
repaired before use. Many accidents are caused by poorly maintained power tools.
f. Keep cutting tools sharp and clean. Properly maintained cutting tools with sharp cutting edges are
less likely to bind and are easier to control.
g. Use the power tool, accessories and tool bits etc. in accordance with these instructions, taking
into account the working conditions and the work to be performed. Use of the power tool for
operations different from those intended could result in a hazardous situation.
h. Keep handles and grasping surfaces dry, clean and free from oil and grease. Slippery handles and
grasping surfaces do not allow for safe handling and control of the tool in unexpected situations.
a. Have your power tool serviced by a qualied repair person using only identical replacement
parts. This will ensure that the safety of the power tool is maintained.