Operating and safety instructions
This dummy camera simulates a real CCTV camera. It can be used to deter potential
burglars. The effect is enhanced by a flashing LED which is powered by two AAA, alkaline
batteries (not included).The unit is suitable forindoor and outdoor use.
1 x Dummy camera with bracket 1 x Allen key
3 x Screws 1 x Warning sticker
3 x Plugs ( 5mm) 1 x Operating instructions
Operating voltage: 3 V DC
Read through these operating instructions fully and carefully. Keep these instructions in
a safe place and should the need arise pass them on to a third party.
Any other use or change of the appliance is improper use. No liability shall be assumed for
consequential damage aswell as damage which iscaused by improper use.
This appliance is not intended to be used by people (including children) with restricted
physical, sensory or mental capacities, or a lack of experience and/or knowledge, unless
they are supervised by or receive instructions how to use the appliance from a person
responsible for their safety. Children must be supervised in order to ensure that they do
not play with the appliance.
After unpacking immediately check that the delivery is complete and that the appliances
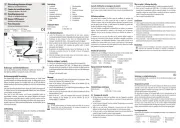
1 Housing 5 Battery compartement
3 Fixing hole 7 Locking screw
4 Battery compartement cover
Bedienings- en veiligheidsinstructies
Batterijen plaatsen / vervangen
Deze dummycamera doet zich voor als een echte bewakingscamera. Hierdoor kunnen
potentiële criminelen of dieven worden afgeschrikt. Het effect wordt verhoogd door
een knipperende lichtdiode. Het apparaat is ontworpen voor gebruik buitenshuis of
binnenshuis. De lichtdiode loopt op twee AAA alkalische batterijen (niet
1 Houder 4 Bevestigingsgat
2 Behuizing 5 Borgschroef
3 Lichtdiode 6 Batterijvakje
Zodra de lichtdiode niet meer knippert, moeten de batterijen worden vervangen
om beschadiging door corrosie te voorkomen.
Om de batterijen in te brengen of te vervangen, is het raadzaam de camera van
de muur of het plafond te verwijderen.
Koppel de behuizing [2] los door deze linkrom te draaien.
Plaats twee nieuwe batterijen (AA, 1,5V alkalisch; niet meegeleverd) met de
juiste pool in het batterijvakje [6].
Lees deze handleiding volledig en zorgvuldig door. Sla deze handleiding zorgvuldig
op en geef deze evtl. door aan derden.
Elk ander gebruik of wijziging van het apparaat geldt als niet in overeenstemming
met de voorschriften. Voor vervolgschade en schade die veroorzaakt wordt door niet
voorgeschreven gebruik of ondeskundige bediening, wordt geen aansprakelijkheid
Dit apparaat is niet bedoeld om te worden gebruikt door personen (inclusief kinderen)
met beperkte fysieke, sensorische of geestelijke capaciteiten of bij gebrek aan
ervaring en/of gebrek aan kennis, tenzij zij onder toezicht staan van een voor hun
veiligheid verantwoordelijke persoon of van deze aanwijzingen hebben ontvangen
hoe het apparaat moest worden gebruikt. Kinderen moeten onder toezicht staan om
te garanderen dat zij niet met het apparaat spelen.
Controleer direct na het uitpakken of het leveringsprogramma volledig is en of de
apparatuur in perfecte staat verkeert.
Batterij: 2x AA, 1,5 V (niet in het leveringsprogramma)
Laat kleine kinderen niet zonder toezicht bij het apparaat, verpakkingsmateriaal
of kleine onderdelen! Anders dreigt levensgevaar door verstikking!
Let erop dat de batterij niet wordt kortgesloten of in het vuur wordt gegooid. Zij
mag bovendien niet worden opgeladen. Er bestaat levensgevaar door explosie.
Uitgelopen of beschadigde batterijen kunnen bij aanraking met de huid
brandwonden veroorzaken; gebruik daarom in dit geval geschikte
1 x Dummycamera met houder 1 x Inbussleutel
3 x Schroeven 1 x Waarschuwingssticker
3 x Pluggen ( 5mm) 1 x Gebruiksanwijzing
Beschadig bij de montage geen leidingen voor gas, stroom of telecommunicatie!
Contenuto della confezione
Controlli, direttamente dopo il disimballaggio della fornitura, che gli apparecchi siano
completi ed in buono stato.
1 Supporto 4 Foro di fissaggio
2 Custodia 5 Viti di fermo
3 Diodo luminoso 6 Vano batteria
Tensione di alimentazione:
Non lasciare bambini non sorvegliati nei pressi dell‘apparecchio, del materiale di
imballaggio o di piccole parti dell’apparecchio medesimo, poiché sussiste ilpericolo
di morte persoffocamento!
Durante le operazione di fissaggio ad una parete non danneggiare condutture del
gas, dell’elettricità o di telecomunicazioni, poiché sussiste il pericolo di morte, di
lesione e didanneggiamento delle condutture!
Inserendo la batteria, fare attenzione alla polarità corretta. Fare attenzione a che la
batteria non sia cortocircuitata o esposta ad un calore estremo, quale ad esempio
della luce solare diretta o del fuoco. Sussiste un pericolo di morte dovuto ad
Batterie esauste o danneggiate possono determinare corrosioni in caso di contatto
con la pelle.In questo caso utilizzare quindiguanti protettivi!
Appena il diodo luminoso smette di lampeggiare, le batterie devono essere
sostituite, per prevenireun danneggiamento da corrosione.
Per inserire o sustituire le batterie, si consigliadisvitare la fotocamera dalla parete o
Scollegarela custodia [2] dalsupporto [1] ruotandola in sensoantiorario.
Avvitare lacustodia sul supporto.
Introdurre/cambiare le batterie
Posizionare due nuove batterie (AA, 1,5V alcaline; non contenute nella fornitura)
conla giusta polarità nelvano batteria [6].
Tenga il pannello del supporto [1] sul punto desiderato sulla parete
segnii tre fori difissaggio [4].
Creiun foro da 5mmØ sui punti segnati edinserisca i tasselli.
Fissiil supporto con leviti sulla parete .
Allenti le viti di fermo [5] con la chiave a brugola e regoli l'allineamento della finta
telecameranella posizione desiderata ela vite di fermo.
1 x Finta telecamera con supporto 1 x chiave a brugola
3 x Vite 1 x Adesivi con le avvertenze
3 x Tasselli ( 5mm) 1 x Istruzioni per funzionamento
Non gettare i materiali di imballo e le batterie consumate o gli apparecchi
obsoleti tra i rifiuti domestici, ma riciclarli. Chiedere al Comune le
informazioni sul centro di raccolta o di riciclaggio a cui rivolgersi.
Istruzioni per funzionamento e sicurezza
Leggere per intero e con attenzione le presenti istruzioni d’uso. Conservare
con cura queste istruzioni d’uso e, qualora fosse necessario, consegnarle a terzi.
ambienti esterni o interni
Ogni altro utilizzoo modifica all'apparecchio è da ritenersi non conforme. Per conseguenze
e danni derivantida unutilizzo nonconforme oda unutilizzo sbagliato,non ci assumiamo
responsabilità. Non fare utilizzare questo apparecchio a persone (ivi inclusi bambini) con
capacità fisiche, sensoriali o mentali limitate. Inoltre l’apparecchio non può essere
utilizzato da persone che non conoscano il suo funzionamento, a meno che una persona
responsabileper la sicurezza svolga un’attività di supervisione o dia indicazioni sul modo in
cuil’apparecchio deve essere utilizzato.
Questa finta telecamera simula una vera telecamera di sorveglianza. Con essa si possono
intimidire potenziali criminali o ladri. L'effetto è aumentato da un diodo luminoso
L'apparecchio è concepito per il funzionamento in . Il diodo
luminosoè azionato tramite duebatterie alcaline AA (non contenutenella fornitura).
Do not leave small children unsupervised with the appliance, packing material or
small parts! Otherwise there is a danger to life through suffocation!
Make sure that the batteries are not short-circuited, nor thrown into fire. They may not
be recharged. There is a danger to life through explosion.
Leaking or damaged batteries can cause burning upon contact with the skin. Where
this is the case use suitable protective gloves.
As soon as the LED becomes weak or does not flash replace the batteries, otherwise
there is a risk of damage by corrosion.
holeat each of themarked positions and insert theplugs.
Securethe bracket to thewall or the ceiling usingthe fixing screws.
Loosen the locking screws [5] with the Allen key, adjust the dummy camera to the
desiredorientation and then retightenthe locking screws.
Do not damage any gas pipes, or electricity or telecommunication cables when
fastening! Otherwise there is a danger to life or risk of injury or damage!
Inserting / replacing the batteries
To insert or replace the batteries, we recommend unscrewing the camera from the wall
Removethe housing [2] fromthe bracket [1] by turningit counter-clockwise.
Insert two new batteries (AA, 1,5V alkaline; not included) with the correct polarity into
thebattery compartement [6].
Screwthe housing back ontothe bracket.
Place the bracket [1] in the desiredposition on the wall or the ceiling and mark through
Packaging material, used batteries or electrical products must not be disposed of
as household waste. Use your recycling system. Details are available from your
Schroef de behuizing terug op de houder.
Houd de plaat van de houder [1] op de gewenste plaats op de muur of de plafond en
markeerde drie bevestigingsgaten [4]daardoorheen.
Booreen gat met Ø5mm op de gemarkeerde puntenen installeer de pluggen.
Bevestigde houder met deschroeven op de muur ofde plafond.
Draai het borgschroef [5]met de inbussleutel los en stel de uitlijning van de
dummycameraaf op de gewenstepositie en draai de hetborgschroef vast.
Lege batterijen en uitgewerkte apparaten niet Zomaar weggooien. Zorg dat
ze milieuvriendelijk worden opgeruimd. Uw gemeentehuis kan u aan het
adres van de milieustraat helpen.