Philips Series 5000 S5216 Manual

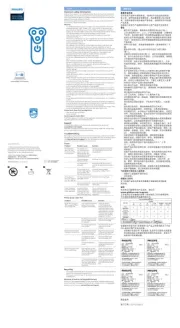
Philips Barberkniv Series 5000 S5216

Læs nedenfor 📖 manual på dansk for Philips Series 5000 S5216 (80 sider) i kategorien Barberkniv. Denne guide var nyttig for 45 personer og blev bedømt med 4.7 stjerner i gennemsnit af 23 brugere

Side 1/80
5000 series
S5xxx
30
26
27
25
28
34
35
36
29
1
2
3
8
9
10
19
20
21
22
23
24
11
12 13 14
15
17
18
33
32
31
4
5
6
7
16
English 6
Deutsch 42
Caution
- Never immerse the cleaning
system or the charging stand in
water and do not rinse it under
the tap.
- Never use water hotter than
60°C to rinse the shaver.
- Only use this appliance for its
intended purpose as shown in
the user manual.
- For hygienic reasons, the
appliance should only be used
by one person.
- Never use compressed air,
scouring pads, abrasive
cleaning agents or aggressive
liquids such as petrol or
acetone to clean the appliance.
- If your shaver comes with a
cleaning system, always use the
original Philips cleaning fluid
(cartridge or bottle, depending
on the type of cleaning system).
8English
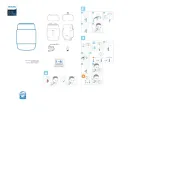
8 Protection cap for shaving unit (S5xxx/59,
S5xxx/57, S5xxx/44, S5xxx/40, S5xxx/21,
S5xxx/10, S5xxx/06, S5xxx/04, S5210/06 only)
9 Click-on shaving unit
10 Shaving unit release button
11 On/off button
12 Turbo button
13 Cleaning reminder
14 Replacement reminder
15 Travel lock symbol
16 Unplug for use symbol
17 Battery charge indicator
18 Socket for small plug
19 Charging stand (S5210/06 only)
20 Body shaver attachment (S5xxx/59 only)
21 5 mm comb for body shaver attachment
(S5xxx/59 only)
22 3 mm comb for body shaver attachment
(S5xxx/59 only)
23 Click-on nose trimmer attachment (S5xxx/45,
S5xxx/44 only)
24 Protection cap for nose trimmer attachment
(S5xxx/45, S5xxx/44 only)
25 On/off button
26 Replacement symbol
27 Rinsing symbol
28 Ready symbol
29 Battery symbol
30 Cap of SmartClean system
31 SmartClean system (S5xxx/26, S5xxx/25,
S5xxx/10 only)
32 Cleaning cartridge for SmartClean system
(S5xxx/26, S5xxx/25, S5xxx/10 only)
33 Cleaning brush
34 Supply unit
35 Small plug
36 Pouch (S5xxx/88, S5xxx/45, S5xxx/43, S5xxx/41,
S5xxx/26, S5xxx/25, S5xxx/22, S5xxx/12 only)
11
English
The accessories supplied may vary for different
products. The box shows the accessories that have
been supplied with your product.
The display
Battery charge indicator
Note: If you press the on/off button during
charging, the 'unplug for use' symbol flashes white
to remind you that you have to disconnect the
appliance from the wall socket.
Battery charge indicator with 3 lights
Quick charge: When the battery is empty and you
connect the appliance to the wall socket, the lights
of the battery charge indicator light up one after
the other repeatedly. When the appliance contains
enough energy for one shave, the bottom light of
the battery charge indicator starts flashing slowly.
While the appliance continues to charge, first the
bottom light of the battery charge indicator flashes
and then lights up continuously. Then the second
light flashes and then lights up continuously, and
so on until the appliance is fully charged.
Battery charge indicator with 1 light
Quick Charge: When the battery is empty and you
connect the appliance to the wall socket, the
battery charge indicator flashes quickly. When the
appliance contains enough energy for one shave,
the battery charge indicator starts flashing slowly.
While the appliance continues to charge, the
battery charge indicator flashes slowly until the
battery is fully charged.
12 English
Battery fully charged
Note: When the battery is full, the display switches
off automatically after 30 minutes.
Note: This appliance can only be used without
cord.
Battery charge indicator with 3 lights
When the battery is fully charged, all lights of the
battery charge indicator light up white
continuously.
Battery charge indicator with 1 light
When the battery is fully charged, the battery
charge indicator lights up white continuously.
Battery low
Battery charge indicator with 3 lights
When the battery is almost empty, the bottom light
of the battery charge indicator flashes orange. At
this point there is enough energy left for one
shave.
Battery charge indicator with 1 light
When the battery is almost empty, the battery
charge indicator flashes orange.
13
English
Note: You cannot use the appliance while it is
charging.
Charging with the supply unit
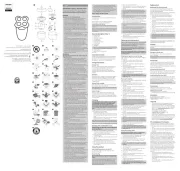
1 Make sure the appliance is switched off.
2Put the small plug in the appliance and put the
supply unit in the wall socket.
3After charging, remove the supply unit from the
wall socket and pull the small plug out of the
appliance.
Note: When the battery is full, the display
switches off automatically after 30 minutes.
Charging in the SmartClean system (specific types
only)
1
2
1 Put the small plug in the back of the
SmartClean system.
2Put the supply unit in the wall socket.
3Press to open the SmartClean system cap, to be
able to place the shaver in the holder ('click').
4Hold the shaver upside down above the holder.
Make sure the front of the shaver points
towards the SmartClean system holder.
16 English
1
23
5Place the shaver in the holder, tilt the shaver
backwards and press down the SmartClean
system cap to connect the shaver (‘click’).
The battery symbol flashes to indicate that the
appliance is charging. When the battery is fully
charged, the battery symbol lights up
continuously.
Using the appliance
Note: This appliance can only be used without
cord.
Switching the appliance on and off
1To switch on the appliance, press the on/off
button once.
2To switch off the appliance, press the on/off
button once.
Battery charge indicator with 3 lights: The display
lights up for a few seconds to show the remaining
battery status.
Shaving
Skin adaptation period
Your first shaves may not bring you the result you
expect and your skin may even become slightly
irritated. This is normal. Your skin and beard need
time to adapt to any new shaving system. To allow
your skin to adapt to this new appliance, we advise
you to shave regularly (at least 3 times a week) and
exclusively with this appliance for a period of 3
weeks.
Dry shaving
1Switch on the appliance.
17
English
2Move the shaving heads over your skin in
circular movements to catch all hairs growing in
different directions. Make sure each shaving
head is fully in contact with the skin. Exert
gentle pressure for a close, comfortable shave.
Note: Do not press too hard, as this can cause
skin irritation.
3Clean the appliance after use.
Wet shaving
For a more comfortable shave, you can also use
this appliance on a wet face with shaving foam or
shaving gel.
To shave with shaving foam or shaving gel, follow
the steps below:
1 Apply some water to your skin.
2Apply shaving foam or shaving gel to your skin.
3Rinse the shaving unit under the tap to ensure
that the shaving unit glides smoothly over your
skin.
4Switch on the appliance.
18 English
5Move the shaving heads over your skin in
circular movements to catch all hairs growing in
different directions. Make sure each shaving
head is fully in contact with the skin. Exert
gentle pressure for a close, comfortable shave.
Note: Do not press too hard, this can cause skin
irritation.
Note: Rinse the shaving unit regularly to ensure
that it continues to glide smoothly over your
skin.
6Dry your face.
7Clean the appliance after use.
Note: Make sure you rinse all foam or shaving
gel off the appliance.
Turbo setting (specific types only)
The appliance is equipped with a Turbo or Turbo+
setting. This allows you to shave hard-to-reach
areas more quickly.
1 Switch on the appliance.
2To activate the Turbo setting, press the Turbo
button once when the appliance is switched on.
3Move the shaving heads over your skin in
circular movements to catch all hairs growing in
different directions. Make sure each shaving
head is fully in contact with the skin. Exert
gentle pressure for a close, comfortable shave.
Note: Circular movements provide better
shaving results than straight movements.
4To deactivate the Turbo setting, press the Turbo
button once.
19
English
Using the click-on attachments
Note: The accessories supplied may vary for
different products. The box shows the accessories
that have been supplied with your product.
Removing or attaching click-on attachments
1 Make sure the appliance is switched off.
2Pull the attachment straight off the appliance.
Note: Do not twist the attachment while you
pull it off the appliance.
3Insert the lug of the attachment into the slot in
the top of the appliance. Then press down the
attachment to attach it to the appliance (‘click’).
Using the precision trimmer attachment
You can use the precision trimmer attachment to
touch up your beard, sideburns and moustache.
1 Attach the attachment to the appliance (‘click’).
2Switch on the appliance.
3Hold the precision trimmer attachment
perpendicular to the skin and move the
appliance downwards while you exert gentle
pressure.
4Clean the attachment after use (see 'Cleaning
and maintenance').
Using the beard styler attachment with
comb
You can use the beard styler attachment with the
comb attached to style your beard at one fixed
20 English
1Pull the comb off the beard styler attachment.
Note: Grab the comb in the center to pull it off
the beard styler attachment. Do not pull at the
sides of the comb.
2Switch on the appliance.
3Hold the beard styler attachment perpendicular
to the skin and move the appliance downwards
while you exert gentle pressure.
4Clean the attachment after use (see 'Cleaning
and maintenance').
Using the cleansing brush attachment
Note: For better shaving results, use the click-on
cleansing brush attachment before shaving.
Use the rotating cleansing brush with your daily
cleansing cream. The cleansing brush removes oil
and dirt, contributing to a healthy and oil-free skin.
We advise you to use it no more than twice a day.
Do not use the appliance on damaged or irritated
skin or on wounds.
1Place the attachment on the attachment
holder.
2Attach the attachment to the appliance ('click').
22 English
11 After the treatment, rinse and dry your face.
Your face is now ready for the next step of your
daily skincare routine.
Using the body shaver attachment
You can use the body shaver wet or dry to shave
hair on all parts of the body below the neckline. Do
not use the body shaver to shave or trim facial or
scalp hair.
You can use the body shaver with a comb to trim
hair to a length of 3 or 5 mm. You can also use the
body shaver without a comb to remove all hair.
Caution: Before you use the body shaver, always
check it for damage or wear. If the shaving foil
unit of the body shaver is damaged or worn, do
not use the body shaver, as injury may occur.
Replace a damaged shaving foil unit right away.
1Attach the attachment to the appliance (‘click’).
2Switch on the appliance.
3Place the body shaver on the skin.
4Move the appliance against the direction of hair
growth with one hand, while you stretch the
skin with the other hand.
Note: Make sure that the body shaver is in full
contact with the skin.
5Switch off the appliance and clean the
attachment after use.
Tip: If the hairs are longer than 10 mm, trim them
first to a length of 3 mm to make shaving easier.
Using the nose/ear trimmer attachment
You can use the nose/ear trimmer attachment to
trim your nose and/or ear hair.
24 English
Trimming nose hair
When trimming nose hair, make sure your nostrils
are clean.
1 Attach the attachment to the appliance (‘click’).
2Switch on the appliance.
3Carefully insert the attachment into one of your
nostrils.
Do not insert the attachment more than 0.5 cm
into your nostrils.
4Slowly move the attachment around to remove
all unwanted hairs in your nostrils.
5Clean the attachment after use (see 'Cleaning
and maintenance').
Trimming ear hair
When trimming ear hair, make sure your outer ear
channels are clean and free from wax.
1 Attach the attachment to the appliance (‘click’).
2Switch on the appliance.
3Slowly move the attachment along the rim of
the ear to remove hairs that stick out beyond
the rim.
4Insert the attachment into the outer ear
channel.
Do not insert the attachment more than 0.5 cm
into your ear channel, as this could damage the
eardrum.
5Slowly turn the attachment around to remove
all unwanted hairs from your outer ear channel.
6Clean the attachment after use (see 'Cleaning
and maintenance').
25
English
Cleaning and maintenance
Note: The accessories supplied may vary for
different products. The box shows the accessories
that have been supplied with your product.
Cleaning the shaver in the SmartClean system
Preparing the SmartClean system for use
Caution: Do not tilt the SmartClean system to
prevent leakage.
Note: Hold the SmartClean system while you
prepare it for use.
Note: If you clean the shaver in the SmartClean
system once a week, the SmartClean cartridge
lasts approximately three months.
1Put the small plug in the back of the
SmartClean system.
2Put the supply unit in the wall socket.
1
2
3While holding the SmartClean system with one
hand, press the button on the side of the
SmartClean system and lift the top part of the
SmartClean system.
4Pull the seal off the cleaning cartridge.
5Place the cleaning cartridge in the SmartClean
system.
26 English
6While holding the SmartClean system with one
hand, gently push the top part of the
SmartClean system back down (‘click’).
Using the SmartClean system
Note: If you use the shaver with shaving foam,
shaving gel or pre-shave products, briefly rinse the
shaver with warm water before you clean it in the
SmartClean system.
Caution: Always shake excess water off the
shaver before you place it in the SmartClean
system.
1Press to open the SmartClean system cap, to be
able to place the shaver in the holder ('click').
2Hold the shaver upside down above the holder.
Make sure the front of the shaver points
towards the SmartClean system holder.
1
23
3Place the shaver in the holder, tilt the shaver
backwards and press down the SmartClean
system cap to connect the shaver (‘click’).
The battery symbol on the SmartClean system
starts to flash, which indicates that the shaver is
charging.
27
English
While rinsing the shaving unit, water may drip out
of the base of the shaver. This is a normal
occurrence.
1Switch on the appliance.
2Rinse the shaving unit under a warm tap.
3Switch off the appliance. Press the release
button to open the shaving unit.
4Rinse the hair chamber under the tap.
5Rinse the shaving head holder under a warm
tap.
6Carefully shake off excess water and let the
shaving head holder air-dry completely.
7Close the shaving head holder ('click').
30 English
Cleaning the click-on attachments
Never dry trimmer or beard styler attachments with
a towel or tissue, as this may damage the trimming
teeth.
The accessories supplied may vary for different
products. The box shows the accessories that have
been supplied with your product.
Cleaning the precision trimmer attachment
Clean the trimmer attachment after each use.
1 Switch on the appliance with the precision
trimmer attachment attached.
2Rinse the attachment under a warm tap.
3After cleaning, switch off the appliance.
4Carefully shake off excess water and let the
attachment air-dry completely.
For optimal performance, lubricate the teeth of the
attachment with a drop of sewing machine oil
every six months.
Cleaning the beard styler attachment
Clean the beard styler attachment after each use.
1 Pull the comb off the beard styler attachment.
Note: Grab the comb in the center to pull it off
the beard styler attachment. Do not pull at the
sides of the comb.
2Switch on the appliance.
3Rinse the beard styler attachment and the
comb separately under a warm tap.
4After cleaning, switch off the appliance.
5Carefully shake off excess water and let the
beard styler and comb air dry completely.
31
English
6For optimal performance, lubricate the teeth of
the attachment with a drop of sewing machine
oil regularly.
Cleaning the cleansing brush attachment
Clean the cleansing brush attachment after each
use.
1Switch off the appliance.
2Detach the brush head from the attachment
holder.
3Clean the parts thoroughly with warm water
and soap.
4Dry the cleansing brush attachment with a
towel.
Cleaning the body shaver attachment
1After each use, pull the top part of the body
shaver off the bottom part.
Caution: The shaving foil is very delicate.
Handle it carefully.
Caution: If the shaving foil is damaged, do not
use the body shaver anymore.
Caution: Do not clean the shaving foil with the
cleaning brush, as this may cause damage.
2Blow and/or shake out any hair that has
accumulated inside the shaving foil.
3Clean the top part of the shaving foil under a
lukewarm tap.
Cleaning the nose trimmer attachment
Clean the nose trimmer attachment every time you
have used it.
1Make sure the appliance is switched off.
32 English
Put the protection cap on the cleansing brush
attachment to protect it from dirt accumulation.
Replacement
Replacing the shaving heads
2yrs
For maximum shaving performance, we advise you
to replace the shaving heads every two years.
Replace damaged shaving heads immediately.
Always replace the shaving heads with original
Philips shaving heads (see 'Ordering accessories').
Replacement reminder
The replacement reminder indicates that the
shaving heads need to be replaced.The shaving
unit symbol and arrows light up when you switch
off the appliance.
1 Switch off the appliance.
2Press the release button to open the shaving
unit.
3Pull the shaving head holder off the bottom
part of the shaving unit.
34 English
1
2
4Turn the retaining rings counterclockwise and
remove them. Place them aside in a safe place.
5Remove the shaving heads from the shaving
head holder.
Discard the used shaving heads immediately to
avoid mixing them with the new shaving heads.
6Place the new shaving heads in the shaving
head holder.
Note: Make sure that the projections of the
shaving heads fit exactly into the recesses of
the shaving head holder.
1
2
7Place the retaining rings back onto the shaving
heads and turn them clockwise to reattach the
retaining ring.
Each retaining ring has two recesses and two
projections that fit exactly in the projections
and recesses of the shaving head holder.
35
English
- Turn the ring clockwise until your hear a click to
indicate that the ring is fixed.
Note: Hold the shaving head holder in your
hand when you reinsert the shaving heads and
reattach the retaining rings. Do not place the
shaving head holder on a surface, as this may
cause damage to the shaving heads.
8Reinsert the hinge of the shaving head holder
into the slot of the shaving unit. Close the
shaving head holder (‘click’).
7 sec.
9To reset the replacement reminder, press and
hold the on/off button for approx. 7 seconds.
Replacing the cleansing brush attachment
The cleansing brush attachment should be
replaced every 3 months or earlier if the brush
hairs are bent or damaged (see 'Ordering
accessories').
Ordering accessories
To buy accessories or spare parts, visit
www.philips.com/parts-and-accessories or go to
36 English
your Philips dealer. You can also contact the
Philips Consumer Care Center in your country (see
the international warranty leaflet for contact
details).
The following accessories and spare parts are
available:
- SH50 Philips shaving heads
- HQ110 Philips shaving head cleaning spray
- RQ111 Philips beard styler attachment
- RQ585 Philips cleansing brush attachment
- RQ560, RQ563 Philips cleansing brush heads
- JC301, JC302, JC303, JC304, JC305 cleaning
cartridge
- HQ8505 supply unit
Note: The availability of the accessories may differ
by country.
Recycling
- This symbol means that this product shall not
be disposed of with normal household waste
(2012/19/EU).
- This symbol means that this product contains a
built-in rechargeable battery which shall not be
disposed of with normal household waste
(2006/66/EC). Please take your product to an
official collection point or a Philips service
center to have a professional remove the
rechargeable battery.
- Follow your country’s rules for the separate
collection of electrical and electronic products
and rechargeable batteries. Correct disposal
helps prevent negative consequences for the
environment and human health.
37
English
If you are unable to solve the problem with the
information below, visit www.philips.com/support
for a list of frequently asked questions or contact
the Consumer Care Center in your country.
Shaver
Problem Possible cause Solution
The appliance
does not work
when I press the
on/off button.
The appliance is still
attached to the wall
socket. For safety
reasons, the
appliance can only
be used without
cord.
Unplug the appliance and
press the on/off button to
switch on the appliance.
The rechargeable
battery is empty.
Recharge the battery.
The travel lock is
activated.
Press the on/off button
for 3 seconds to
deactivate the travel lock.
The shaving unit is
soiled or damaged
to such an extent
that the motor
cannot run.
Clean the shaving heads
thoroughly or replace
them.
The appliance do 
es not shave as
well as it used to.
The shaving heads
are damaged or
worn.
Replace the shaving
heads.
Hairs or dirt
obstruct the shaving
heads.
Clean the shaving heads
in the regular way or clean
them thoroughly.
I replaced the
shaving heads,
but the
replacement
reminder is still
showing.
You have not reset
the replacement
reminder.
To reset the replacement
reminder, press and hold
the on/off button for more
than 7 seconds.
39
English
Problem Possible cause Solution
A shaving head
symbol has
suddenly
appeared on the
display.
This symbol is the
replacement
reminder.
Replace the shaving
heads.
Water is leaking
from the bottom
of the appliance.
During cleaning,
water may collect
between the inner
body and the outer
shell of the
appliance.
This is normal and not
dangerous because all
electronics are enclosed in
a sealed power unit inside
the appliance.
SmartClean system
Problem Possible cause Solution
The SmartClean
system does not
work when I
press the on/off
button.
The SmartClean
system is not
connected to the
wall socket.
Put the small plug in the
SmartClean system and put
the supply unit in the wall
socket.
The cleaning
cartridge is empty.
The replacement
symbol flashes to
indicate that you
have to replace the
cleaning cartridge.
Place a new cleaning
cartridge in the SmartClean
system.
The shaver is not
entirely clean
after I clean it
with the
SmartClean
system.
You have not
placed the shaver in
SmartClean system
properly, so there is
no electrical
connection
between
SmartClean system
and the shaver.
Press down the top cap
(‘click’) to ensure a proper
connection between the
shaver and the SmartClean
system.
40 English
Problem Possible cause Solution
The battery of the
shaver is not
charged sufficiently.
If the battery of the shaver
is not charged sufficiently,
the SmartClean system
may not work properly. The
shaver needs to be able to
switch on briefly during the
rinsing phase. Charge the
shaver for a short time
before you use the
SmartClean system to
clean your shaver.
The cleaning
cartridge needs to
be replaced.
Replace the cleaning
cartridge.
You have used
another cleaning
fluid than the
original Philips
cleaning cartridge.
Only use the original
Philips cleaning cartridge.
The hole of the
drain of the
cleaning cartridge is
blocked.
Remove the cartridge from
the SmartClean system and
push the hairs down the
drain with a toothpick.
The shaver is not
fully charged
after I charge it
in SmartClean
system.
You have not
placed the shaver in
the SmartClean
system properly, so
there is no electrical
connection
between the
SmartClean system
and the shaver.
Press down the top cap
(‘click’) to ensure a proper
connection between the
shaver and the SmartClean
system.
41
English
Einführung
Herzlichen Glückwunsch zu Ihrem Kauf und
willkommen bei Philips! Um die Unterstützung von
Philips optimal nutzen zu können, sollten Sie Ihr
Produkt unter www.philips.com/welcome
registrieren.
Wichtige Sicherheitsinformationen
Lesen Sie diese wichtigen Informationen vor dem
Gebrauch des Geräts und des Zubehörs
aufmerksam durch, und bewahren Sie sie für eine
spätere Verwendung auf. Das mitgelieferte
Zubehör kann für verschiedene Produkte variieren.
Gefahr
- Halten Sie das Netzteil trocken.
Warnhinweis
- Verwenden Sie nur das im Lieferumfang des
Geräts enthaltene abnehmbare Netzteil
(HQ8505), um den Akku aufzuladen.
- Das Netzteil enthält einen Transformator.
Schneiden Sie das Netzteil keinesfalls auf,
um einen anderen Stecker anzubringen, weil
dies eine gefährliche Situation verursachen
könnte.
42 Deutsch
- Dieses Gerät kann von Kindern ab 8 Jahren
und Personen mit verringerten physischen,
sensorischen oder psychischen Fähigkeiten
oder Mangel an Erfahrung und Kenntnis
verwendet werden, wenn sie bei der
Verwendung beaufsichtigt werden oder
Anleitung zum sicheren Gebrauch des
Geräts erhalten und die Gefahren
verstanden haben. Kinder dürfen nicht mit
dem Gerät spielen. Die Reinigung und
Pflege des Geräts darf von Kindern nicht
ohne Aufsicht durchgeführt werden.
- Ziehen Sie stets das Netzteil aus der
Steckdose, bevor Sie den Rasierer unter
fließendem Wasser reinigen.
- Überprüfen Sie das Gerät vor jedem
Gebrauch. Um Verletzungen zu vermeiden,
benutzen Sie das Gerät nicht, wenn es
beschädigt ist. Ersetzen Sie ein
beschädigtes Teil nur durch Originalteile.
- Dieses Gerät verwendet Akkus, die nicht
austauschbar sind.
- Öffnen Sie das Gerät nicht, um den Akku zu
ersetzen.
43
Deutsch
Achtung
- Tauchen Sie das
Reinigungssystem und die
Ladestation niemals in Wasser.
Spülen Sie sie auch nicht unter
fließendem Wasser ab.
- Das Wasser zur Reinigung des
Rasierers darf nicht heißer als
60°C sein.
- Verwenden Sie dieses Gerät nur
für den vorgesehenen Zweck
wie in der Bedienungsanleitung
angegeben.
- Aus hygienischen Gründen
sollte das Gerät nur von einer
Person verwendet werden.
- Benutzen Sie zum Reinigen des
Geräts keine Druckluft,
Scheuerschwämme und -mittel
oder aggressive Flüssigkeiten
wie Benzin oder Azeton.
44 Deutsch
- Wenn Ihr Rasierer über ein
Reinigungssystem verfügt,
verwenden Sie immer die
original Philips
Reinigungsflüssigkeit
(Kartusche oder Flasche, je
nach Art des
Reinigungssystems).
- Stellen Sie das
Reinigungssystem stets auf
eine stabile, ebene und
waagerechte Unterlage, um
Auslaufen von Flüssigkeit zu
vermeiden.
- Wenn Ihr System eine
Reinigungskartusche
verwendet, stellen Sie immer
sicher, dass das Kartuschenfach
geschlossen ist, bevor Sie das
Reinigungssystem zum
Reinigen oder Laden des
Rasierers verwenden.
45
Deutsch
Akkuladestandsanzeige mit 3 Anzeigen
Schnellaufladung: Wenn der Akku leer ist und Sie
das Gerät an die Steckdose anschließen, leuchten
die Akkuladestandanzeigen hintereinander
wiederholt auf. Wenn das Gerät genügend Energie
für eine Rasur hat, blinkt die untere
Akkuladestandanzeige langsam.
Während das Gerät aufgeladen wird, blinkt die
untere Akkuladestandanzeige zuerst und leuchtet
dann dauerhaft. Anschließend blinkt die zweite
Anzeige und leuchtet dann dauerhaft. Das
wiederholt sich, bis das Gerät vollständig
aufgeladen ist.
Akkuladestandsanzeige mit 1 Anzeige
Akkuladestandsanzeige mit 1Anzeige
Schnellaufladung: Wenn der Akku leer ist und Sie
das Gerät an der Wandsteckdose anschließen,
blickt die Akkuladestandanzeige schnell. Wenn das
Gerät genügend Energie für eine Rasur aufweist,
blinkt die Akkuladestandanzeige langsam.
Beim Laden des Geräts blitzt die Akkuladeanzeige
langsam, bis der Akku vollständig geladen ist.
Akku voll aufgeladen
Hinweis: Wenn der Akku voll ist, schaltet sich das
Display nach 30 Minuten automatisch aus.
Hinweis: Dieses Gerät kann nur ohne Kabel
verwendet werden.
Akkuladestandsanzeige mit 3 Anzeigen
49
Deutsch
Erinnerung "Vor Gebrauch von der Stromversorgung
trennen"
Das Gerät verfügt über eine Erinnerung "Vor
Gebrauch von der Stromversorgung trennen". Das
Symbol "Vor Gebrauch von der Stromversorgung
trennen" blinkt und erinnert Sie, dass Sie das Gerät
vom Netzteil trennen müssen, bevor Sie es
einschalten können.
Reinigungsanzeige
Für eine optimale Leistung empfehlen wir, den
Rasierer nach jedem Gebrauch zu reinigen. Wenn
Sie das Gerät ausschalten, leuchtet die
Reinigungsanzeige auf, um Sie daran zu erinnern,
das Gerät zu reinigen.
Reisesicherung
Wenn Sie vorhaben, auf Reisen gehen, können Sie
den Rasierer sperren, um unbeabsichtigtes
Einschalten (siehe 'Die Reisesicherung aktivieren')
zu verhindern.
Die Reisesicherung aktivieren
3 sec.
1 Halten Sie den Ein-/Ausschalter 3 Sekunden
lang gedrückt, um die Reisesicherung zu
verwenden.
Während Sie die Reisesicherung aktivieren,
leuchtet das Reisesicherungssymbol dauerhaft.
Wenn die Reisesicherung aktiviert ist, blinkt das
Reisesicherungs-Symbol.
Beim Versuch, den Rasierer mit aktiver
Reisesicherung einzuschalten, blinkt das
Reisesicherungs-Symbol.
51
Deutsch
Die Reisesicherung deaktivieren
1 Halten Sie den Ein-/Ausschalter 3 Sekunden
lang gedrückt.
Während Sie die Reisesicherung deaktivieren,
leuchtet das Reisesicherungs-Symbol kurz auf,
und der Rasierer gibt einen kurzen Signalton
aus.Der Rasierer schaltet sich ein und kann nun
wieder verwendet werden.
Ersatzanzeige
Für eine optimale Rasierleistung empfehlen wir,
die Scherköpfe alle zwei Jahre auszuwechseln. Das
Gerät ist mit einer Ersatzanzeige ausgestattet, die
Sie daran erinnert, die Scherköpfe zu ersetzen. Das
Schereinheitssymbol und Pfeile leuchten auf, um
anzuzeigen, dass die Scherköpfe (siehe 'Die
Scherköpfe auswechseln') ausgetauscht werden
müssen.
Hinweis: Nachdem Sie die Scherköpfe
ausgetauscht haben, müssen Sie die
Erinnerungsfunktion zurücksetzen, indem Sie den
Ein-/Ausschalter 7 Sekunden lang gedrückt halten.
Aufladen
Laden Sie den Rasierer vor dem ersten Gebrauch
auf und wenn das Display anzeigt, dass der Akku
fast leer ist.
Der Ladevorgang dauert ca. 1 Stunde.
Hinweis: Sie können das Gerät nicht verwenden,
während es aufgeladen wird.
Aufladen mit der Stromversorgungseinheit
1 Vergewissern Sie sich, dass das Gerät
ausgeschaltet ist.
52 Deutsch
2Stecken Sie die Stromversorgungseinheit in
eine Steckdose, und stecken Sie den kleinen
Stecker in das Gerät.
3Nach dem Ladevorgang trennen Sie die
Stromversorgungseinheit von der Steckdose
und ziehen Sie den kleinen Stecker vom Gerät
ab.
Hinweis: Wenn der Akku voll ist, schaltet sich
das Display nach 30 Minuten automatisch aus.
Im SmartClean-System aufladen (nur bestimmte
Gerätetypen)
1
2
1 Stecken Sie den kleinen Stecker in die
Rückseite des SmartClean-Systems.
2Stecken Sie die Stromversorgungseinheit in die
Steckdose.
3Drücken Sie auf die Kappe des SmartClean-
Systems, um den Rasierer in die Halterung
einsetzen zu können (er rastet hörbar ein).
4Halten Sie den Rasierer kopfüber über der
Halterung. Überprüfen Sie, dass die Vorderseite
des Rasierers auf das SmartClean-System
gerichtet ist.
1
23
5Setzen Sie den Rasierer in die Halterung ein,
kippen Sie den Rasierer nach hinten, und
drücken Sie die Kappe des SmartClean-
Systems nach unten, um den Rasierer zu
verbinden. (er rastet hörbar ein).
53
Deutsch
Das Akkusymbol blinkt, um anzuzeigen, dass
das Gerät aufgeladen wird. Ist der Akku
vollständig geladen, leuchtet das Akkusymbol
dauerhaft.
Das Gerät benutzen
Hinweis: Dieses Gerät kann nur ohne Kabel
verwendet werden.
Das Gerät ein- und ausschalten
1Um das Gerät einzuschalten, drücken Sie
einmal den Ein-/Ausschalter.
2Um das Gerät auszuschalten, drücken Sie
einmal den Ein-/Ausschalter.
Akkuladestandanzeige mit 3 Anzeigen: Das Display
leuchtet einige Sekunden lang auf, um die
verbleibende Akkukapazität anzuzeigen.
Rasieren
Anpassungszeit der Haut
Ihre ersten Rasuren bringen möglicherweise nicht
das erwartete Ergebnis, und Ihre Haut kann sogar
leicht gereizt werden. Das ist normal. Ihre Haut und
Ihr Bart müssen sich erst an ein neues Schersystem
gewöhnen. Damit sich Ihre Haut an den neuen
Rasierer gewöhnen kann, empfehlen wir Ihnen,
sich 3 Wochen lang regelmäßig (mindestens 3 Mal
pro Woche) mit diesem Rasierer zu rasieren.
Trockenrasur
1Schalten Sie das Gerät ein.
54 Deutsch
5Bewegen Sie die Scherköpfe in kreisenden
Bewegungen über die Haut, um alle Haare zu
berücksichtigen, die in verschiedene
Richtungen wachsen. Führen Sie sanften Druck
für eine gründliche, komfortable Rasur aus.
Hinweis: Drücken Sie nicht zu fest, da sonst
Hautreizungen auftreten können.
Hinweis: Spülen Sie die Schereinheit regelmäßig
ab, um sicherzustellen, dass sie weiterhin sanft
über die Haut gleitet.
6Trocknen Sie Ihr Gesicht.
7Reinigen Sie das Gerät nach dem Gebrauch
(siehe 'Reinigung und Wartung').
Hinweis: Spülen Sie alle Schaum- oder Gelreste
vom Gerät ab.
Turbo-Einstellung (nur bestimmte
Gerätetypen)
Das Gerät verfügt über eine Turbo- oder Turbo+-
Einstellung. Dadurch können Sie schwer
erreichbare Bereiche schneller rasieren.
1 Schalten Sie das Gerät ein.
2Zum Aktivieren der Turbo-Einstellung drücken
Sie die Turbo-Taste bei eingeschaltetem Gerät
einmal.
3Bewegen Sie die Scherköpfe in kreisenden
Bewegungen über die Haut, um alle Haare zu
berücksichtigen, die in verschiedene
Richtungen wachsen. Führen Sie sanften Druck
für eine gründliche, komfortable Rasur aus.
Hinweis: Kreisförmige Bewegungen bieten
bessere Rasurergebnisse als gerade
Bewegungen.
56 Deutsch
4Zum Deaktivieren der Turbo-Einstellung
drücken Sie die Turbo-Taste einmal.
Die Aufsätze verwenden
Hinweis: Das mitgelieferte Zubehör kann für
verschiedene Produkte variieren. Die Verpackung
zeigt das Zubehör, das mit Ihrem Produkt
mitgeliefert wurde.
Aufsteckbare Aufsätze entfernen oder
anbringen
1 Vergewissern Sie sich, dass das Gerät
ausgeschaltet ist.
2Ziehen Sie den Aufsatz gerade vom Gerät ab.
Hinweis: Drehen Sie den Aufsatz nicht, wenn Sie
ihn vom Gerät abziehen.
3Stecken Sie die Führung des Aufsatzes in den
Schlitz oben auf dem Gerät. Drücken Sie den
Aufsatz dann nach unten, sodass er hörbar auf
dem Gerät einrastet.
Den Präzisionstrimmer-Aufsatz verwenden
Sie können den Präzisionstrimmer-Aufsatz
verwenden, um Ihren Bart, Ihre Koteletten oder
Ihren Schnauzer neu in Form zu bringen.
1 Bringen Sie den Aufsatz am Gerät an, sodass er
hörbar einrastet.
2Schalten Sie das Gerät ein.
57
Deutsch
3Halten Sie den Präzisionstrimmer-Aufsatz
senkrecht zur Haut, und bewegen Sie das Gerät
unter leichtem Druck abwärts.
4Reinigen Sie den Aufsatz nach jedem Gebrauch
(siehe 'Reinigung und Wartung').
Den Bart-Styler-Aufsatz mit Kamm
verwenden
Sie können den Bart-Styler-Aufsatz mit Kamm
verwenden, um Ihren Bart mit einer festen
Einstellung oder mit verschiedenen
Längeneinstellungen zu stylen. Sie können ihn
auch zum Schneiden langer Haare vor der Rasur
für eine angenehmere Rasur verwenden.
Die Längeneinstellungen des Bart-Styler-
Aufsatzes entsprechen der verbleibenden
Haarlänge nach dem Schneiden und reichen von
1 bis 5 mm. 
1 Bringen Sie den Aufsatz am Gerät an, sodass er
hörbar einrastet.
2Schieben Sie den Kammaufsatz in die Rillen an
beiden Seiten des Bart-Styler-Aufsatzes, bis er
hörbar einrastet.
2
1
3Drücken Sie den Schnittlängenregler, und
schieben Sie ihn nach links oder rechts, um die
gewünschte Schnittlängeneinstellung
auszuwählen.
4Schalten Sie das Gerät ein.
58 Deutsch
Verwenden Sie das Gerät nicht auf geschädigter
oder gereizter Haut oder auf Wunden.
1Setzen Sie den Aufsatz auf den Aufsatzhalter.
2Bringen Sie den Aufsatz am Gerät an, sodass er
hörbar einrastet.
3Feuchten Sie den Aufsatz mit Wasser an.
Hinweis: Verwenden Sie das Gerät nicht mit
trockenem Bürstenaufsatz, dies kann die Haut
reizen.
4Feuchten Sie Ihr Gesicht mit Wasser an, und
tragen Sie einen Gesichtsreiniger auf Ihre Haut
auf.
5Setzen Sie den Aufsatz auf die Wange auf.
6Schalten Sie das Gerät ein.
20 sec.
7Bewegen Sie die Bürste sanft über die Haut von
der Nase zum Ohr. Drücken Sie die Bürste nicht
zu stark auf die Haut, damit die Behandlung
angenehm bleibt.
Hinweis: Reinigen Sie nicht den empfindlichen
Bereich um Ihre Augen.
20 sec.
8Nach ca. 20 Sekunden können Sie das Gerät auf
Ihrer anderen Wange platzieren und mit der
Reinigung dieses Teils des Gesichts beginnen.
60 Deutsch
2Stecken Sie den Adapter in die Steckdose.
1
2
3Drücken Sie die Taste an der Seite des
SmartClean-Systems und heben Sie den
oberen Teil des SmartClean- Systems, während
Sie das SmartClean-System mit einer Hand
halten.
4Ziehen Sie das Siegel von der
Reinigungskartusche.
5Platzieren Sie die Reinigungskartusche in das
SmartClean-System.
6Schieben Sie den oberen Teil des SmartClean-
Systems sanft nach unten (‚Klick ), während Sie
das SmartClean-System mit einer Hand halten.
Das SmartClean-System verwenden
Hinweis: Wenn Sie den Rasierer mit Rasierschaum,
Rasiergel oder Preshave-Produkten verwenden,
spülen Sie den Rasierer kurz vor dem Reinigen im
SmartClean-System mit warmem Wasser ab.
Achtung: Vergewissern Sie sich, dass
überschüssiges Wasser vor dem Einsetzen in das
SmartClean-System immer abgeschüttelt wird.
64 Deutsch
Das Akkusymbol leuchtet dauerhaft, um
anzuzeigen, dass der Rasierer vollständig
aufgeladen ist. Der Ladevorgang dauert ca.
1 Stunde.
5Um den Rasierer trocknen zu lassen, können Sie
ihn im SmartClean-System bis zur nächsten
Rasur lassen. Sie können auch den Rasierer
vom SmartClean-System abnehmen, die
überschüssige Flüssigkeit abschütteln, die
Schereinheit öffnen und den Rasierer an der
Luft trocknen lassen Drücken Sie auf die
SmartClean-Kappe, um den Rasierer aus der
Halterung zu nehmen (es ist ein Klick zu hören).
Hinweis: Hinweis: Wenn Sie während des
Reinigungsprogramms des SmartClean-Systems
den Ein-/Ausschalter betätigen, wird das
Programm abgebrochen. In diesem Fall hört das
Durchspül- oder Trocknungssymbol auf zu blinken.
Hinweis: Hinweis: Wenn Sie das SmartClean-
System von der Stromversorgung trennen, wird
das Reinigungsprogramm angehalten.
Die SmartClean-Kartusche ersetzen
Ersetzen Sie die Reinigungskartusche, wenn das
Ersatzsymbol orangefarben blinkt oder wenn Sie
mit dem Reinigungsergebnis nicht mehr zufrieden
sind. Wenn Sie den Rasierer einmal pro Woche mit
dem SmartClean-System reinigen, hält die
Kartusche ca. drei Monate.
1
2
1 Drücken Sie die Taste an der Seite des
SmartClean-Systems und heben Sie den
oberen Teil an, während Sie das SmartClean-
System mit einer Hand halten.
66 Deutsch
Das mitgelieferte Zubehör kann für verschiedene
Produkte variieren. Die Verpackung zeigt das
Zubehör, das mit Ihrem Produkt mitgeliefert wurde.
Den Präzisionstrimmer-Aufsatz reinigen
Reinigen Sie den Trimmeraufsatz nach jedem
Gebrauch.
1 Wechseln Sie zur Funktion mit dem
aufgesetzten Präzisionstrimmer-Aufsatz.
2Spülen Sie den Aufsatz unter warmem
Leitungswasser.
3Schalten Sie das Gerät nach der Reinigung aus.
4Schütteln Sie überschüssiges Wasser sorgfältig
ab, und lassen Sie den Aufsatz trocknen.
Um eine optimale Leistung zu gewährleisten, ölen
Sie die Zinken des Aufsatzes alle sechs Monate mit
einem Tropfen Nähmaschinenöl.
Den Bart-Styler-Aufsatz reinigen
Reinigen Sie den Bart-Styler-Aufsatz nach jeder
Verwendung.
1 Ziehen Sie den Kammaufsatz vom Bart-Styler-
Aufsatz ab.
Hinweis: Halten Sie den Kammaufsatz in der
Mitte, um ihn vom Bart-Styler-Aufsatz zu
ziehen. Ziehen Sie nicht an den Seiten des
Kammaufsatzes.
2Schalten Sie das Gerät ein.
3Spülen Sie den Bart-Styler-Aufsatz und den
Kammaufsatz getrennt einige Zeit unter
fließendem, warmem Wasser ab.
4Schalten Sie das Gerät nach der Reinigung aus.
5Schütteln Sie übriges Wasser sorgfältig ab und
lassen Sie den Bart-Styler und Kammaufsatz
ganz trocken werden.
69
Deutsch


Produkt Specifikationer

Mærke: Philips
Kategori: Barberkniv
Model: Series 5000 S5216

Har du brug for hjælp?

Hvis du har brug for hjælp til Philips Series 5000 S5216 stil et spørgsmål nedenfor, og andre brugere vil svare dig