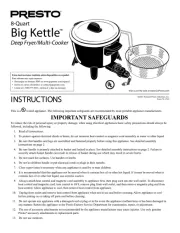
Presto Options 06003 Manual

Presto Multi komfur Options 06003

Læs gratis den danske manual til Presto Options 06003 (10 sider) i kategorien Multi komfur. Denne vejledning er vurderet som hjælpsom af 40 personer og har en gennemsnitlig bedømmelse på 3.7 stjerner ud af 20.5 anmeldelser. Har du et spørgsmål om Presto Options 06003, eller vil du spørge andre brugere om produktet?

Side 1/10
Options
multi-cooker/steamer
So versatile, you’ll use it every day.
Steams, stews, boils, deep fries and more.
Easy to clean. Nonstick surface, inside and out.
INSTRUCTIONS ©2018 National Presto Industries, Inc.
Form 72-897C
Estas instrucciones también están disponibles en español.
Para obtener una copia impresa:
• Descargue en formato PDF en www.GoPresto.com/espanol.
• Envíe un correo electrónico a contact@GoPresto.com.
• Llame al 1-800-877-0441, oprima 2 y deje un mensaje.
This is a Listed appliance. The following important safeguards are recommended by most portable appliance manufacturers.
IMPORTANT SAFEGUARDS
To reduce the risk of personal injury or property damage, when using electrical appliances basic safety precautions should always be
followed, including the following:
1. Read all instructions.
2. To protect against electrical shock or burns, do not immerse heat control or magnetic cord in water or other liquid.
3. Be sure that handles and legs are assembled and fastened properly before using this appliance. See detailed assembly instructions
on page 2.
4. Be sure the handle is properly attached to the basket and locked in place. See detailed assembly instructions on page 2. Failure to
securely attach the basket handle can result in the release of the basket during use which may result in severe burns.
5. Do not touch hot surfaces. Use handles or knobs.
6. Do not let children handle or put electrical cords or plugs in their mouths.
7. Close supervision is necessary when any appliance is used by or near children.
8. It is recommended that this appliance not be moved when it contains hot oil or other hot liquid. If it must be moved when it contains
hot oil or other hot liquid, use extreme caution.
9. Alwaysattachtheheatcontroltotheappliancerst,thenplugthemagneticcordintotheoutlet.Todisconnecttheheatcontrol
and magnetic cord, turn the heat control to OFF, remove the plug from outlet, and remove the magnetic cord from heat control.
Allow appliance to cool before removing the heat control.
10. Unplug the appliance from the outlet and remove the heat control from the appliance when not in use and before cleaning. Allow
the appliance to cool before putting on or taking off parts and before cleaning.
11. Do not operate any appliance with a damaged cord or plug, in the event the appliance malfunctions, or if it has been damaged in
any manner. Return the appliance to the Presto Factory Service Department for examination, repair, or adjustment.
12. The use of accessory attachments not recommended by the appliance manufacturer may cause injuries. Use only genuine Presto
accessories and replacement parts.
13. Do not use outdoors.
14. Do not let the cord hang over edge of the table or counter or touch hot surfaces.
15. Do not place on or near a hot gas or electric burner or in a heated oven.
16. Do not use the appliance for other than intended use.
SAVE THESE INSTRUCTIONS
THIS APPLIANCE IS FOR HOUSEHOLD USE ONLY.
Visit us on the web at
www.GoPresto.com
2
Leg
Mounting
projection
Screws
Rubber foot
Handle
Screw hole
Fig. A
Plug guard
Tab
Fig. CFig. B
Important Cord Information
Thisappliancehasapolarizedplug(onebladeiswiderthantheother).Toreducetheriskofelectricshock,thisplugisintendedtot
intoapolarizedoutletonlyoneway.Iftheplugdoesnottfullyintotheoutlet,reversetheplug.Ifitstilldoesnott,contactaqualied
electrician. Do not attempt to modify the plug in any way.
A short power supply cord is provided to reduce the risk of becoming entangled in or tripping over a longer cord. DO NOT USE WITH
AN EXTENSION CORD. Do not allow the cord to run underneath or around the unit. The magnetic cord may not detach easily if the
cord is positioned in this fashion.
Connect the power supply cord to a 120VAC electrical outlet only.
How to Attach Legs and Handles
Tools Required: #2 Phillips screwdriver
Parts Included: 4 Legs, 2 Handles
Attach Legs to Base
1. Place the multi-cooker upside down on the table or counter.
2. Using a Phillips screwdriver, remove the screws from the mounting
projections on the bottom of the multi-cooker (Fig. A) and set aside.
These screws will attach the legs to the base.
3. Position one of the legs, with the rubber foot facing up, over one of
the mounting projections. Align the hole in the leg with the hole in
the mounting projection and fasten securely with the screw. The leg
should not rock or move if twisted.
NOTICE: Continuing to tighten, once secure, can result in the stripping
of screws or the cracking of legs.
4. Repeat step 3 for other three legs.
5. Turn the multi-cooker right side up on the table or counter. When
properly assembled, the multi-cooker should sit level with no leg rock.
Attach Handles to Base
1. Place the multi-cooker upside down on the table or counter.
2. Using a Phillips screwdriver, remove the screws from the tabs on each side of the base and set aside. These screws will attach the
handles to the base. HINT: When removing the screw under the plug guard, hold the screwdriver at a slight angle or use a short
screwdriver or a screwdriver with a long shank.
3. Slide one of the handles, with the screw hole up, onto the tab so the hole on the tab aligns with the hole on the handle (Fig. A). Fasten
securely with the screw. The handle should not wobble, but slight movement from side to side is normal. NOTICE: Continuing to
tighten, once secure, can result in the stripping of screws or the cracking of handles.
4. Repeat step 3 for other handle.
5. Turn the multi-cooker right side up on the table or counter. When properly assembled, the handles should be parallel with the table
or counter.
Attach Basket Handle
1. Slide lock bar up on the handle (Fig. B). Place one of the handle bars into one of the tabs on bracket.
Squeezethehandlebarstogetherandttheotherhandlebarintotheoppositetabonbracket.
2. After attaching the handle to the basket, make sure to slide the lock bar down (Fig. C) to the locked
position to insure against accidental detachment of the handle from the basket. Check before each
use to assure the handle is still properly secured.
Before First Use
This versatile electric multi-cooker braises, steams, boils, deep fries, and more. It is also great for making soups, stews, and desserts.
Beforeusingthemulti-cookerforthersttime,becomefamiliarwiththevariousparts(Fig.D,page3),readtheinstructionscarefully,
and wash it according to the “Care and Cleaning” instructions on pages 3 and 4.
NOTICE: This appliance is not intended to melt wax, gels, plastics, or other materials for making candles or for other hobbyist activities
orinanycommercialorbusinessapplication.Usingthisapplianceforpurposesdifferentfromthosespeciedintheinstructionmanual
may cause damage to the appliance and will void the warranty.


Produkt Specifikationer

Mærke: Presto
Kategori: Multi komfur
Model: Options 06003

Har du brug for hjælp?

Hvis du har brug for hjælp til Presto Options 06003 stil et spørgsmål nedenfor, og andre brugere vil svare dig