Rangemaster SD9852 Manual
Læs gratis den danske manual til Rangemaster SD9852 (4 sider) i kategorien Vask. Denne vejledning er vurderet som hjælpsom af 18 personer og har en gennemsnitlig bedømmelse på 4.9 stjerner ud af 9.5 anmeldelser.
Har du et spørgsmål om Rangemaster SD9852, eller vil du spørge andre brugere om produktet?

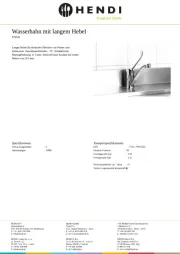
Produkt Specifikationer
| Mærke: | Rangemaster |
| Kategori: | Vask |
| Model: | SD9852 |
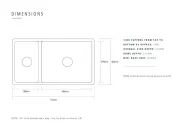
| Bredde: | 985 mm |
| Dybde: | 508 mm |
| Produktfarve: | Rustfrit stål |
| Installationsrum bredde: | 965 mm |
| Installationsrum dybde: | 488 mm |
| Første skål, dybde: | 190 mm |
| Anden skål, dybde: | 120 mm |
| Første skål, dimensioner (BxL): | 350 x 424 mm |
| Anden skål, dimensioner (BxL): | 156 x 342 mm |
| Antal vaskeskåle: | 2 skåle |
| Vask, type: | Skylle-monteret håndvask |
| Vask form: | Rektangulær |
| Vask materiale: | Rustfrit stål |
| Facon på første vask: | Rektangulær |
| Facon på anden vask: | Rektangulær |
| Vandhane, hul: | Ja |
| Drænebræt: | Ja |
| Vandhane inkluderet: | Ingen |
| Antal huller til haner: | 1 |
| Størrelse på vandhane: | 35 mm |
Har du brug for hjælp?
Hvis du har brug for hjælp til Rangemaster SD9852 stil et spørgsmål nedenfor, og andre brugere vil svare dig
Vask Rangemaster Manualer


Vask Manualer
- Caple
- Smeg
- Advance Tabco
- Saro
- Hendi
- Roca
- Schock
- Nodor
- Kohler
- Artusi
- Elkay
- Franke
- Kernau
- Eagle Group
- Blaupunkt
Nyeste Vask Manualer