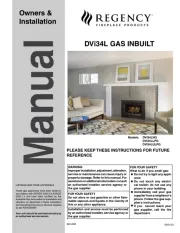
Regency DVi34L Manual


Læs gratis den danske manual til Regency DVi34L (44 sider) i kategorien Varmeapparat. Denne vejledning er vurderet som hjælpsom af 84 personer og har en gennemsnitlig bedømmelse på 4.6 stjerner ud af 42.5 anmeldelser. Har du et spørgsmål om Regency DVi34L, eller vil du spørge andre brugere om produktet?

Side 1/44
PLEASE KEEP THESE INSTRUCTIONS FOR FUTURE
REFERENCE
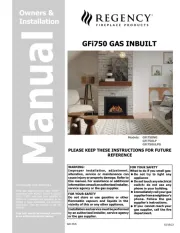
Models: DVi34LNG
DVi34LLPG
DVi34LULPG
Owners &
Installation
Manual
03/01/22
LISTINGS AND CODE APPROVALS
These gas appliances have been tested in
accordance with AS/NZS 5263.0 & AS/NZS
5263.1.3 and have been certified by the
Australian Gas Association for installation and
operation as described in these Installation
and Operating Instructions. Must be installed
as per AS/NZS5601.
Your unit should be serviced annually by
an authorised service person.
920-236f
DVi34L GAS INBUILT
FOR YOUR SAFETY
What to do if you smell gas:
Do not try to light any appli-
ance
Do not touch any electri-
cal switch: do not use any
phone in your building.
Immediately call your gas
supplier from a neighbour's
phone. Follow the gas sup-
plier's instructions.
If you cannot reach your
gas supplier, call the fire
department.
WARNING:
Improper installation, adjustment, alteration,
service or maintenance can cause injury or
property damage. Refer to this manual. For
assistance or additional information consult
an authorised installer, service agency or
the gas supplier.
FOR YOUR SAFETY
Do not store or use gasoline or other flam-
mable vapours and liquids in the vicinity of
this or any other appliance.
Installation and service must be performed
by an authorised installer, service agency or
the gas supplier.
2
Regency DVi34L Gas Inbuilt Fireplace
REGENCY
GAS INBUILT FIREPLACE
TO THE NEW OWNER
Congratulations! You are the owner of a state-of-the-art Gas Inbuilt Fireplace by FPI. The Regency
Gas Fireplace Series of appliances has been designed to provide you with all the warmth and
charm of a fireplace, at the flick of a switch. The model DVi34L of this series has been approved
by Australian Gas Association for both safety and efficiency. As it also bears our own mark, it
promises to provide you with economy, comfort and security for many trouble free years to follow.
Please take a moment now to acquaint yourself with these instructions and the many features of
your Regency Fireplace.
PAIRING YOUR REMOTE CONTROL
The control box will only learn the Remote ID codes during the first 30 seconds after power is applied
and will ignore this special command from the Remote after the first 30 seconds.
To match the control box to the remote, follow the steps below :
1. Remove a battery from the remote handset.
2. Remove main power to the control box by turning off the isolation switch or switch on the GPO to
the heater.
3. Wait 30 seconds (approx.).
4. Reconnect main power to the control box.
5. Immediately put the battery back in the remote & point the remote in the direction of the heater.
6. Press and hold the PROG and FAN buttons simultaneously. The
letters “LC” will appear on the display indicating the ID codes have
been transmitted.
7. Release both buttons.
8. The display will revert back to the normal off mode display. The
heater should light spark, burner, etc even though the remote
screen says the heater is off.
9. Press the Off button on the remote. The heater should turn off.
10. Wait approx. 30 seconds turn the on again & check all the functions
work fan speed can be adjusted, flame height can be adjusted, etc.
Note: To view a step-by-step pairing video please visit
regency-fire.com.au/Customer-Care/Fireplace-Care-Videos
Note: The Remote Control Handset has a set of unique ID codes that is
pre-programmed into its memory. This set of ID codes helps to differen-
tiate one Remote Control Handset from another so that only the control
box with a matching ID code will respond to the appropriate Remote
Control Handset.
regency.com.au
The control box will only learn the remote ID codes during the first 30
seconds after power is applied. After the first 30 seconds, the control
box will ignore this special command.
The remote control handset has a set of unique ID codes that are pre-
programmed into its memory. This set of ID codes helps differentiate one
remote control handset from another; only the control box with a matching
ID code will respond to the appropriate remote control handset.
To match the control box, follow these steps:
1. Ensure the remote is siwtched off.
2. Remove the main power to the control box.
3. Reconnect the main power to the control box.
4. Press and hold the PROG and FAN buttons simultaneously. The tem-
perature display will show the letters "LC", indicating the ID codes were
transmitted, then revert to the normal off mode display.
5. Release the PROG and FAN buttons.
The control box will only learn the remote ID codes during the first 30 sec-
onds after power is applied and will ignore this special command from the
remote afterward.
Note: The pairing process can be carried out by anyone.
Note: Please visit www.regency-fire.com.au to see the pairing video.
Fan Operation
The fan must be on at all times while the unit is in operation. This model
offers a two-speed fan.
PAIRING YOUR REMOTE CONTROL


Produkt Specifikationer

Mærke: Regency
Kategori: Varmeapparat
Model: DVi34L

Har du brug for hjælp?

Hvis du har brug for hjælp til Regency DVi34L stil et spørgsmål nedenfor, og andre brugere vil svare dig