Rittal TS 8004.500 Manual


Læs gratis den danske manual til Rittal TS 8004.500 (38 sider) i kategorien Ikke kategoriseret. Denne vejledning er vurderet som hjælpsom af 78 personer og har en gennemsnitlig bedømmelse på 3.9 stjerner ud af 39.5 anmeldelser. Har du et spørgsmål om Rittal TS 8004.500, eller vil du spørge andre brugere om produktet?

Side 1/38
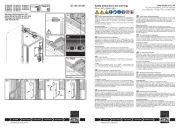
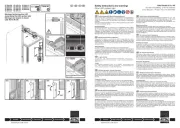
Anreihschränke TS 8
Baying enclosures TS 8
Armoires juxtaposables TS 8
Montage- und Bedienungsanleitung
Assembly and operating instructions
Notice de montage et d’emploi
TS 8004.500
TS 8005.500
TS 8006.500
TS 8080.500
TS 8084.500
TS 8204.500
TS 8205.500
TS 8206.500
TS 8208.500
TS 8215.500
TS 8226.500
TS 8245.500
TS 8265.500
TS 8284.500
TS 8285.500
TS 8286.500
TS 8405.510
TS 8406.510
TS 8450.600
TS 8451.600
TS 8452.600
TS 8453.600
TS 8454.600
TS 8455.600
TS 8456.600
TS 8457.600
TS 8485.510
TS 8486.510
TS 8604.500
TS 8605.500
TS 8606.500
TS 8608.500
TS 8615.500
TS 8626.500
TS 8645.500
TS 8665.500
TS 8684.500
TS 8685.500
TS 8686.500
TS 8804.500
TS 8805.500
TS 8806.500
TS 8808.500
TS 8815.500
TS 8826.500
TS 8845.500
TS 8865.500
TS 8880.500
TS 8881.500
TS 8884.500
TS 8885.500
TS 8886.500
2 TS 8 Montageanleitung/TS 8 assembly instructions/Notice de montage TS 8
Inhaltsverzeichnis
Contents
Sommaire
Seite
1. Hinweise zur Dokumentation 4
1.1 CE-Kennzeichnung 4
1.2 Aufbewahrung der Unterlagen 4
1.3 Verwendete Symbole 4
1.4 Mitgeltende Unterlagen 4
1.5 Normative Verweise 4
2. Sicherheitshinweise 5 – 7
3. Gerätebeschreibung 8 – 11
3.1 Bestimmungsgemäße
Verwendung 8 – 9
3.2 Funktionsbeschreibung
und Bestandteile 10
3.3 Lieferumfang 11
4. Montage und Aufstellung 12 – 29
4.1 Anforderungen an den Aufstellort 12
4.2. Tür demontieren 13
4.3 Türanschlagwechsel 14
4.4 Türrohrrahmen demontieren 15
4.5 Rückwand demontieren 16
4.6 Dachblech demontieren 17
4.7 Montageplatte versetzen 18
4.8 Montageplatteneinbau in hinterster
Stellung 19
4.9 Bodenbleche montieren 20
4.10 Wechsel des Verschluss-Einsatzes 21
4.11 180°-Scharniere montieren 22
4.12 Innenausbau Schienensysteme 23
4.13 Seitenwände montieren 24
4.14 Anreihung 25 – 27
4.15 Montageplatten-Zwischenstück
montieren 28
4.16 Erdung und Potenzialausgleich 29
4.17 Befestigung bei dynamischer
Belastung 30
4.18 Befestigung der Montageplatte
bei dynamischer Belastung durch
Transport und am Aufstellungsort 30
5. Transport 31
6. Installation 32
7. Erdung und
Potenzialausgleich 32
8. Bedienung 32
9. Inspektion und Wartung 33
10. Lagerung 34
11. Technische Daten/
Schutzgrade/
Verlustleistung 35 – 36
12. Ersatzteile 37
13. Garantie 37
14. Kundendienstadressen 37
Page
1. Notes on documentation 4
1.1 CE labelling 4
1.2 Storing the documents 4
1.3 Symbols used 4
1.4 Other applicable documents 4
1.5 Normative references 4
2. Safety instructions 5 – 7
3. Device description 8 – 11
3.1 Proper usage 8 – 9
3.2 Function description
and components 10
3.3 Scope of delivery 11
4. Assembly and siting 12 – 29
4.1 Site requirements 12
4.2 Removing the door 13
4.3 Switching the door hinges 14
4.4 Removing the tubular door frame 15
4.5 Removing the rear panel 16
4.6 Removing the roof plate 17
4.7 Moving the mounting plate 18
4.8 Fitting the mounting plate in the
rearmost position 19
4.9 Fitting the gland plates 20
4.10 Changing the lock insert 21
4.11 Fitting the 180° hinges 22
4.12 Installing mounting angle systems 23
4.13 Fitting the side panels 24
4.14 Baying 25 – 27
4.15 Fitting the mounting plate infi ll 28
4.16 Earthing and potential equalisation 29
4.17 Securing in case of dynamic load 30
4.18 Securing of mounting plate in case
of dynamic load by transport and
on installation site 30
5. Transport 31
6. Installation 32
7. Earthing and potential
equalisation 32
8. Operation 32
9. Inspection and maintenance 33
10. Storage 34
11. Technical specifi cations/
Degrees of protection/
Heat loss 35 – 36
12. Spare parts 37
13. Guarantee 37
14. Customer services addresses 37
Page
1. Remarques relatives
à la documentation 4
1.1 Certifi cation CE 4
1.2 Conservation des documents 4
1.3 Symboles utilisés 4
1.4 Autres documents applicables 4
1.5 Renvois à la norme 4
2. Consignes de sécurité 5 – 7
3. Description de l’armoire 8 – 11
3.1 Utilisation correcte de l’armoire 8 – 9
3.2 Description fonctionelle et éléments 10
3.3 Composition de la livraison 11
4. Montage et implantation 12 – 29
4.1 Exigences concernant le lieu
d’implantation 12
4.2 Démontage de la porte 13
4.3 Inversion du sens d’ouverture 14
4.4 Démontage du cadre
de porte tubulaire 15
4.5 Démontage du panneau arrière 16
4.6 Démontage du toit 17
4.7 Déplacement de la plaque
de montage 18
4.8 Installation de la plaque de montage
en position arrière 19
4.9 Montage des plaques passe-bles 20
4.10 Remplacement du dispositif
de verrouillage 21
4.11 Montage des charnières à 180° 22
4.12 Équipement intérieur
des rails de montage 23
4.13 Montage des panneaux latéraux 24
4.14 Juxtaposition 25 – 27
4.15 Montage des intercalaires
pour plaques de montage 28
4.16 Mise à la terre et équipotentialité 29
4.17 Fixation en cas de charge
dynamique 30
4.18 Fixation de la plaque de montage
en cas de charge dynamique
durant le transport et sur le site
d’installation 30
5. Transport 31
6. Installation 32
7. Mise à la terre et
équipotentialité 32
8. Utilisation 32
9. Inspection et entretien 33
10. Stockage 34
11. Caractéristiques techniques /
Indices de protection /
Puissance dissipée 35 – 36
12. Pièces de rechange 37
13. Garantie 37
14. Coordonnées des services
après-vente 37


Produkt Specifikationer

Mærke: Rittal
Kategori: Ikke kategoriseret
Model: TS 8004.500
Kode for international beskyttelse (IP): IP55
Type: Fritstående reol
Bredde: 1000 mm
Dybde: 400 mm
Højde: 2000 mm
Produktfarve: Grå
Pakkevægt: 152800 g
Materiale: Stål

Har du brug for hjælp?

Hvis du har brug for hjælp til Rittal TS 8004.500 stil et spørgsmål nedenfor, og andre brugere vil svare dig