ROCWARE RT13 Manual


Læs gratis den danske manual til ROCWARE RT13 (2 sider) i kategorien Videokonferencesystem. Denne vejledning er vurderet som hjælpsom af 2 personer og har en gennemsnitlig bedømmelse på 4.8 stjerner ud af 1.5 anmeldelser. Har du et spørgsmål om ROCWARE RT13, eller vil du spørge andre brugere om produktet?

Side 1/2
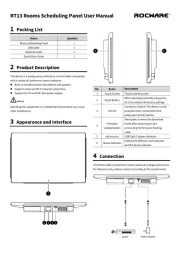
RT13 Rooms Scheduling Panel User Manual
1 Packing List
Name Quantity
Rooms Scheduling Panel 1
USB Cable 1
Network Cable 1
Quick Start Guide 1
2 Product Description
This device is a professional conference control tablet compatible
with a variety of conference control software:
Built-in omnidirectional microphone and speaker.
Support wired and Wi-Fi network connection.
Support DC 5V and PoE dual power supply.
Operating this equipment in a residential environment may cause
radio interference.
3 Appearance and Interface
No. Name
Description
1 Touch Screen Touch control screen.
2 Reset Button
When operating normally, long-press
for 3s to restore the factory settings.
3 LAN-PoE
Connect to Switch (The device can be
powered when connected to the
power port of PoE switch).
4
Firmware
Update Button
Short press to enter the download
mode after powering on and
connecting the firmware flashing
cable.
5 USB Interface USB Type-C power interface.
6 Status Indicator
Display the different room statuses
and the device statuses.
4 Connection
The below cable connections contain optional configuration and is
for reference only, please connect according to the actual needs.
Warning
Power Connection Use the supplied USB cable or connect a
PoE switch to power the device (Note: The device can be
powered by PoE without connecting the adapter).
Connect to the Network Connect the Ethernet Network via a
network cable; Or, connect the Ethernet Network via Wi-Fi.
5 APP Installation
Install via U-disk, or download the APP thought the network.
Contact the manufacturer to customize the system version of
the integrated conference control APP.
6 Version Upgrade
Use the network to upgrade the version on site.
Please see the specific operations below
Build an HTTP upgrade server (Note: If you have customized
the manufacturer's upgrade service, you do not need to build
the server yourself, please ignore this operation). The below
steps indicate you to build an easy upgrade server on windows
PC via the <HFS> software:
Step 1 Create a new folder on PC to store the network upgrade
package.
Step 2 Place the network upgrade package in the folder. Please
contact the manufacturer to supply the network upgrade
package.
Step 3 The network of the server and the device to be
upgraded is reachable (e.g: server_IP:192.168.1.254
client_IP:192.168.1.3).
Step 4 Visit https://www.rejetto.com/hfs/ to download and
install the <HFS> software.
Step 5 Running <HFS> on PC, browse the <Virtual File System>,
right-click the URL area and select “Add folder from disk.
Step 6 Browse the upgrade package folder and click “Confirm”.
Step 7 Right-click the created folder, select <rename> to set the
name (e.g: v1.0).
Step 8 Click “Port” on <HFS> interface and set the upgrade port
(e.g: 8080), set a number that is not used by other
services on the intranet.
Step 9 Browse the <Virtual File System> and click the renamed
folder.
Step 10 The path box of <HFS> show the upgrade path:
http://192.168.1.254:8080/v1.0/. This path should be
filled in “Http upgrade URL” box on the device.
Running the “Upgrade Program” and select “Network
upgrading” (Default).
Set the upgrade server address (If the manufacturer upgrade
service is customized, the upgrade path will be created
automatically), tap "Use default URL" to restore the upgrade
path to the factory setting.
7 FCC Statement
NOTE: This equipment has been tested and found to comply with
the limits for a Class B digital device, pursuant to part 15 of the FCC
Rules. These limits are designed to provide reasonable protection
against harmful interference in a residential installation. This
equipment generates uses and can radiate radio frequency energy
and, if not installed and used in accordance with the instructions,
may cause harmful interference to radio communications. However,
there is no guarantee that interference will not occur in a particular
installation. If this equipment does cause harmful interference to
radio or television reception, which can be determined by turning
the equipment off and on, the user is encouraged to try to correct
the interference by one or more of the following measures:
- Reorient or relocate the receiving antenna.
- Increase the separation between the equipment and receiver.
- Connect the equipment into an outlet on a circuit different from
that to which the receiver is connected.
- Consult the dealer or an experienced radio/TV technician for help.
Changes or modifications not expressly approved by the party
responsible for compliance could void the user's authority to
operate the equipment.
This device complies with Part 15 of the FCC Rules. Operation is
subject to the following two conditions:
1) This device may not cause harmful interference.
2) This device must accept any interference received, including
interference that may cause undesired operation.
RF Exposure Warning Statements:
This equipment complies with FCC radiation exposure limits set
forth for an uncontrolled environment. This equipment shall be
installed and operated with minimum distance 20cm between the
radiator & body.
All transmission frequencies of U-NII-1 and U-NII-3 comply with 47
CFR FCC Part15.407(g) and the manufacturer declares that their
transmission is maintained within the U-NII-1 and U-NII-3 bands.


Produkt Specifikationer

Mærke: ROCWARE
Kategori: Videokonferencesystem
Model: RT13

Har du brug for hjælp?

Hvis du har brug for hjælp til ROCWARE RT13 stil et spørgsmål nedenfor, og andre brugere vil svare dig


Videokonferencesystem ROCWARE Manualer

ROCWARE

ROCWARE RT13 Manual

27 September 2025

Videokonferencesystem Manualer

Nyeste Videokonferencesystem Manualer

Crestron

Crestron UC-FCM-U Manual

24 September 2025
Crestron

Crestron UC-PHONE-T Manual

23 September 2025
Crestron

Crestron UC-P100-S Manual

23 September 2025
Crestron

Crestron UC-FCMX-Z Manual

23 September 2025
Crestron

Crestron UC-FCMX-T Manual

23 September 2025
Crestron

Crestron UC-FCM-Z Manual

23 September 2025
Crestron

Crestron UC-B140-T Manual

23 September 2025
Crestron

Crestron UC-P110-S Manual

23 September 2025