SEADA G4K Pro Manual
Læs gratis den danske manual til SEADA G4K Pro (2 sider) i kategorien Processor. Denne vejledning er vurderet som hjælpsom af 48 personer og har en gennemsnitlig bedømmelse på 4.9 stjerner ud af 24.5 anmeldelser.
Har du et spørgsmål om SEADA G4K Pro, eller vil du spørge andre brugere om produktet?
Produkt Specifikationer
| Mærke: | SEADA |
| Kategori: | Processor |
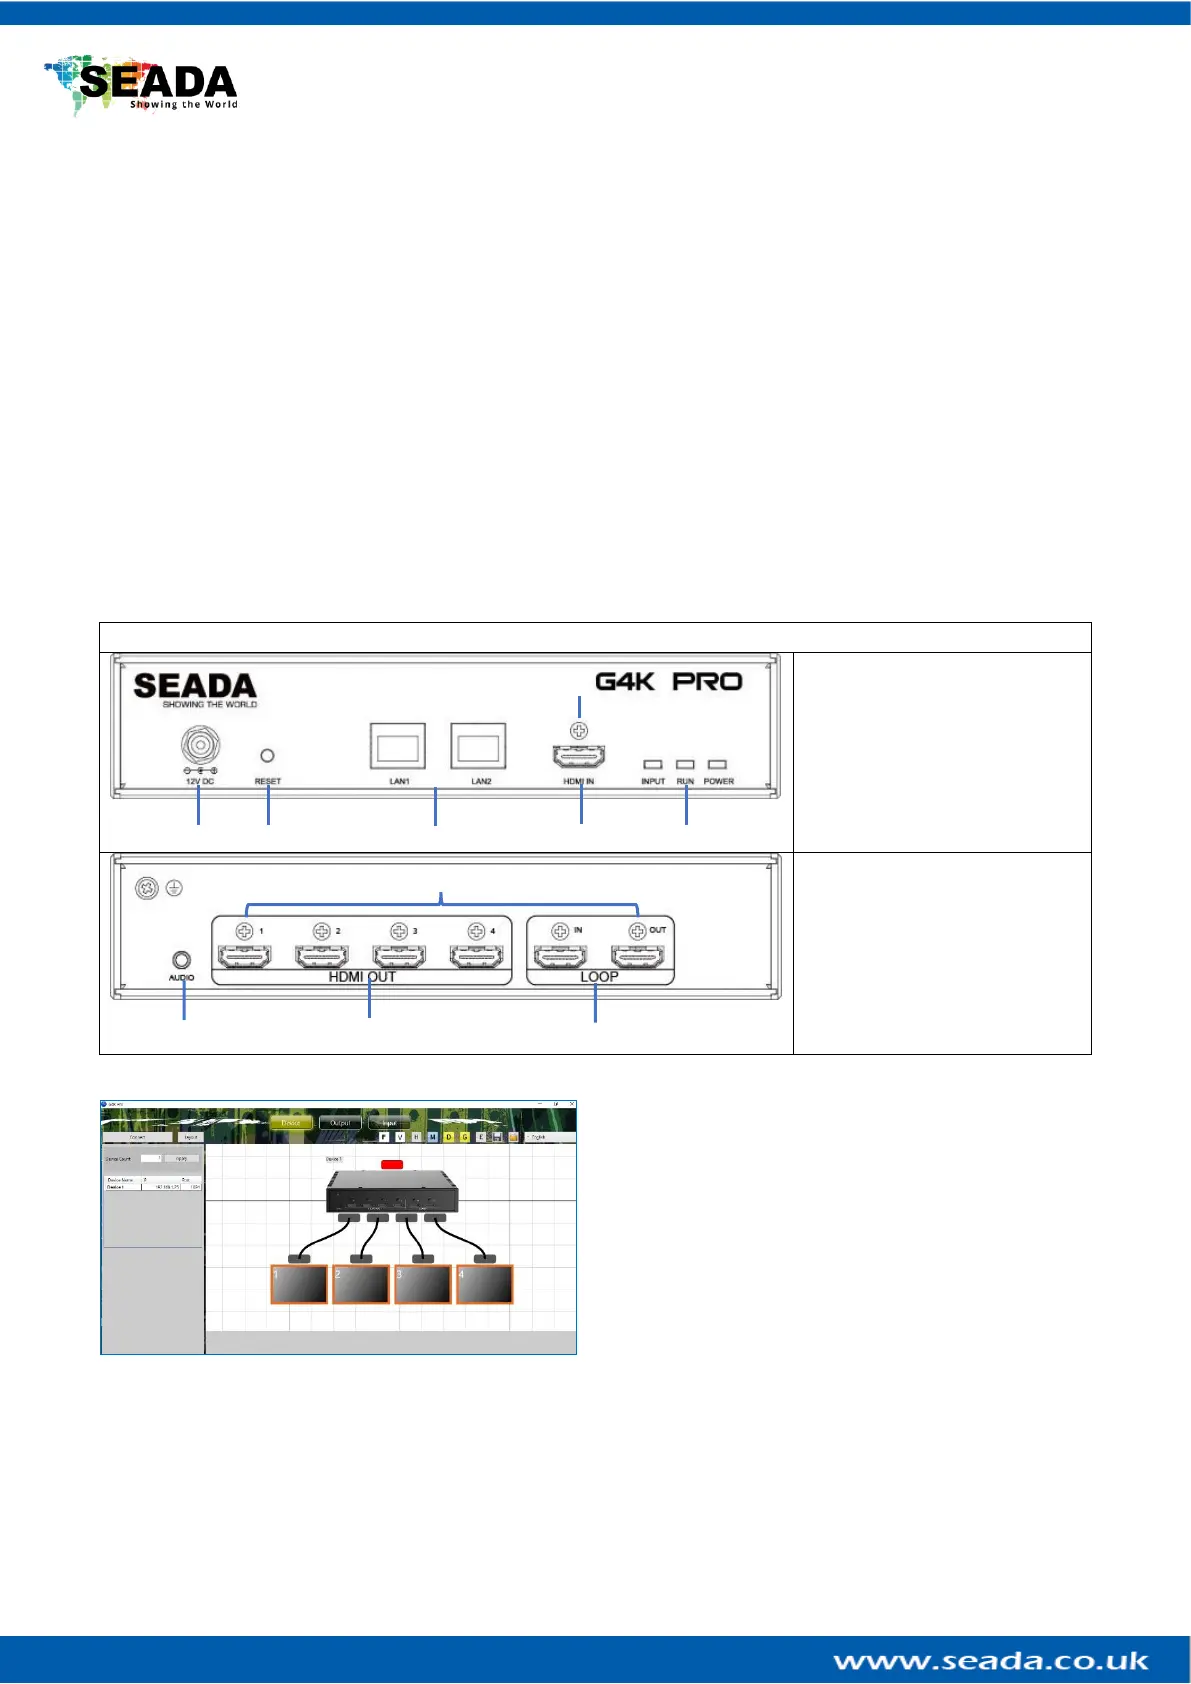
| Model: | G4K Pro |
| Bredde: | 225.5 mm |
| Dybde: | 200 mm |
| Højde: | 44.5 mm |
| Vægt: | 1300 g |
| Brugervejledning: | Ingen |
| Produktfarve: | Sort |
| Indbygget skærm: | Ingen |
| Pakkevægt: | 2140 g |
| Pakkedybde: | 253 mm |
| Pakkebredde: | 453 mm |
| Pakkehøjde: | 96 mm |
| Opbevaringstemperatur (T-T): | 0 - 60 °C |
| Relativ luftfugtighed ved drift (H-H): | 10 - 90 % |
| Relativ luftfugtighed ved opbevaring (H-H): | 10 - 90 % |
| HDCP: | Ja |
| Ethernet LAN: | Ja |
| Strømforbrug (typisk): | 20 W |
| Driftstemperatur (T-T): | 0 - 40 °C |
| Ethernet LAN-datahastigheder: | 10,100,1000 Mbit/s |
| Husmateriale: | Metal |
| Pakketype: | Lamineret karton |
| Batterier inkluderet: | Ingen |
| Strømforbrug (maks.): | 25 W |
| Kabelteknologi: | 10/100Base-T(X) |
| Bæredygtighedscertifikater: | CE |
| Indgangsspænding: | 12 V |
| Medfølgende software: | G4KPro.exe software |
| Oprindelsesland: | Storbritannien |
| HDMI-version: | 1.3 |
| Indgangsfrekvens: | 50/60 Hz |
| Overholdelse af bæredygtighed: | Ja |
| Monteringssæt: | Ingen |
| Stativ-montering: | Ja |
| Antal blæsere: | 0 blæser(e) |
| Indeholder ikke: | Bly |
| Skalerede opløsninger: | 1920 x 1200 |
| Antal RJ-45-porte: | 2 |
| HDCP-version: | 1.4 |
| Kode i den britiske toldtarif: | 84718000 |
| Antal HDMI-indgangsporte: | 1 |
| Indbygget ventilator: | Ingen |
| Placering af strømforsyning: | Ekstern |
| Rackkapacitet: | 0.5U |
| Overholdelse af affald af elektrisk og elektronisk udstyr (WEEE): | Ja |
| Tilgængeligt produkt- eller artikelinformationsark?: | Ja |
| Antal HDMI-udgangsporte: | 4 |
| RS-232/422 stik: | Ingen |
Har du brug for hjælp?
Hvis du har brug for hjælp til SEADA G4K Pro stil et spørgsmål nedenfor, og andre brugere vil svare dig
Processor SEADA Manualer


Processor Manualer
- Lexicon
- DAS Audio
- GeoBox
- Lindell Audio
- AXESS
- Tascam
- Yamaha
- Blackmagic Design
- NovaStar
- Hikvision
- TV One
- BZBGear
- CEDAR
- Warm Audio
- Vivolink
Nyeste Processor Manualer