Smart-AVI SM-EDPN-2S Manual

Smart-AVI bryter SM-EDPN-2S

Læs gratis den danske manual til Smart-AVI SM-EDPN-2S (4 sider) i kategorien bryter. Denne vejledning er vurderet som hjælpsom af 16 personer og har en gennemsnitlig bedømmelse på 4.5 stjerner ud af 8.5 anmeldelser. Har du et spørgsmål om Smart-AVI SM-EDPN-2S, eller vil du spørge andre brugere om produktet?

Side 1/4
SM-EDPN KVM
with Barco Monitor mdcc-6530
USER MANUAL
Designed and Manufactured in the USA
1-800-284-2131
www.smartavi.com
SM-EDPN-2S 2-Port Single-Head DP KVM Switch with Aux Emulation
SM-EDPN-2D 2-Port Dual-Head DP KVM Switch with Aux Emulation
SM-EDPN-2Q 2-Port Quad-Head DP KVM Switch with Aux Emulation
SM-EDPN-4S 4-Port Single-Head DP KVM Switch with Aux Emulation
SM-EDPN-4D 4-Port Dual-Head DP KVM Switch with Aux Emulation
SM-EDPN-4Q 4-Port Quad-Head DP KVM Switch with Aux Emulation
SM-EDPN-8S 8-Port Single-Head DP KVM Switch with Aux Emulation
2/4/8-Port DP KVM Switch with Audio and USB 2.0 Support 2
Installation
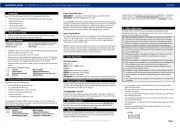
BARCO MONITOR KVM SETUP:
1. Start by connecting your DP input cables from your various devices ONLY to the ports labeled A on
the unit. Then connect the DP output cable from the Barco monitor. This DP cable needs to be from
port marked DP output 1 on the monitor. You should have up to 4 inputs cables coming from various
devices and 1 output cable going to the Barco monitor plugged into the unit at this point.
Note: You must use the cable coming from DP output 1 on the Barco monitor for this process to work. If
you are unsure about which port that is, consult the manual for your respective Barco monitor.
1
2 3 4 5 6 7
8
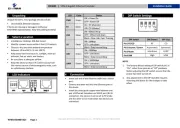
NUMBER DESCRIPTION
1 Kensington security slot
2 Service port (for Barco service purposes only)
3 DisplayPort IN2
4 DisplayPort OUT (covered with a plastic cap by default, remove the cap to use this connector)
5 DisplayPort IN1
6 USB-A 2.0 downstream connectors (2x)
7 USB-B 2.0 upstream connector
8 100-240 VAC mains power input and power switch
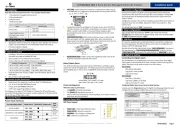
2. Make sure your Barco monitor has the correct settings for each video input by using the monitor’s
on-screen display menu. The settings you are looking for in the monitor’s OSD is called EDID timings
and the correct settings are the following: Resolution should be , Refresh Rate should be , 3MP+ High
and Color Depth should be .8 bit
DisplayPort IN1


Produkt Specifikationer

Mærke: Smart-AVI
Kategori: bryter
Model: SM-EDPN-2S

Har du brug for hjælp?

Hvis du har brug for hjælp til Smart-AVI SM-EDPN-2S stil et spørgsmål nedenfor, og andre brugere vil svare dig


bryter Smart-AVI Manualer

Smart-AVI

Smart-AVI SM-DVN-2D Manual

21 December 2024
Smart-AVI

Smart-AVI SM-DPN-2Q Manual

21 December 2024
Smart-AVI

Smart-AVI MXU-88 Manual

21 December 2024
Smart-AVI

Smart-AVI SM-DVN-44X Manual

21 December 2024
Smart-AVI

Smart-AVI SM-DVN-16S Manual

21 December 2024
Smart-AVI

Smart-AVI SM-D2H-4S Manual

21 December 2024
Smart-AVI

Smart-AVI SM-D2H-4D Manual

21 December 2024
Smart-AVI

Smart-AVI HKM-02 Manual

21 December 2024
Smart-AVI

Smart-AVI SM-DVN-8S Manual

21 December 2024
Smart-AVI

Smart-AVI SM-DPN-4D Manual

21 December 2024

bryter Manualer

Nyeste bryter Manualer