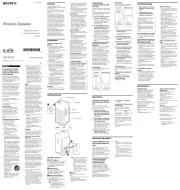
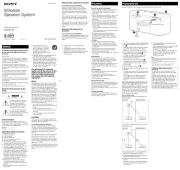
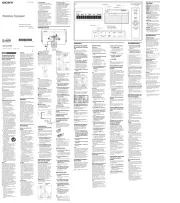
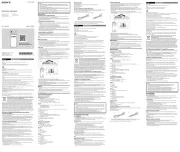
After playback of the iPod (or component
connected to AUDIO IN jack) has finished, if no
operation is performed for about 20 minutes, the
unit will automatically turn off.
To prepare a power source
This unit contains a rechargeable battery pack.
Charge the battery before using this unit for the
first time, or when it is depleted. You can operate
1 Connect the supplied AC adaptor to the
DC IN 14.5V jack on the back of this
unit firmly, and plug it into a wall outlet
Use the supplied Sony AC adaptor only. The
polarity of the plugs of other manufacturers
may be different. Failure to use the supplied AC
adaptor may cause the unit to malfunction.
2 Confirm that charging has started.
The BATTERY/CHARGE indicator (red) lights
up while charging, and turns off when
It will take approximately 5 hours to charge the
You can operate the unit with the rechargeable
battery instead of the AC adaptor.
* Measured by JEITA (Japan Electronics and
Information Technology Industries
Association) standards. The usage time is
measured with the SOUND function set to off,
and actual battery life will vary depending on
the circumstances of the unit.
Notes on the rechargeable battery
The maximum output will be lower when the
AC adaptor is disconnected.
The BATTERY/CHARGE indicator (green)
becomes dim when the battery is weak, and
turns off when remaining battery power is
When to replace the rechargeable
Repeated recharging causes the capacity of the
battery power to decrease over time. Replace the
battery pack when its capacity becomes half the
usual time, even after charging it fully.
The rechargeable battery pack is not a
commercially available product. To purchase
rechargeable battery pack (NH – M15 RDP),
consult with your nearest Sony dealer.
To replace the rechargeable
1 Remove the screw of the battery
compartment at the bottom of the unit,
2 Disconnect the connector of the battery
pack and pull the old one out.
3 Insert a new battery pack and connect its
4 Replace the battery compartment lid and
Charge a new battery pack before use. See “To
prepare a power source” for details.
Turn off the unit and disconnect the AC
adaptor before replacing the battery pack.
When replacing the battery pack, place a soft
cloth etc., under the unit.
To charge your iPod (AC only)
You can use the unit as a battery charger for your
iPod when the power is supplied by the AC
Charging begins when the iPod is connected to
the unit. The charging status appears in the
display on iPod. For details, see the user’s guide of
button indicator will light up when the
Before using the supplied remote commander for
the first time, remove the insulation film.
Aim the remote commander at the (Remote
The / button indicator flashes when the remote
commander’s command is received.
buttons have a tactile dot.
Turns the unit on/off. The
lights up when the unit is turned on.
Start playing iPod. Press again to pause/resume
Press and hold to turn off the iPod.
Press and hold while listening to the sound to
Press and hold in pause while observing the
display on iPod to locate a desired point.
Go back to the previous track. During
playback, this operation returns to the
beginning of the current track. To go back to
the previous track, press twice.
Press and hold while listening to the sound to
Press and hold in pause while observing the
display on iPod to locate a desired point.
Select a menu item or track for playback.
Go back to the previous menu.
Press and hold to go back to the main menu.
Execute the selected menu item or begin
Press once or twice to obtain the desired sound
effect. (For details, see “To obtain the bass or
expansion sound effect.”)
VOL +/ −(Volume plus/minus)
When using the rechargeable battery, press the
remote commander works only when the AC
Some operations may differ or may not be
available between models of iPod.
Some operations may differ or may not be
available when using the iPod in a horizontal
When to replace the battery
With normal use, the battery (CR2025) should
last for about 6 months. When the remote
commander no longer operates the unit, replace
the battery with a new one.
If you are not going to use the remote
commander for a long time, remove the battery
to avoid any damage that may be caused by
The compatible iPod/iPhone models are as
Update software of your iPod/iPhone to the latest
version before using it with this unit.
iPod touch (4th generation)
iPod touch (3rd generation)
iPod touch (2nd generation)
iPod touch (1st generation)
iPod nano (6th generation)*
iPod nano (5th generation)
iPod nano (4th generation)
iPod nano (3rd generation)
iPod nano (2nd generation)
* The iPod nano (6th generation) cannot be
controlled by the remote when the command of
“ ,” “ ,” “ ,” and “ ” is pressed.MENU ENTER
iPhone, iPod, iPod classic, iPod nano, and iPod
touch are trademarks of Apple Inc., registered in
the U.S. and other countries.
“Made for iPod,” and “Made for iPhone” mean
that an electronic accessory has been designed to
connect specifically to iPod or iPhone,
respectively, and has been certified by the
developer to meet Apple performance standards.
Apple is not responsible for the operation of this
device or its compliance with safety and
regulatory standards. Please note that the use of
this accessory with iPod or iPhone may affect
This unit is not specified for use with an iPad,
and malfunction may result if used as such.
To set an iPod on the Docking
1 Press on the front of the unit until PUSH
the Docking Tray comes forward.
2 Set your iPod on the Dock connector.
To set an iPod in sideways
You can use the supplied Dock Holder to set your
iPod. The Dock Holder code (A, B, etc.) and
compatible iPod model(s) are indicated on the
Dock Holder. Check for compatibility before use.
A iPod touch (4th generation)
iPod touch (3rd generation)/
iPod touch (2nd generation)/
iPod touch (1st generation)
C iPod nano (5th generation)
D iPod nano (4th generation)
1 Press on the front of the unit until PUSH
the Docking Tray comes forward.
2 Attach and slide the appropriate Dock
Holder down in the Docking Tray.
Hold the Docking Tray when attaching the
3 Set your iPod on the Dock connector.
4 Twist the Docking Tray anti-clockwise to
Conversely, the Docking Tray will not move
To change the Dock Holder, slide it up and pull
out. Hold the Docking Tray when pulling the
Attach the Dock Holder for using the iPod in
the horizontal position. Otherwise, the iPod
may fall when the Docking Tray is twisted.
To close the Docking Tray
1 Twist the Docking Tray clockwise until it
2 Remove the iPod from the Dock
3 Press on the front of the unit until PUSH
the Docking Tray is locked.
When using the rechargeable battery with the
The iPod begins to play back.
You can operate the connected iPod via this unit
Remove the case or cover from your iPod
before setting it in the Docking Tray to ensure a
When placing or removing the iPod, hold the
iPod at the same angle as that of the connector
on this unit, and do not twist or bend the iPod
as it may result in connector damage.
Remove the iPod and lock the Docking Tray of
the unit when transporting it, otherwise a
When placing or removing the iPod, hold the
If the battery of your iPod is extremely low,
charge it for a while before operation.
An iPod touch/iPhone will not work unless it is
turned on. Be sure to turn on the power of the
iPod touch/iPhone before operation.
Sony cannot accept responsibility in the event
that data recorded to an iPod is lost or damaged
when using an iPod connected to this unit.
For details of environmental conditions for
operating your iPod, check the website of Apple
Press VOLUME +/− VOL +/− ( on the remote
button indicator flashes three times
when the sound is set to either maximum or
The button indicator lights up umber. SOUND
High quality bass sound will be heard.
The indicator lights up green. Additional
expansion of the sound field will be heard.
To return to normal sound, press the button again
and the indicator will turn off.
You can enjoy the sound from an optional
component, such as a portable digital music
player, through the speakers of this unit. Be sure
to turn off the power of each component before
1 Firmly connect the line output jack of a
portable digital music player (or other
component) to the AUDIO IN jack on the
back of the unit, using a suitable audio
connecting cable (not supplied).
2 Press to turn on the unit.
3 Turn the connected component on.
4 Play the connected component.
The sound from the connected component is
output from the speakers of this unit.
The audio connecting cable required depends
on the external equipment. Make sure the cable
is correct for the external equipment to be
If the volume level is low, adjust the volume of
the unit first. If the volume is still too low,
adjust the volume of the connected equipment.
When playing an external component
connected to the AUDIO IN jack, stop playback
Disconnect the audio connecting cable when
Dedicated Dock App for iPod/iPhone available at
Search for “D-Sappli” and download the free App
to find out more about the functions.
If the App to link with this unit is not
downloaded to your iPod/iPhone, a pop-up
message prompting you to download D-Sappli
Deactivate the App’s link function to stop the
To deactivate the App’s link function: Connect
the AC adaptor, and then press
the unit. Remove your iPod/iPhone from the
Dock connector, and then press and hold
than 2 seconds. (The BATTERY/CHARGE
indicator (red) flashes 3 times when
Repeat the above steps to activate the function.
(The BATTERY/CHARGE indicator (green)
flashes 3 times when activated.)
buttons have a tactile dot.