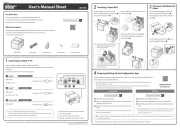
Star Micronics mC-Print2 Manual
Læs gratis den danske manual til Star Micronics mC-Print2 (2 sider) i kategorien Printer. Denne vejledning er vurderet som hjælpsom af 98 personer og har en gennemsnitlig bedømmelse på 3.8 stjerner ud af 49.5 anmeldelser.
Har du et spørgsmål om Star Micronics mC-Print2, eller vil du spørge andre brugere om produktet?
Produkt Specifikationer
| Mærke: | Star Micronics |
| Kategori: | Printer |
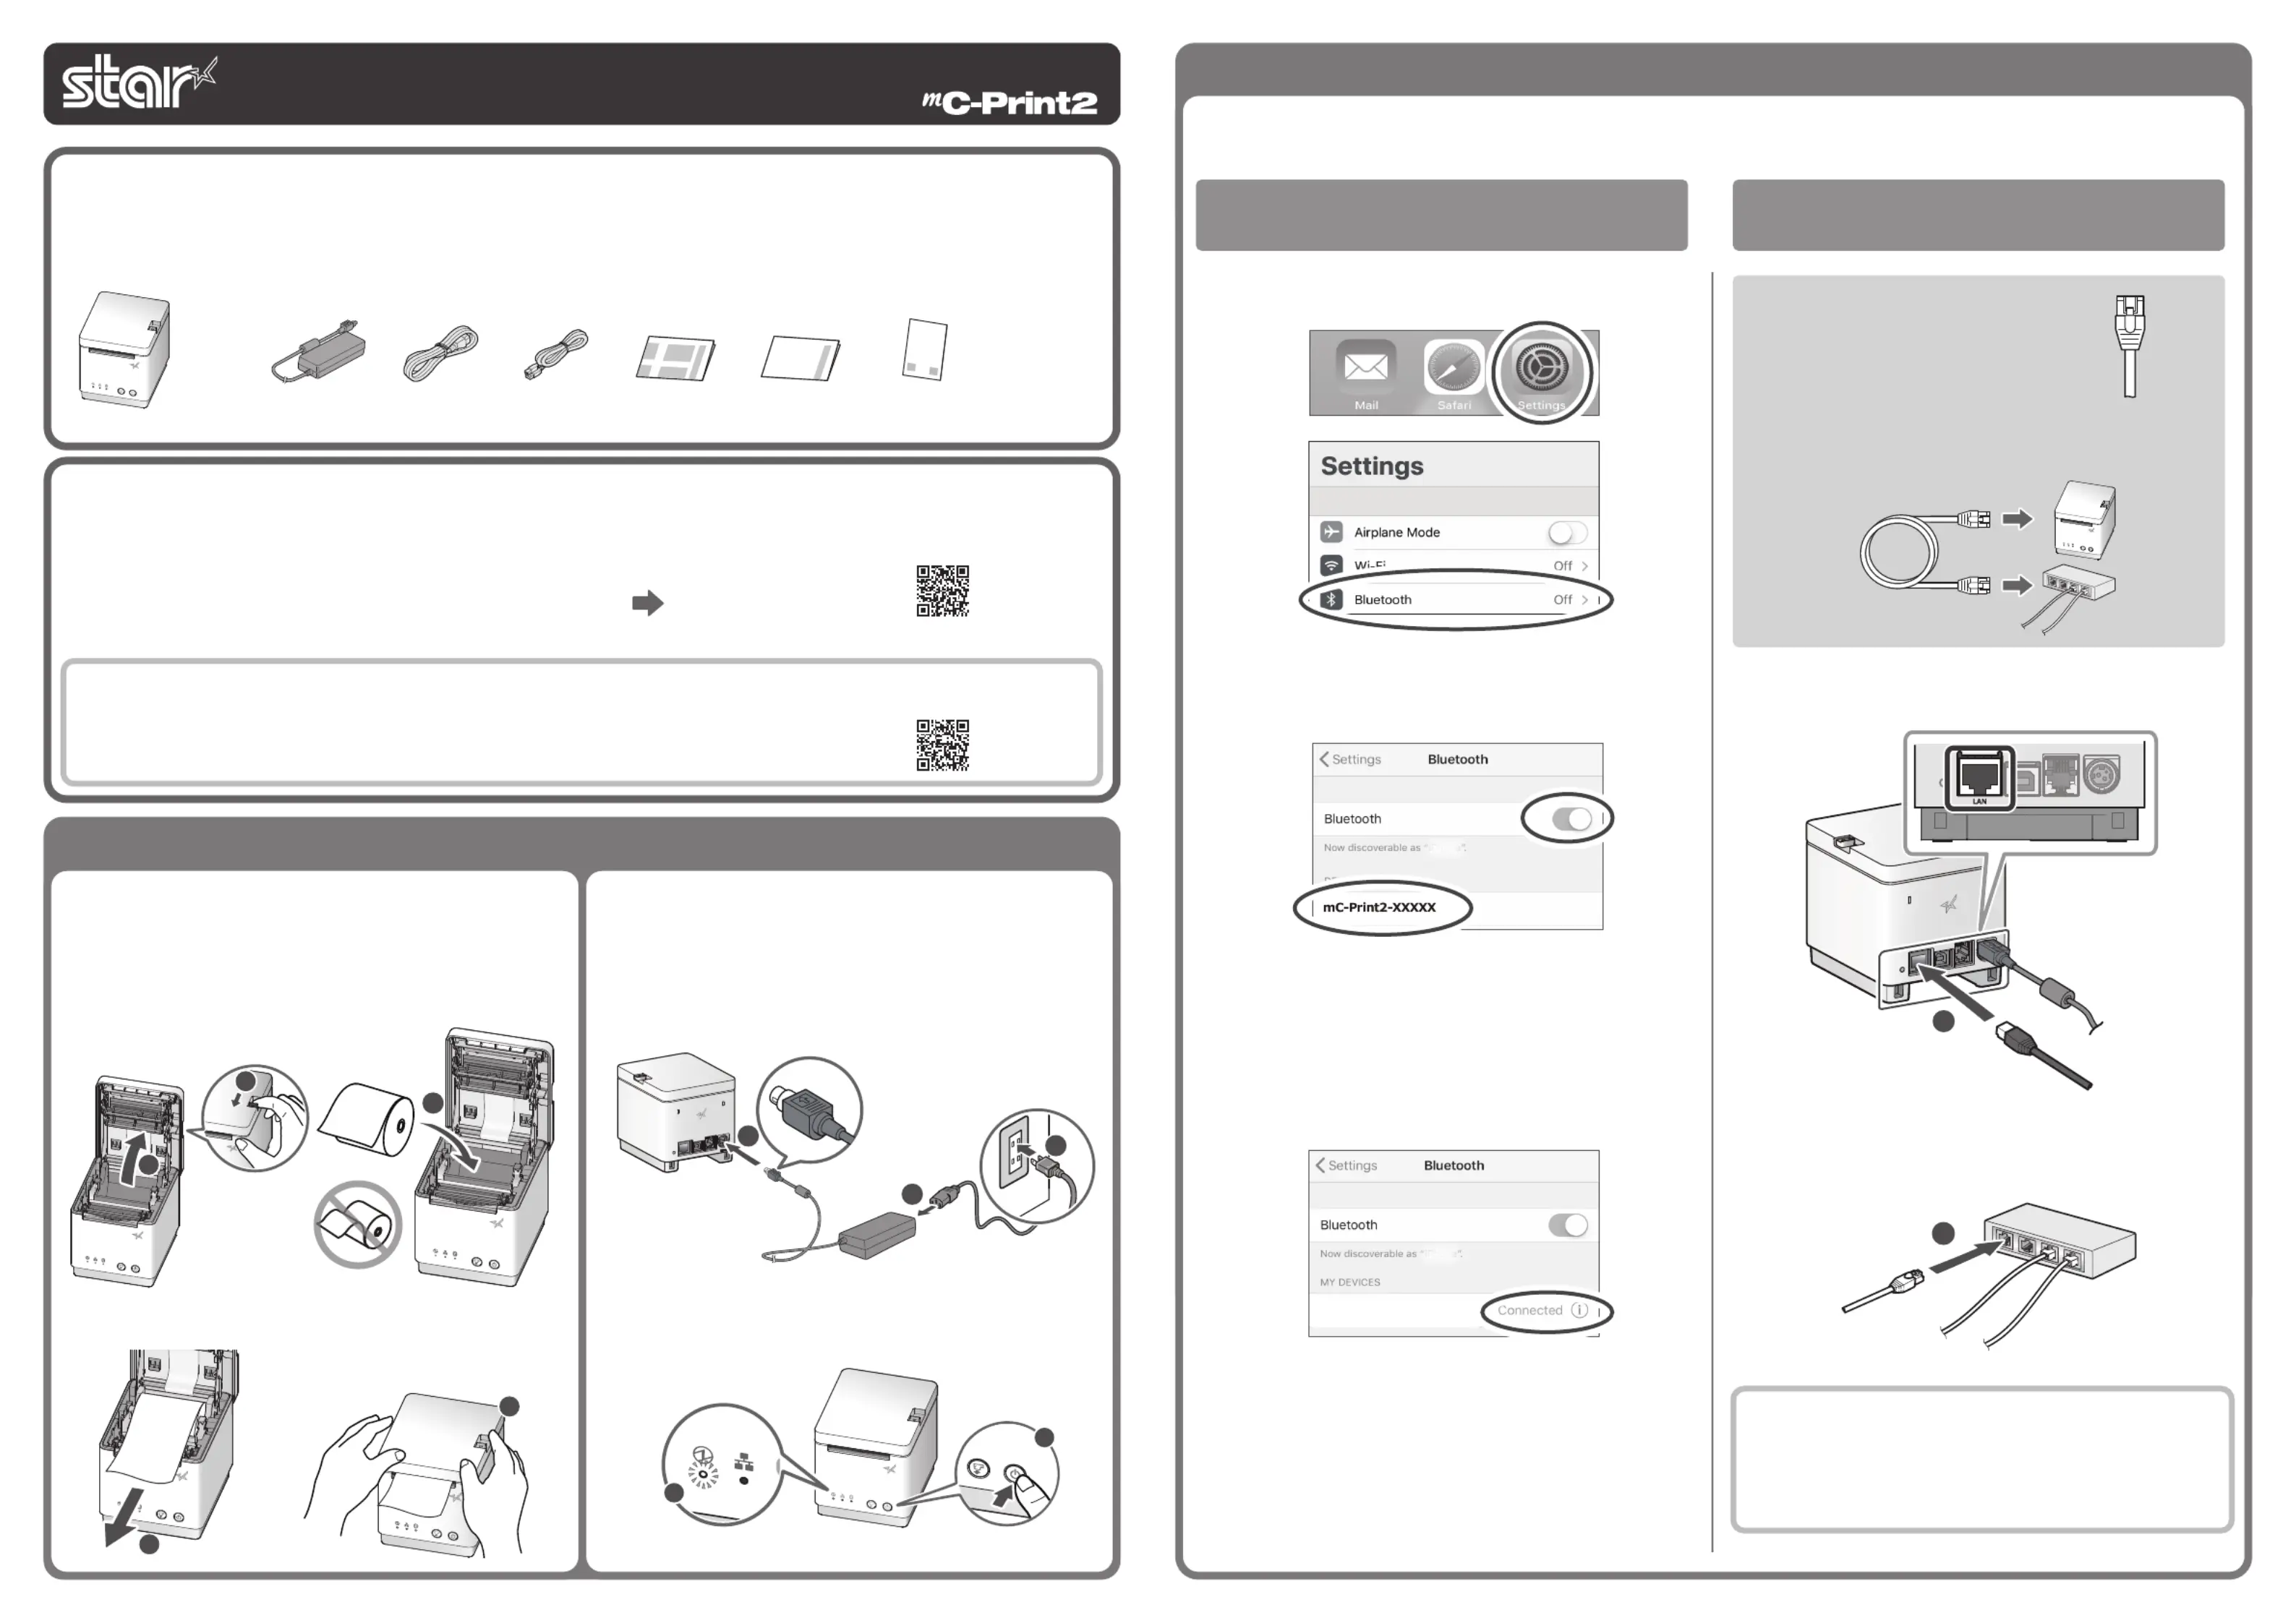
| Model: | mC-Print2 |
| Type: | POS printer |
| Bredde: | 96 mm |
| Dybde: | 113 mm |
| Højde: | 100 mm |
| Vægt: | 800 g |
| Produktfarve: | Hvid |
| Indbygget skærm: | Ingen |
| Bluetooth: | Ingen |
| USB-port: | Ja |
| Ethernet LAN-porte (RJ-45): | 1 |
| Antal USB 2.0-porte: | 1 |
| Ethernet LAN: | Ja |
| Udskrivningsteknologi: | Termisk |
| Maksimal opløsning: | 203 x 203 dpi |
| USB-stik: | USB Type-B |
| Hurtig start guide: | Ja |
| Forbindelsesteknologi: | Ledningsført |
| Strømkilde type: | Vekselstrøm |
| AC-adapter inkluderet: | Ja |
| Harmoniseret systemkode (HS): | 84433210 |
| Mac kompabilitet: | Ja |
| Understøttede mobile operativsystemer: | Android, Windows CE, iOS |
| Bæredygtighedscertifikater: | ENERGY STAR |
| Strømforbrug (udskrivning): | 19.2 W |
| Kompatible operativsystemer: | Android, iOS, Windows and Linux |
| Standard grænseflader: | Ethernet, USB 2.0 |
| Understøttet papirbredde: | 58 mm |
| Udskrivningshastighed: | 100 mm/sek. |
| Maksimal udskrivningsbredde: | 50.8 mm |
| Maksimal rullediameter: | 50 mm |
| Seriegrænseflade: | Ja |
| Auto-skærer holdbarhed: | 2 million snit |
| Tykkelse af printmedier: | 0.053 - 0.075 µm |
| Skæremaskine: | Ja |
Har du brug for hjælp?
Hvis du har brug for hjælp til Star Micronics mC-Print2 stil et spørgsmål nedenfor, og andre brugere vil svare dig
Printer Star Micronics Manualer
Printer Manualer
- Fujitsu
- Konica-Minolta
- CUSTOM
- Zebra
- StarTech.com
- Edikio
- Brother
- Nilox
- Nisca
- AVM
- Amstrad
- Fargo
- Utax
- Huawei
- DNP
Nyeste Printer Manualer


