over-discharged due to a difference of voltage or capacity.
This can result in venting, leakage, and rupture and may
• Remove and immediately recycle or dispose of batteries
from equipment not used for an extended period of time
according to local regulations.
• Always completely secure the battery compartment. If the
battery compartment does not close securely, stop using
the product, remove the batteries and keep them away
• WARNING: Batteries may pose a choking hazard. As with all
small items, do not let children handle batteries. If
swallowed, seek medical attention immediately.
• Tell others about the risk associated with button batteries
and how to keep their children safe.
• Clean the battery contacts and also those of the device
prior to battery installation.
• PRECAUTION: Do not dispose of batteries in fire. Batteries
• This product uses 1 x CR2032 (nominal 3V) battery.
• Remove and immediately recycle or dispose of used batteries
according to local regulations and keep away from children. Do
NOT dispose of batteries in household trash or incinerate.
• Even used batteries may cause severe injury or death.
• Call a local poison control center for treatment information.
• Non-rechargeable batteries are not to be recharged.
• Do not force discharge, recharge, disassemble, heat above
(manufacturer’s specified temperature rating) or incinerate.
Doing so may result in injury due to venting, leakage or explosion
resulting in chemical burns.
• Ensure the batteries are installed correctly according to polarity
• Always purchase the correct size and grade of battery most
suitable for the intended use.
• Do not mix old and new batteries, different brands or types of
batteries, such as alkaline, carbon-zinc, or rechargeable
• When batteries of different brand or type are used together, or
new and old batteries are used together, some batteries may be
ONE YEAR LIMITED WARRANTY
Taylor® warrants this product to be free from defects in
material or workmanship (excluding battery) for one (1) year
from the original purchaser from the date of retail purchase. It
does not cover damages to wear resulting from accident,
misuse, abuse, commercial use, or unauthorized adjustment
and/or repair. If help or troubleshooting is required, do not
return to retailer. Should this product require service (or
replacement at our option), while under warranty, contact
Taylor for return authorization and troubleshooting assistance.
Phone: 866-843-3905 (8-5pm MST, M-F)
Email: taylorusa@lifetimebrands.com
There are no express warranties except as listed above. This
warranty gives you specific legal rights, and you may have
other rights which vary from state to state. For additional
product information, or warranty information outside the USA,
please contact us through www.taylorusa.com.
Made to our exact specifications in China.
©2024 Taylor, a division of Lifetime Brands Inc. All rights
reserved. Oak Brook, IL 60523
The thermometer operates on 1 CR2032 lithium battery. If the
unit does not turn on for first use, remove and then reinstall the
battery. Change the battery when the display becomes dim. To
1. Open the battery compartment by turning the battery
compartment door cover on the back of the thermometer
counterclockwise, using a coin in the slot.
2. Remove used battery and insert new one, with the "+" sign
3. Close the compartment. Make sure the o-ring is seated
around the opening to maintain waterproof feature. Note: If
battery door is not closed properly, water can get into the
battery compartment causing the unit to malfunction.
Taylor’s Safe-T-Guard™ Sleeve and housing incorporates an EPA
registered additive that inhibits the growth of odor and stain
causing bacteria on the plastic housing only which minimizes
cross contamination. It is important to thoroughly clean and
disinfect your thermometer before and after each use.
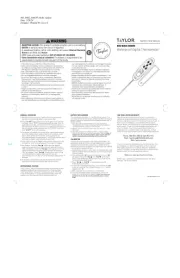
Waterproof Digital Thermometer
1. Sterilize the metal probe by inserting it into an appropriate
solution such as boiling water for several minutes.
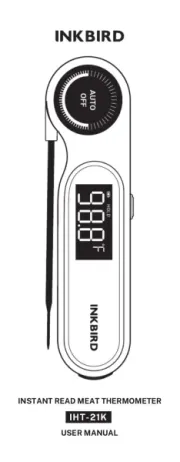
2. On/OFF Press " " to turn the unit on. Press again for a 5 second
backlight. Press " " to select temperature scale. Note: To ºF/ºC
save battery life, this unit has an AUTO-OFF feature that turns
the instrument off after 5 minutes if no buttons are pressed and
the temperature reading is lower than 122°F (50°C). Press and
hold “ to turn off manually.On/OFF”
3. The sensor is located in the probe tip for a quick response and
accurate reading. When ready to test the temperature, insert
thermometer probe into the center of the product for an
accurate temperature measurement. The LCD will stabilize when
reading is complete (approximately 10 seconds).
4. Hold Hold Feature: Press the " " button and the temperature will
be held (the "HOLD" icon will appear). Press again to release.
5. Max/ Max Feature: Press the " s" button once to read the
maximum temperature that the probe has reached (the word
“Max” will appear). Press the " button again to read the Max/s"
minimum temperature that the probe has reached (the word
“Min” will appear). Press " " a third time to return to the Max/s
current temperature reading. Otherwise the unit will
automatically return to the current temperature reading after 10
6. To avoid burns near heat, snap the pocket sleeve onto the
opposite end of the thermometer and use as a handle.
If recalibration is necessary, for best results calibrate within the
temperature range most commonly used. Always utilize a reliable
source as a benchmark when calibrating. If a verified reference
temperature cannot be achieved in the usage range, then calibrate
in an ice bath as described in Step 1.
1. Suspend probe at least 1” into a 'slush' of crushed ice and water
(32°F) for at least 30 seconds. Keep the probe from touching the
2. Press and hold the “SET” button for 5 seconds. The word “SET”
will appear. Then press "Max/s" and "Hold/t" at the same
time to enter Temperature Setting mode. The LCD will turn red.
The current temperature blinks.
3. Press "Max/s" or "Hold/t" to increase/decrease the
temperature by 1°F (0.5°C)
4. To enter the recalibrated temperature, press and hold the “SET”
button for 5 seconds. The LCD will turn green. A “----” pattern
5. After 2 seconds, the unit will return to normal mode.
6. To restore the default calibration temperature, remove the
battery for 1 minute and then replace it. (Note: If no buttons are
pressed for 30 seconds, the unit will automatically return to normal
• INGESTION HAZARD: This product contains a button cell or coin battery.
• DEATH or serious injury can occur if ingested.
• A swallowed button cell or coin battery can cause Internal Chemical
Burns in as little as 2 hours.
• KEEP new and used batteries OUT OF REACH OF CHILDREN!
• Seek immediate medical attention if a battery is suspected to be
swallowed or inserted inside any part of the body.
806_806E_806GW IM RL Update
Designer: Wendell W. Cisco II