Tenda TE3L Manual

Tenda Router TE3L

Læs gratis den danske manual til Tenda TE3L (2 sider) i kategorien Router. Denne vejledning er vurderet som hjælpsom af 3 personer og har en gennemsnitlig bedømmelse på 4.4 stjerner ud af 2 anmeldelser. Har du et spørgsmål om Tenda TE3L, eller vil du spørge andre brugere om produktet?

Side 1/2
MESH/RST 1/2.5GE 2 3 4 POWER
输入: 12V 1A
Shenzhen Tenda Technology Co., Ltd.
6-8 Floor, Tower E3, No.1001, Zhongshanyuan Road, Nanshan D istrict,
Shenzhen, China. 518052 www.te ndacn.com Made in China
输入: 12V 1A
6-8 Floor, Tower E3, No.1001, Zhongshanyuan Road, N anshan District,
Shenzhen, Ch ina. 518052 www.tendacn.com Made in China
MESH/RS 2.5G 2 3 4 POWER
Shenzhen Tenda Technology Co., Ltd.
6-8 Floor, Tower E3, No.1001, Zhongshanyuan Road , Nanshan District,
Shenzhen, China. 518052 www.tendacn .com Made in China
MESH/RS 2.5G 2 3 4 POWER
Shenzhen Tenda Technology Co., Ltd.
6-8 Floor, Tower E3, No.1001, Zhongshanyuan Road , Nanshan District,
Shenzhen, China. 518052 www.tendacn .com Made in China
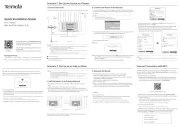
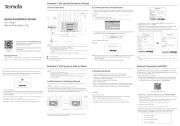
Scenario 1: Set Up the Device as a Router
II. Connect the Router to the Internet
I. Add the Router to an Existing Network
Scenario 2: Set Up as an Add-on Node Internet Connection with NFC
1. Place the router in an elevated and open position within 3 meters from your existing
router.
2. Use the power adapter to connect the router to a power source.
3. Press the networking button of the router for about 1-3 seconds. The indicator blinks
green quickly. Within 2 minutes, press the networking button of the existing router for 1-3
seconds to negotiate with this router. The indicator blinks green quickly.
When the indicator of the router lights solid green, the networking is successful and the
router becomes a secondary node in the network.
Tips
• This router can be networked with Tenda WiFi+ routers.
• Ensure that the existing router (primary node) has been connected to the internet and the router (secondary node) to
be added has never been used. If not, reset this router first.
• Two RE6L Pro are taken an example here. If the router fails to be added to an existing network, contact Tenda
customer service for help.
Wi-Fi 7 Router
RE6L Pro/TE6L Pro/RE3L/TE3L
Quick Installation Guide
• Wireless router x 1 • Power adapter x 1 • Ethernet cable x 1 • Quick installation guide
Package Contents
RE6L Pro is used for illustrations here unless otherwise specified. The actual product prevails.
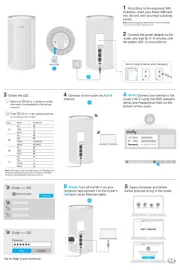
I. Connect the Router
The product appearance may vary with models. Please refer to the product you purchased.
LAN
Or
Internet
Ethernet jack
Any Ethernet ports. 2.5GE port is recommended (if any)
Example: RE6L Pro
Modem
Ethernet cable
Power source
Power on the router.
Connect the WAN port of the router to the LAN port of your modem or the Ethernet
jack using an Ethernet cable.
If you use the modem for internet access, power off the modem first before connecting the WAN port of the router to
the LAN port of your modem and power it on after the connection.
• Refer to the following relocation tips to locate the router to a proper position:
- Place the router in a high position with few obstacles.
- Keep your router away from electronics with strong interference, such as microwave ovens, induction cookers, and
refrigerators.
- Keep your router away from metal barriers, such as weak current boxes, and metal frames.
- If prompts on the page, ignore it.Unsecured Network
- For network security, the Wi-Fi password will be set in later setup.
Tips
Tips
1. Connect your wireless client such as a smartphone to the Wi-Fi network of the router. For
the default Wi-Fi name (SSID), check the label on the device body. It is no Wi-Fi password
by default.
3. Perform operations as prompted.
2. The page will automatically redirect to the web UI of the router. If not, disable your mobile
data traffic, start a browser and visit in the address bar.tendawifi.com
tendawifi.com
Welcome to use Tenda router
Faster, Safer, Smoother, Smarter
Start
Tap .Start
• If the router detects that your connection type is . Your internet access is available DHCP
without further configuration (for example, PPPoE connection through an optical
modem is completed).
Set Wi-Fi name, Wi-Fi password and login password. Tap Next.
• If the router detects that your connection type is PPPoE. Set the Wi-Fi name, Wi-Fi
password and login password. Tap .Next
If the PPPoE user name and password are required for internet access, select the ISP
Type based on your region and ISP and enter required parameters (if any).
If you forgot the PPPoE user name and password, you can obtain the PPPoE user name
and password from your ISP and manually enter them.
The Wi-Fi password is used to connect to the Wi-Fi network, while the login password is used to log in to the web UI of
the router.
Tips
Previous Next
ISP Type Normal
* PPPoE
Username
Internet Settings
Dynamic IP
Detection succeeded. Recommended internet
connection type: PPPoE
Internet
Connection
Type
Enter the username
* PPPoE
Password
Enter the password
Done. When the indicator is solid green, the network connection is successful.
This router supports IPv6, and the IPv6 is enabled by default. If your broadband service
supports IPv6, you can access the IPv6 network after setup.
To access the internet with:
• Wi-Fi-enabled devices: Connect to the router’s new Wi-Fi network (see the configuration
completion page for tips). You can connect to any Wi-Fi to access the internet, and 5G
Wi-Fi is recommended.
*As required by related laws and regulations, the device is performing Dynamic Frequency Selection (DFS).
Please connect to the Wi-Fi after about 90 seconds.
*Clients need to support 802.11be to experience the high speeds offered by Wi-Fi 7 routers.
• Wired devices: Connect to an Ethernet port of the router using an Ethernet cable.
II. Relocate the Router
1. Refer to the following relocation tips to locate the router to a proper position:
• Ensure that the distance between any two nodes is less than 10 meters.
• Keep your routers away from electronics with strong interference, such as microwave
ovens, induction cookers, and refrigerators.
• Place the routers in a high position with few obstacles.
2. Power on the router again.
3. Wait for 1-2 minutes and observe the router’s indicator. If the indicator is solid green, the
connection between the primary node and secondary node is good. Otherwise, move the
router (secondary node) closer to the existing router for better connection quality.
The router has NFC stickers, you can connect your NFC-enabled devices to the router's
Wi-Fi with one-touch. Only NFC-enabled orAndroid HarmonyOS phones or tablets can
connect to the internet with one-touch.
1. Write Wi-Fi information to NFC stickers.
(1) Install and register Tenda WiFi App by scanning the QR code. After managing the
router (connect to the router's Wi-Fi, the App will automatically discover the router),
enter the router configuration page and navigate to the NFC Sticker.
(2) Select the Wi-Fi name you want to write into sticker, and tap .Write NFC Sticker
(3) Place the NFC sticker near the NFC area of the phone (usually around the camera on
the back of the phone).
Wait for a moment, the Wi-Fi information is successfully written into the NFC sticker.
Place the NFC sticker in a visible location at home for internet access.
*NFC stickers can be re-written if the Wi-Fi name or Wi-Fi password changes.
2. Connect your phone to the internet.
* Ensure that the NFC function is enabled, and the screen is unlocked and active.
Place the NFC sticker near the NFC area of the phone, wait for a moment, and remove the
phone when the phone prompts for sound or vibration. When the phone prompts
Connect to network, tap CONNECT to connect to Wi-Fi without encryption.
Done.
To access the internet with:
Wi-Fi-enabled devices: Connect to your Wi-Fi network. (The Wi-Fi name and Wi-Fi
password of the new router are the same as the existing router.)
* Clients need to support 802.11be to experience the high speeds offered by Wi-Fi 7 routers.
Wired devices: Connect to an Ethernet port of any router using an Ethernet cable.
Internet
MESH/RST MESH/RST
This router Existing router
Within 2 minutes
Example: RE6L Pro
SSID
XXXXXX_XXXXXX
Internet connection type: DHCP
Not encrypted
Previous Next
*WiFi Name @Tenda_XXXXXX
*WiFi
WiFi Settings
i
8 – 32 characters
Not encrypted
Set WiFi password to router login
password
Set WiFi password to router login
password
Previous Next
*WiFi Name @Tenda_XXXXXX
*WiFi
WiFi Settings
i
Configuration completes
Complete
Scan to download Tenda WiFi App
NFC Service Just now
Connect to network
Connect to @Tenda_XXXXXX?
CANCEL CONNECT
Scan the QR code or visit www.tendacn.com for
installation videos, technical specifications, user
guides and more information.
You can see the product name and model on the
product label.
The label can be found on the back of the device.
Get Support
and Services
MESH/RST 1/2.5GE 2 3 4 POWER
输入: 12V 1A
Shenzhen Tenda Technology Co., Ltd.
6-8 Floor, Tower E3, No.1001, Zhongshanyuan R oad, Nanshan District,
Shenzhen, China. 5 18052 www.tendacn.com Made in China
Jack, Ports and Buttons
The jack, ports and buttons may vary with models. The actual product prevails.
Example: RE6L Pro
Indicator
Example: RE6L Pro
FAQ
Q1: I cannot log in to the web UI by visiting tendawifi.com. What should I do?
A1: First, try to visit http://tendawifi.com http://192.168.0.1 or in the address bar (not the search bar).
If you are using a Wi-Fi-enabled device, such as a smartphone:
• Ensure that your smartphone is connected to the Wi-Fi network of the router.
− For the first login, connect the Wi-Fi name (Tenda_ ) on the label of the devices body. XXXXXX
XXXXXX is the last six digits of the MAC address on the label.
− When logging in again after settings, use the changed Wi-Fi name and password to connect to the
Wi-Fi network.
• Ensure that the cellular network (mobile data) of the smartphone is disabled.
If you are using a wired device, such as a computer:
− Ensure that your wired devices are connected to a LAN port properly.
− Ensure that the computer is set to andObtain an IP address automatically Obtain DNS server
address automatically.
If the problem persists, reset the router by referring to and try again.Q4
Q2: I cannot access the internet after the configuration. What should I do?
A2: Try the following solutions:
• Ensure that the WAN port of the router is connected to a modem or Ethernet jack properly.
• Log in to the web UI of the router and navigate to the page. Follow the instructions Internet Settings
on the page to solve the problem.
If the problem persists, try the following solutions:
• For Wi-Fi-enabled devices:
− Ensure that your devices are connected to the Wi-Fi network of the router.
− If you still cannot access the internet, connect your computer to the Ethernet port of your router with
an Ethernet cable, log in to the web UI of the router, change your Wi-Fi name and Wi-Fi password,
and reconnect to Wi-Fi.
• For wired devices:
− Ensure that your wired devices are connected to a LAN port properly.
− Ensure that wired devices are set to Obtain an IP address automatically Obtain DNS server and
address automatically.
Q3: Some computers cannot search router's Wi-Fi. What should I do?
A3: Try the following solutions:
− Change the network mode of the router's 2.4G Wi-Fi and 5G Wi-Fi to not include 802.11ax and
802.11be, and search again.
− If the router's Wi-Fi can be searched after changing the network mode, the wireless network adapter
version is older and needs to be updated. You can go to the corresponding official website of the
wireless network adapter to download and install, or you can use software such as driver wizard to
detect and update online.
− If only 2.4G Wi-Fi is searched, first check whether the computer supports 5G band. If other 5G
Wi-Fi can be searched, change the 5G Wi-Fi channel of the router to channel 36 or channel 149 in
turn, and then search. If it can be searched after changing the channel, it means that the 5G wireless
network adapter only supports high-channel or low-channel Wi-Fi.
Q4: How to restore the router to factory settings?
A4: With your router connected to power and turned on, hold down the reset (marked or ) button RST Reset
of the router for about 8 seconds, and release it when the indicator blinks red fast. After about 1 minute, the
router is reset successfully and rebooted. You can configure the router again.
Before operating, read the operation instructions and precautions to be taken, and follow them to prevent
accidents. The warning and danger items in other documents do not cover all the safety precautions that
must be followed. They are only supplementary information, and the installation and maintenance
personnel need to understand the basic safety precautions to be taken.
- The device is for indoor usage only.
- The device must be horizontally mounted for safe use.
- Do not use the device in a place where wireless devices are not allowed.
- Please use the included power adapter.
- The mains plug is used as the disconnect device, and shall remain readily operable.
- The power socket shall be installed near the device and easily accessible.
- Operating environment: Temperature: 0 – 40 (32 - 104 ); Humidity: (10% – 90%) RH,
non-condensing; Storage environment: Temperature: -40 to +70 -40 - 158 ;
Humidity: (5% – 90%) RH, non-condensing.
- Keep the device away from water, fire, high electric field, high magnetic field, and inflammable and
explosive items.
- Unplug this device and disconnect all cables during lightning storms or when the device is unused for
long periods.
- Do not use the power adapter if its plug or cord is damaged.
- If such phenomena as smoke, abnormal sound or smell appear when you use the device, immediately
stop using it and disconnect its power supply, unplug all connected cables, and contact the after-sales
service personnel.
- Disassembling or modifying the device or its accessories without authorization voids the warranty, and
might cause safety hazards.
- Refer all servicing to qualified service personnel.
- Disconnect the power source during servicing.
- Keep this device out of reach of children to prevent children from using it as a toy and causing personal
injury.
- The device's marking information can be found on its surface.
For the latest safety precautions, see Safety and Regulatory Information www.tendacn.comon .
Safety Precautions
CE Mark Warning
This is a Class B product.
In a domestic environment, this product may cause radio interference, in which case the user may be required to take adequate
measures.
This equipment should be installed and operated with a minimum distance 20cm between the device and your body.
NOTE: (1) The manufacturer is not responsible for any radio or TV interference caused by unauthorized modifications to this
equipment. (2) To avoid unnecessary radiation interference, it is recommended to use a shielded RJ45 cable.
Declaration of Conformity
Hereby, SHENZHEN TENDA TECHNOLOGY CO., LTD. declares that the device (Router) is in compliance with Directive
2014/53/EU.
The full text of the EU Declaration of Conformity is available at the following internet address:
https://www.tendacn.com/download/list-9.html
FCC Statement
This equipment has been tested and found to comply with the limits for a Class B digital device, pursuant to Part 15 of the FCC
Rules. These limits are designed to provide reasonable protection against harmful interference in a residential installation. This
equipment generates, uses and can radiate radio frequency energy and, if not installed and used in accordance with the
instructions, may cause harmful interference to radio communications. However, there is no guarantee that interference will not
occur in a particular installation. If this equipment does cause harmful interference to radio or television reception, which can be
determined by turning the equipment off and on, the user is encouraged to try to correct the interference by one or more of the
following measures:
- Reorient or relocate the receiving antenna.
- Increase the separation between the equipment and receiver.
- Connect the equipment into an outlet on a circuit different from that to which the receiver is connected.
- Consult the dealer or an experienced radio/TV technician for help.
Operation is subject to the following two conditions: (1) this device may not cause harmful interference, and (2) this device must
accept any interference received, including interference that may cause undesired operation.
The device is for indoor usage only.
Radiation Exposure Statement
This device complies with FCC radiation exposure limits set forth for an uncontrolled environment and it also complies with Part 15 of the
FCC RF Rules.
This equipment should be installed and operated with minimum distance 20cm between the device and your body.
Caution:
Any changes or modifications not expressly approved by the party responsible for compliance could void the user's authority to operate
this equipment.
This transmitter must not be co-located or operating in conjunction with any other antenna or transmitter.
Operating frequency: 2412-2462MHz, 5150-5350 MHz, 5725-5850MHz
NOTE: (1) The manufacturer is not responsible for any radio or TV interference caused by unauthorized modifications to this equipment.
(2) To avoid unnecessary radiation interference, it is recommended to use a shielded RJ45 cable.
RECYCLING
This product bears the selective sorting symbol for Waste electrical and electronic equipment (WEEE). This means that this product must
be handled pursuant to European directive 2012/19/EU in order to be recycled or dismantled to minimize its impact on the environment.
User has the choice to give his product to a competent recycling organization or to the retailer when he buys a new electrical or electronic
equipment.
Technical Support
Shenzhen Tenda Technology Co., Ltd.
Floor 6-8, Tower E3, No.1001, Zhongshanyuan Road, Nanshan District, Shenzhen, China. 518052
Website: www.tendacn.com
E-mail: support@tenda.com.cn
support.uk@tenda.cn (United Kingdom)
support.us@tenda.cn (North America)
Copyright © 2024 Shenzhen Tenda Technology Co., Ltd. All rights reserved.
Tenda is a registered trademark legally held by Shenzhen Tenda Technology Co., Ltd. Other brand and product
names mentioned herein are trademarks or registered trademarks of their respective holders. Specifications are
subject to change without notice.
V1.0 Keep for future reference.
Português-Atenção: Nos estados membros da UE, países da EFTA, Irlanda do Norte e Grã-Bretanha, o funcionamento na gama
de frequências 5150MHz-5350MHz só é permitido no interior.
Svenska-Uppmärksamhet: I EU medlemsstater, EFTA - länderna, Nordirland och Storbritannien är det endast tillåtet att använda
frekvensområdet 5150MHz-5350MHz MHz inomhus.
Slovenský-Pozor: V členských štátoch EÚ, krajinách EFTA, Severnom Írsku a Veľkej Británii je prevádzka vo frekvenčnom pásme
5150MHz-5350MHz povolená len v interiéri.
-:   μ  ,    ,       ,
    5150MHz-5350MHz  μ   .
Magyar-Figyelem: Az EU-tagállamokban, az EFTA-országokban, Észak-Írországban és Nagy-Britanniában az
5150MHz-5350MHz -es frekvenciatartományban való működtetés csak beltérben engedélyezett.
Italiano-Attenzione: Negli Stati membri dell'UE, nei Paesi EFTA, nell'Irlanda del Nord e in Gran Bretagna, il funzionamento nella
gamma di frequenze 5150MHz-5350MHz è consentito solo in ambienti chiusi.
Български-Внимание: В страните-членки на ЕС, страните от ЕАСТ, Северна Ирландия и Великобритания, работата в
честотния диапазон 5150MHz-5350MHz е разрешена само на закрито.
Español-Atención: En los estados miembros de la UE, los países de la AELC, Irlanda del Norte y Gran Breta, el rango de
frecuencia operativa de 5150MHz-5350MHz solo está permitido en interiores.
Eesti-Tähelepanu: EL-o liikmesriikides, EFTA riikides, Põhja-Iirimaal ja Suurbritannias on sagedusvahemikus 5150MHz-5350MHz
kasutamine lubatud ainult siseruumides.
Dansk-Bemærk: I EU-medlemslandene, EFTA-landene, Nordirland og Storbritannien er drift i frekvensområdet
5150MHz-5350MHz kun tilladt indendørs.
Suomi-Huom: Eu-maissa, EFTA-maissa sekä Isossa-Britanniassa ja Pohjois-Irlannissa taajuusaluetta 5150MHz-5350MH on
sallittua käyttää ainoastaan sisätiloissa.
Hrvatski-Pozornost: U državama članicama EU, zemljama EFTA-e, Sjevernoj Irskoj i Velikoj Britaniji, rad u frekvencijskom rasponu
od 5150MHz-5350MHz dopušten je samo u zatvorenom prostoru.
Latviešu-Uzmanību: ES valstīs, EBTA valstīs, Ziemeļīrijā un Lielbritānijā, operēšana iekštelpās ir atļauta tikai 5150MHz-5350MHz
diapazonā.
Lietuvių-Dėmesio: ES valstybėse narėse, ELPA šalyse, Šiaurės Airijoje ir Didžiojoje Britanijoje 5150MHz-5350MHz in dažn
diapazone leidžiama veikti tik patalpose.
Slovenščina-Pozor: V državah članicah EU, državah EFTA, Severni Irski in Veliki Britaniji je delovanje v frekvenčnem območju
5150MHz-5350MHz dovoljeno samo v zaprtih prostorih.
Íslenska-Athugið: Í aðildarríkjum ESB, EFTA-löndum, Norður-Írlandi og Bretlandi er rekstur á tíðnisviðinu 5150MHz-5350MHz
aðeins leyfður innandyra.
Norsk-OBS: I EUs medlemsland, EFTA-land, Nord-Irland og Storbritannia er drift i frekvensområdet 5150MHz-5350MHz kun tillatt
innendørs.
English-Attention: In EU member states, EFTA countries, Northern Ireland and Great Britain, the operation in the frequency range
5150MHz-5350MHz is only permitted indoors.
Polski-Uwaga: W państwach członkowskich UE, krajach Europejskiego Stowarzyszenia Wolnego Handlu (EFTA), Irlandii Północnej
i Wielkiej Brytanii praca w zakresie częstotliwości 5150MHz-5350MHz jest dozwolona tylko w pomieszczeniach.
Deutsch-Achtung: In den EU-Mitgliedsstaaten, den EFTA-Ländern, Nordirland und Großbritannien ist der Betrieb im
Frequenzbereich 5150MHz-5350MHz nur in Innenräumen erlaubt.
Français-Attention: Dans les États membres de l’UE, les pays de l’AELE, l’Irlande du Nord et la Grande-Bretagne, l’utilisation dans
la gamme de fréquences 5150MHz-5350MHz nest autorisée qu’en intérieur.
Nederlands-Aandacht: In de EU-lidstaten, de EVA-landen, Noord-Ierland en Groot-Brittannië is gebruik in het
5150MHz-5350MHz frequentiebereik alleen binnenshuis toegestaan.
Čeština-Pozor: V členských státech EU, zemích ESVO, Severním Irsku a Velké Británii je provoz ve frekvenčním rozsahu
5150MHz-5350MHz povolen pouze v interiéru.
Română-Atenţie: În statele membre UE, ţările EFTA, Irlanda de Nord și Marea Britanie, operarea în intervalul de frecvenţă
5150MHz-5350MHz este permisă numai în interior.
English: Operating Frequency/Max Output Power
Deutsch: Betriebsfrequenz/Max. Ausgangsleistung
Italiano: Frequenza operativa/Potenza di uscita massima
Español: Frecuencia operativa/Potencia de salida máxima
Português: Frequência de Funcionamento/Potência Máxima de Saída
Français: Fréquence de fonctionnement/Puissance de sortie maximale
Nederlands: Bedrijfsfrequentie/Maximaal uitgangsvermogen
Svenska: Driftsfrekvens/Max Uteffekt
Dansk: Driftsfrekvens/Maks. Udgangseffekt
Suomi: Toimintataajuus/maksimilähtöteho
Magyar: Működési frekvencia/Maximális kimeneti teljesítmény
Polski: Częstotliwość pracy / Maksymalna moc wyjściowa
Русский: Рабочая частота/макс. выодная мощность
Čeština: Provozní frekvence/maximální výstupní výkon
:  /  
Română: Frecvenţa de funcţionare/Puterea maximă de ieșire
Български: Работна честота/максимална изодна мощност
Eesti: Töösagedus/Max väljundvõimsus
Slovenščina: Delovna frekvenca/Največja izhodna moč
Slovenčina: Prevádzková frekvencia/maximálny výstupný výkon
Hrvatski: Radna frekvencija/Maksimalna izlazna snaga
Latviešu: Operējošās frekvences/Maksimālā jauda
Lietuvių: Darbinis dažnis/maksimali išėjimo galia
Türkçe: Çalışma Frekansı/Maks. Çıkış Gücü
2412MHz-2472MHz/20dBm
5150MHz-5350MHz (indoor use only)/23dBm
UK(NI)
UK
AT BE BG CH CZ DE DK EE EL ES FI FR HR HUCY
IS IT LI MT NL NO PL PT RO SE SI SKLT LU LV
IE
Operating Frequency/Max Output Power
IC RSS Warning
This device complies with Innovation, Science and Economic Development Canada licence-exempt RSS
standard (s). Operation is subject to the following two conditions:
(1) this device may not cause interference, and
(2) this device must accept any interference, including interference that may cause undesired operation of
the device.
Le onjunc areil est conforme aux CNR d’ l’innovation, la science et le développement économique Canada
licables aux areils radio exempts de licence. Lexploitation est autorisée aux deux conditions suivantes:
(1) l’areil ne doit pas produire de brouillage, et
(2) l’utilisateur de l’appareil doit accepter tout brouillage radioélectrique subi, onj si le brouillage est
susceptible d’en compromettre le fonctionnement.
Any changes or modifications not expressly approved by the party responsible for compliance could void
the user’s authority to operate the equipment.
Tous les changements ou modifications non expressément approuvée par le responsible de la conformité
pourrait vider l’utilisateur est habilité à exploiter l’équipemen.
ISEDC Radiation Exposure Statement:
This equipment complies with ISEDC RF radiation exposure limits set forth for an uncontrolled
environment. This transmitter must not be co-located or operating in conjunction with any other antenna or
transmitter. This equipment should be installed and operated with minimum distance 20cm between the
radiator& your body
Cet appareil est
conforme aux limitesd’exposition de rayonnement RF ISEDC établiespour un environnement non contrôlé.
Cetémetteur ne doit pas être co-implanté oufonctionner en onjunction avec toute autreantenne ou
transmetteur. La distance entre le radiateur et le corps doit être d'au moins 20 cm lors de l'installation et du
fonctionnement de l'appareil.
Operation of 5150-5350MHz is restricted to indoor use only.
le fonctionnement de 5150-5350MHz est limité à une utilisation en intérieur uniquement.
Indicator Scenario
Indicator
Status Description
Solid greenStartup
Internet
connection
Primary
node
Secondary
node
WPS
Ethernet cable
connection
Blinking green quickly
for 3 seconds
A device is connected to or disconnected from an Ethernet
port of the router.
The system is starting up.
Blinking red quicklyResetting Restoring to factory settings.
Solid green The router is connected to the internet.
Blinking green quickly
Pending for or performing WPS negotiation (valid
within 2 minutes)
Blinking green slowly Not configured and the router is not connected to the internet.
Blinking red slowly Configured but the router failed to connect to the internet.
Blinking orange slowly Configured but not connected to an Ethernet port.
Solid green Networking succeeds. Good connection quality.
Solid orange Networking succeeds. Fair connection quality.
Solid red Networking succeeds. Poor connection quality.
Blinking green slowly Waiting to connect to another node.
Blinking red slowly Configured but the router failed to connect to the internet.
Description
Jack/Port/Button
MESH/RST
WAN/LAN auto-adaptive port. Any Ethernet ports can be functioned as WAN or LAN port.1/2.5GE/2/3/4
Power jack.
POWER
Used to start the WPS negotiation process, or to reset the router.
- : Through the WPS negotiation, you can connect to the Wi-Fi network of the router WPS
without entering the password.
Method: Press the button for about 1-3 seconds, and the indicator blinks green fast. Within
2 minutes, enable the WPS function of the other WPS-supported device to
establish a WPS connection.
- : When it is used as a Mesh networking button, you can extend your network with Mesh
another device that supports the Mesh function.
Method: Press this button for about 1-3 seconds. The indicator blinks green fast, which
indicates the device is searching for another device to form a network. Within 2
minutes, press the button of another device for 1-3 seconds to MESH/WPS
negotiate with this device.
- : Refer to in . Reset method Q4 FAQ


Produkt Specifikationer

Mærke: Tenda
Kategori: Router
Model: TE3L

Har du brug for hjælp?

Hvis du har brug for hjælp til Tenda TE3L stil et spørgsmål nedenfor, og andre brugere vil svare dig


Router Tenda Manualer
Tenda

Tenda TE3L Manual

20 August 2025
Tenda

Tenda RE3L Manual

20 August 2025
Tenda

Tenda G0-5G-PoE Manual

14 August 2025
Tenda

Tenda 4G03 Pro Manual

13 August 2025
Tenda

Tenda 4G05 Manual

13 August 2025
Tenda

Tenda TX12 Manual

13 August 2025
Tenda

Tenda TX2L Pro Manual

12 August 2025
Tenda

Tenda G1 Manual

12 August 2025
Tenda

Tenda 4G06c Manual

12 August 2025
Tenda

Tenda G0-8G-PoE Manual

12 August 2025

Router Manualer

Nyeste Router Manualer

D-Link

D-Link DSL-2745 Manual

19 August 2025
D-Link

D-Link DI-714P+ Manual

19 August 2025
D-Link

D-Link GO-RTW-N300 Manual

19 August 2025
D-Link

D-Link DSL-2542B Manual

19 August 2025
D-Link

D-Link DSL-G804V Manual

19 August 2025
D-Link

D-Link DI-804HV Manual

19 August 2025
D-Link

D-Link DSL-524T Manual

19 August 2025
D-Link

D-Link DIR-815 Manual

19 August 2025
D-Link

D-Link DSL-G624M Manual

19 August 2025