Meteodata 140 S 24V KNX 1409201
Meteodata 140 S 24V GPS KNX 1409204
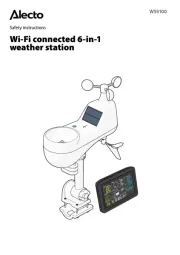
Weather station
307032 04
1. Designated use
2. Safety instructions
The weather station measures temperature, brightness and wind
speed. A rain sensor is also installed on the top of the device. The
device is designed for use on buildings.
Time/date and position can be received via an integrated GPS
module (with Meteodata 140 S 24V GPS KNX – 1409204).
ETS (Engineering Tool Software) enables application programs
to be selected, specific parameters and addresses to be assigned
and transferred to the device.
• Rain is only detected when the rain sensor is sufficiently wet.
There can be a delay between the first raindrops in a shower to
the point where rain is detected.
• When the rain stops, and despite heating, it can take several
minutes before the sensor is dry again and the
device is able to detect that correctly.
• Caution: When it is windy, awnings/blinds take time to retract.
Configure the wind thresholds below the value provided by the
awning/blinds manufacturer.
Rain sensor becomes hot during use
Do not touch the rain sensor.
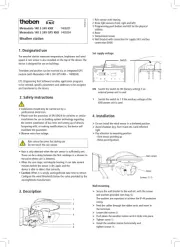
3. Description
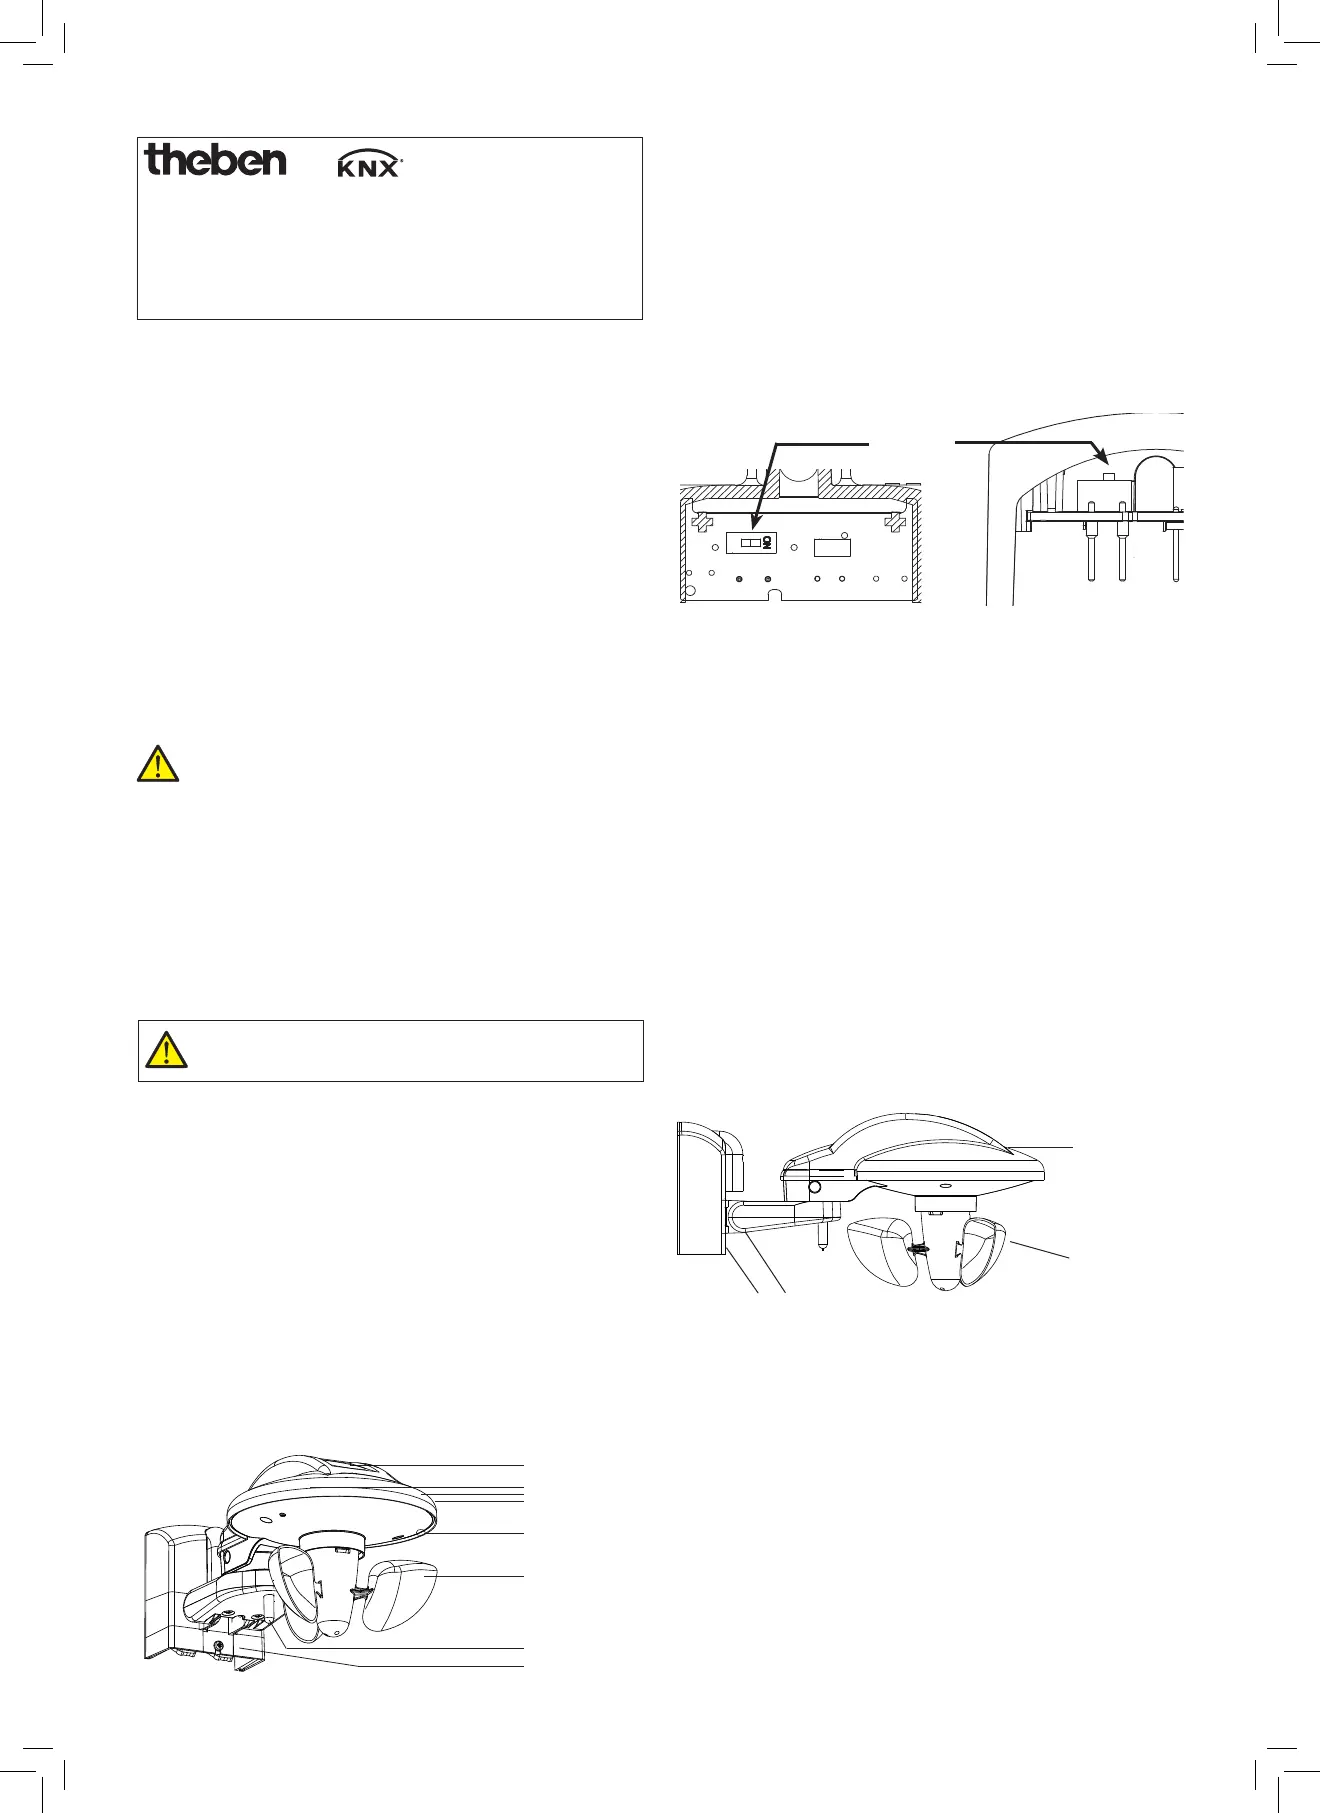
4. Installation
1 Rain sensor with heating
2 three light sensors (front, right and left)
3 Programming push button and LED for the physical
address
4 Rotor
5 Temperature sensor
6 Wall bracket with connection for supply 24 V and bus
connection (KNX)
Do not install the wind sensor in a sheltered position.
Avoid shadows (e.g. from masts etc.) and reflected
light.
Pay attention to mounting position
– Rain sensor pointing up
– Rotor pointing down
Wall-mounting
Secure the wall bracket to the wall etc. with the screws
and washers provided (see chap. 5).
The washers are important to achieve the IP 44 protection
rating.
Feed the cables through the rubber seals and insert in
the terminals.
Loosen the screws
.
Push down the weather station until it clicks into place.
Tighten screw .
Install the weather station horizontally and
tighten screws .
Rain sensor
Rotor
Screws:
Installation should only be carried out by a
professional electrician.
Please note the provisions of EN 50428 for switches or similar
installations for use in building system technology regarding
the correct installation of bus lines and setting up of devices.
Tampering with, or making modifications to, the device will
invalidate the guarantee.
Observe extra-low voltage.
1
2
3
4
6
5
ON Switch the switch to ON (factory setting) if an
external power unit is used
Switch
1 Switch the switch to 1 if the auxiliary voltage of the
KNX power unit is used
Set supply voltage