240426
ASSEMBLY AND INSTALLATION
INSTRUCTIONS
NOTES: 1. Before installing, consult local electrical codes for wiring and grounding requirements.
2. Read and save this instruction.
P0428
WARNING:
TO AVOID RISK OF ELECTRICAL SHOCK, BE SURE TO SHUT OFF
POWER WHILE INSTALLING OR SERVICING THIS FIXTURE.
Turn off the power at fuse or circuit box.
Turn on the power at fuse or circuit box.
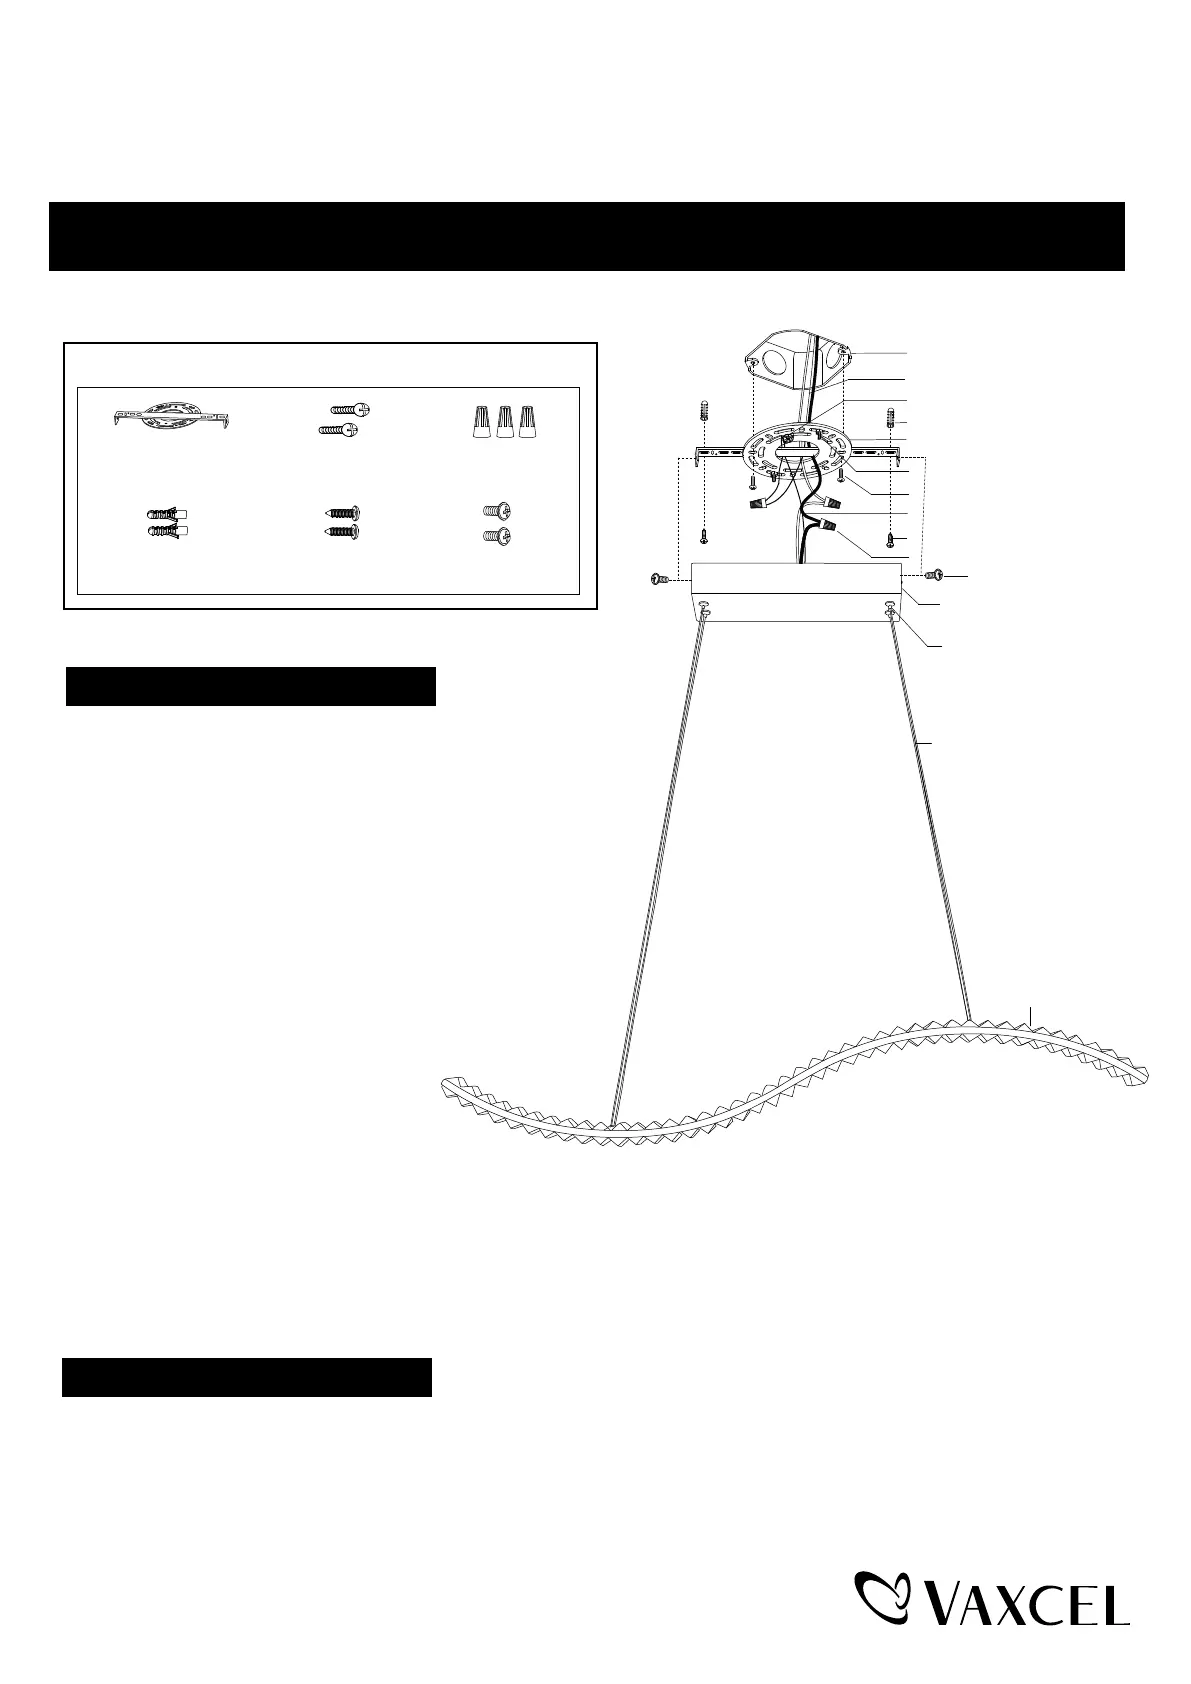
Installation Steps
House Ground Wire
Fixture Ground Wire
Fixture Mounting Screw
Set Screw (F)
Wire Connector (C)
Mounting Plate Unit (A)
Anchor (D)
Green Ground Screw
Mounting Screw (B)
Outlet Box
Drywall Screw (E)
Hardware Package (included):
Mounting Screw (B) Wire Connector (C)Mounting Plate Unit (A)
Anchor
(D)
Drywall Screw
(E)
Set Screw
(F)
Canopy
Button
Steel Wire
Clear Crystal
1. Connect mounting plate unit (A) to the outlet box
with two mounting screws (B), and secure it to the
celling with drywall screws (E) and anchors (D).
2. Adjusting the steel wires and fixture wire length:
a. Reduce the steel wires and fixture wire length:
Push the steel wires and fixture wire into the canopy to
adjust the steel wires and fixture wire the desired length.
b. Increase the steel wires and fixture wire length:
Press the buttons under the canopy, pull the steel wires and
fixture wire from the canopy to adjust the steel wires to
desired length. Release the buttons to hold the steel wires
and fixture wire in position as shown in the diagram.
After adjusting the length of the cables and wires, the
remaining cables and wires are
arranged and placed in the canopy.
4. Pull out the source wires from the outlet box.
Make wire connections using wire connectors (C) as follows:
---Connect the hot wire (black insulation) from the fixture to the black wire from the power source.
---Connect the neutral wire (white insulation) from the fixture to the white wire from the power source.
---Attach the fixture ground wire (bare wire) to the mounting strap unit (A) with the green ground screw, then connect it
to the house ground wire with the wire connector (C).
Carefully put the wires back into the outlet box.
4. Fasten the canopy to the mounting plate
unit (A)
with two side set screws (F).
Note: Dimming range: 100% full illumination to 10% of full illumination.
This fixture is dimmable with a forward phase electronic dimmer. Dimmers tested to be compatible
with this fixture are the Lutron: TGCL-153PH, MACL-153MH, SCL-153P, DVWCL-153PH.
If you are unfamiliar with electrical installations, it is recommended you have a qualified electrician
for your installations.
Page 1 / 2


