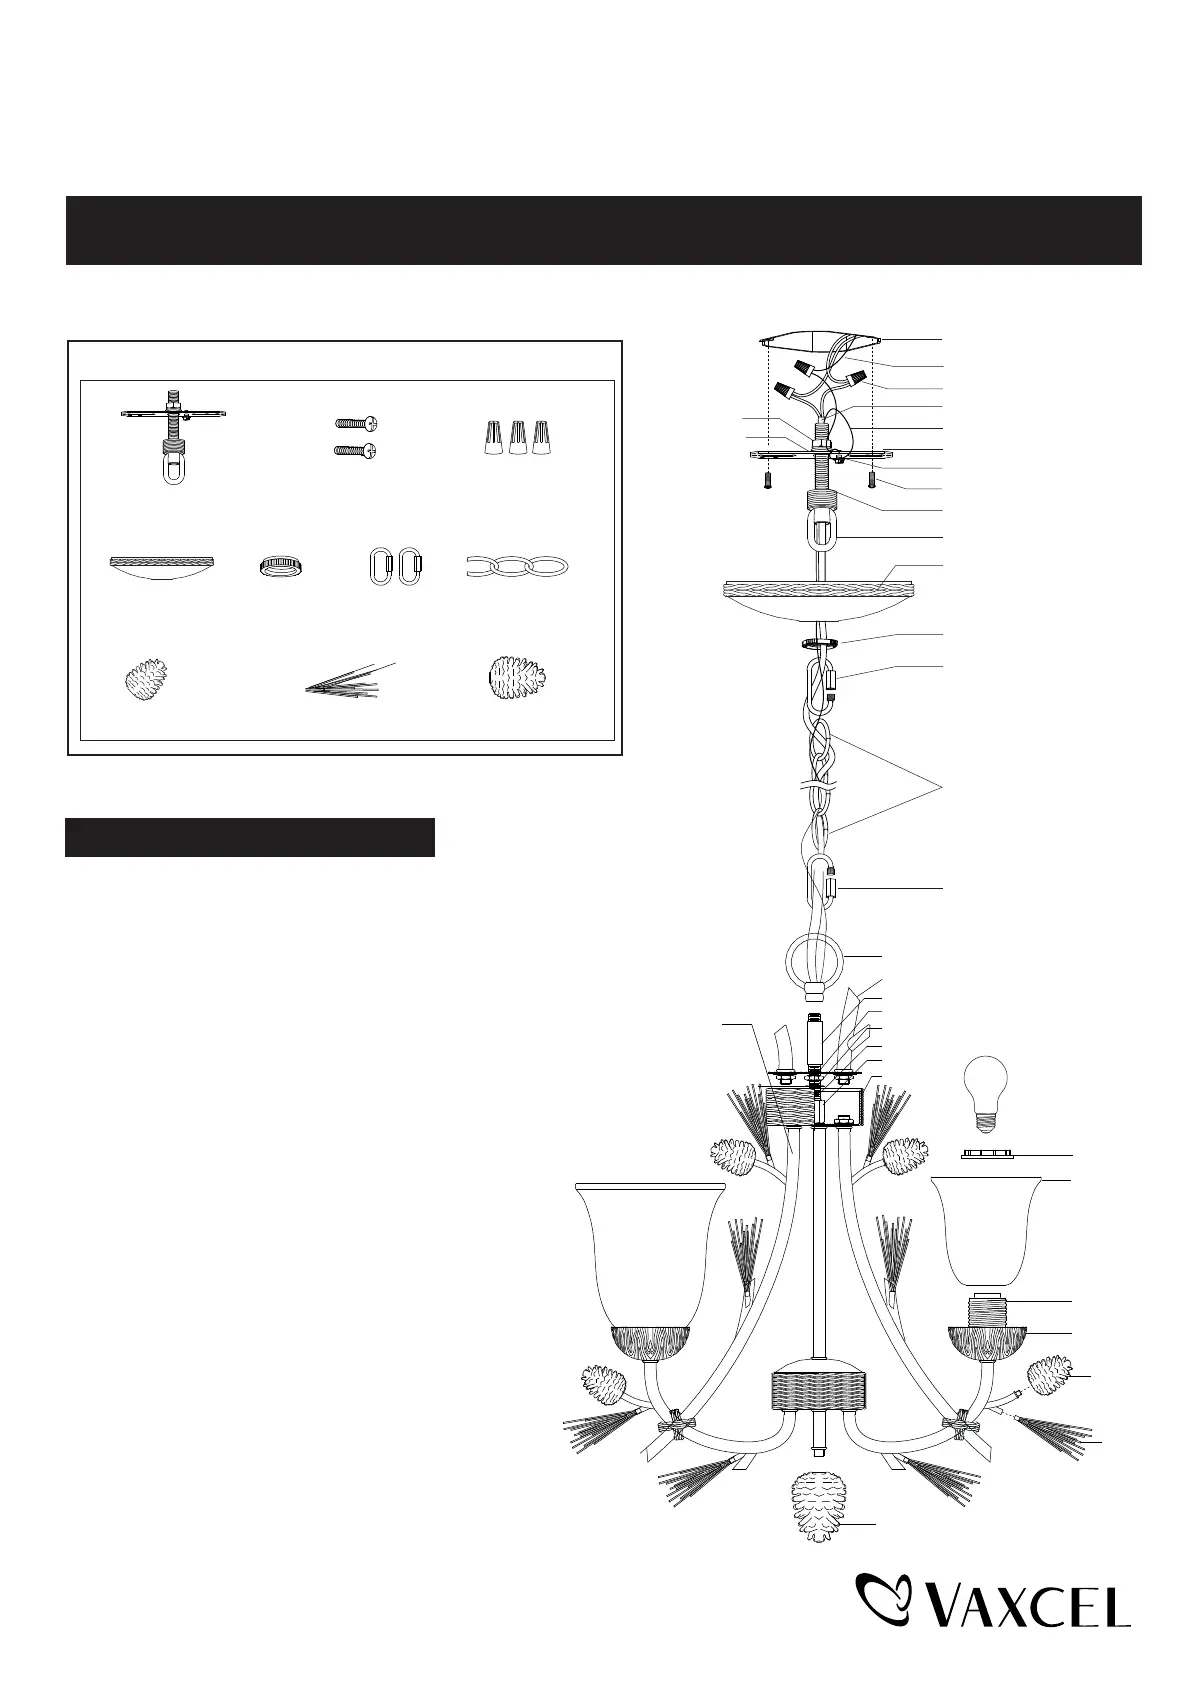
Glass Shade
Sockert
Glass Holder
Small Pine
Cone(H)
Pine
Needle
(I)
Middle Pine Cone (J)
Socket ring
ASSEMBLY AND INSTALLATION
INSTRUCTIONS
NOTES: 1. Before installing, consult local electrical codes for wiring and grounding requirements.
2. READ AND SAVE THESE INSTRUCTIONS.
H0172
WARNING:
TO AVOID RISK OF ELECTRICAL SHOCK, BE SURE TO SHUT OFF
POWER BEFORE INSTALLING OR SERVICING THIS FIXTURE.
Turn off the power at fuse or circuit box
Installation Steps
Hardware Package (included):
Outlet Box
House Ground Wire
Wire Connector (C)
Fixture Wire
Fixture Ground Wire
Mounting Strap Unit (A)
Green Ground Screw
Mounting Screw (B)
Threaded Pipe
Canopy (D)
Top Loop
Hex Nut(E)
Washer(F)
Collar (E)
Quick Link (F)
Quick Link (F)
Washer
Threaded Pipe
Bottom Arm
Chain(G)
Pine Needle (I)12pcsSmall Pine Cone (H) 6pcs Middle Pine Cone (J)1pc
1. Attach mounting strap unit (A) to outlet box using two mounting screws (B).
2. Slip the top arm assembly down through the threaded pipe to fixture.
3. Adjust the arms of the fixture according to the picture
on the package.
Important:
a. The bottom arms should be positioned with
equal distances between them.
b. The bottom arms should be fixed securely.
c. Each top arm is supposed to be alighed with
the corresponding bottom arm.
4. Slip the tube down through the threaded pipe,
and then secure it with loop.
5. Choose the length of the chain (G) you need, then
weave the fixture wire and the fixture ground wire
through the chain (G), collar (E) and canopy (D).
6. Connect one end of the chain (G) to the loop by
using a quick link (F).
7. Connect the other end of the chain (G) to the top
loop by using another quick link (F).
8. Thread the fixture wire and fixture ground wire through the
top loop, threaded pipe and mounting strap unit (A).
Page 1 / 2
241105
Max. 60W Medium
Base bulb
(not included)
Loop
Top Arm Assembly
Tube
Hex Nut
Coupling
Fixture
Mounting Strap Unit (A) Wire Connector (C)
Collar (E)
Mounting Screw (B)
Canopy (D)
Quick Link (F)
Chain (G)


