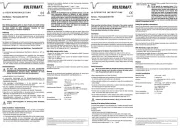
Voltcraft DET3R Manual


Læs gratis den danske manual til Voltcraft DET3R (4 sider) i kategorien Termometer. Denne vejledning er vurderet som hjælpsom af 61 personer og har en gennemsnitlig bedømmelse på 4.0 stjerner ud af 31 anmeldelser. Har du et spørgsmål om Voltcraft DET3R, eller vil du spørge andre brugere om produktet?

Side 1/4
B E D I E N U N G S A N L E I T U N G °
Version 03/14
Elektronisches Einstichthermometer DET3R
Best.-Nr. 123320
1. Funktionen
Aktuelle Temperatur, MAX/MIN/HOLD
T 90 Messzeit ca. 8 Sek.
Abschaltautomatik mit Dauermessfunktion
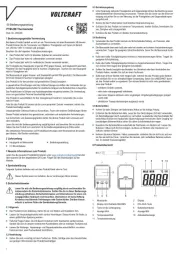
Einstichfühler 105 mm Wasserdicht, kalibrierfähig Für Haushalt, Beruf und Hobby, auch
für Lebensmittel gemäß HACCP • Mit Kunststoffhülse und Klipp • Batterie inklusive
2. Tasten
1 ON/OFF Taste
2 MAX/MIN/HOLD Taste
3 °C/°F Taste
3. Gehäuse
4 Batteriefach
5 Kunststoffhülse
6 Klipp
4. Bedienung
Entfernen Sie die Schutzfolie vom Display.
Öffnen Sie das Batteriefach, indem Sie den Deckel mit Hilfe einer Münze entgegen dem
Uhrzeigersinn drehen (Pfeilrichtung: OPEN).
Legen Sie die Knopfzellen-Batterie (LR 44) mit dem „+“-Pol nach oben ein.
Schließen Sie das Batteriefach wieder (Pfeilrichtung: CLOSE).
Alle Segmente werden kurz angezeigt.
Das Gerät ist nun funktionsbereit.
Das Display zeigt die momentan gemessene Temperatur an.
Der Sensor befindet sich in der Sondenspitze.
Drücken Sie die Taste im Normalmodus.MAX/MIN/HOLD
HOLD erscheint auf dem Display.
Es wird die gemessene Temperatur festgehalten.
Drücken Sie die Taste dreimal, gelangen Sie in den Normalmodus zurück.MAX/MIN/HOLD
4.1 MAX/MIN Funktion
Drücken Sie die Taste zweimal im Normalmodus und es erscheint dieMAX/MIN/HOLD
maximale Temperatur seit der letzten Rückstellung (MAX).
Drücken Sie noch einmal die Taste und es erscheint die minimaleMAX/MIN/HOLD
Temperatur seit der letzten Rückstellung (MIN).
Drücken Sie noch einmal die Taste und Sie kehren in den NormalmodusMAX/MIN/HOLD
zurück.
Steigt oder fällt die Temperatur im Max./Min. Modus über oder unter den angezeigten Wert,
erfolgt ein dynamisches Update.
Zur Löschung der gespeicherten maximalen und minimalen Werte halten Sie die
MAX/MIN/HOLD Taste für 3 Sekunden im entsprechenden Modus gedrückt, während MAX
bzw. MIN angezeigt wird.
“---” erscheint auf dem Display.
Mit der Taste kehren Sie zurück in den Normalmodus.MAX/MIN/HOLD
4.2 Abschaltung
Drücken Sie die Taste für 2 Sekunden.ON/OFF
OFF blinkt im Display.
Das Gerät schaltet sich aus.
Bei Nichtbenutzung schaltet sich das Gerät nach ca. 10 Minuten aus.
4.3 Umschalten °C/°F
Drücken Sie mit einem spitzen Gegenstand den grauen Knopf in der Öffnung auf der
Rückseite, um zwischen °C (Celsius) und °F (Fahrenheit) als Maßeinheit für die Temperatur
zu wählen.
4.4 Langzeit-Messungen
Drücken Sie die Taste für 3 Sekunden im Normalmodus.MAX/MIN/HOLD
X erscheint im Display.
Die automatische Abschaltfunktion ist deaktiviert.
Halten Sie die Taste gedrückt, wird die automatische AbschaltfunktionMAX/MIN/HOLD
wieder aktiviert.
5. Kalibrierung
Drücken Sie die Taste.ON/OFF
Stecken Sie die Fühlerspitze des Gerätes für 3 Minuten in ein Gefäß mit Eiswasser bis die
Temperatur sich nicht mehr verändert (±2°C).
Herstellung von Eiswasser: Thermoskanne mit möglichst klein gestoßenen Eiswürfeln kom-
plett füllen. Danach die Thermoskanne mit kaltem Wasser auffüllen, so dass keine Luft mehr
in den Zwischenräumen ist. Nach ca. 30 Minuten hat sich eine Temperatur von 0°C (+0,1°C)
im Eiswasser der Thermoskanne gebildet. Je nach Qualität der Thermoskanne bleibt die
Temperatur bis zu 24 Stunden konstant.
Beachten Sie dabei, dass der Fühler mindestens zu zwei Drittel seiner nge eingetaucht ist.
Halten Sie die °C/°F Taste gedrückt (ca. 3 Sek), um in den Kalibrierungsmodus zu gelangen.
CAL erscheint auf dem Display.
Warten Sie, bis die Temperaturanzeige 0°C (±0,5°C) anzeigt.
Halten Sie die °C/°F Taste gedrückt, bis 0°C auf dem Display erscheint.
Das Gerät ist nun kalibriert.
Durch Loslassen der °C/°F Taste kehren Sie in den Normalmodus zurück.
6. Batteriewechsel
• Tauschen Sie die Batterie aus, wenn das Batteriesymbol erscheint.
• Verwenden Sie Alkaline Batterien. Vergewissern Sie sich, dass die Batterie polrichtig einglegt
ist. Schwache Batterien sollten möglichst schnell ausgetauscht werden, um ein Auslaufen der
Batterien zu vermeiden. Batterien enthalten gesundheitsschädliche Säuren. Beim Hantieren
mit ausgelaufenen Batterien Schutzhandschuhe und Schutzbrille tragen!
7. Instandhaltung
Bewahren Sie das Gerät an einem trockenen Platz auf.
Setzen Sie das Gerät keinen extremen Temperaturen, Vibrationen und Erschütterungen aus.
Reinigen Sie das Gerät mit einem weichen, leicht feuchten Tuch. Keine Scheuer- oder
Lösungsmittel verwenden!
Wenn das Gerät nicht einwandfrei funktioniert, tauschen Sie die Batterie aus.
8. Bestimmungsgemäßer Einsatz, Haftungsausschluss,
Sicherheitshinweise
Das Gerät ist kein Spielzeug. Bewahren Sie es außerhalb der Reichweite von Kindern auf.
Dieses Gerät ist nicht für medizinische Zwecke oder zur öffentlichen Information geeignet.
Die technischen Daten dieses Produktes können ohne vorherige Benachrichtigung geändert
werden.
Unsachgemäße Behandlung oder nicht autorisiertes Öffnen des Gerätes führt zum Verlust
der Gewährleistung/Garantie.
9. Entsorgung
a) Allgemein
Entsorgen Sie die Produkte am Ende Ihrer Lebensdauer gemäß den geltenden
gesetzlichen Bestimmungen.
b) Batterien und Akkus
Als Endverbraucher sind Sie gesetzlich zur Rückgabe aller gebrauchten(Batterieverordnung)
Batterien und Akkus verpflichtet; eine Entsorgung über den Hausmüll ist untersagt.
Schadstoffhaltige Batterien, Akkus sind mit nebenstehenden Symbolen gekenn-
zeichnet, die auf das Verbot der Entsorgung über den Hausmüll hinweisen. Die
Bezeichnungen für das ausschlaggebende Schwermetall sind = Cadmium, Cd Hg
= Quecksilber, = Blei. Pb
Verbrauchte Batterien, Akkus sowie Knopfzellen können Sie unentgeltlich bei den
Sammel stellen Ihrer Gemeinde, unseren Filialen oder überall dort abgeben, wo
Batterien/Akkus/ Knopfzellen verkauft werden!
Sie erfüllen damit die gesetzlichen Verpflichtungen und leisten Ihren Beitrag zum Umweltschutz!
10. Technische Daten
Messbereich: -40°C bis +250°C (-40°F bis 482°F)
Betriebstemperatur: -20°C bis +50°C (-4°F bis 122°F)
Genauigkeit: ±0,5°C bei -10°C…100°C (14°F…212°F),ansonsten ±1,0°C
Batterie: LR 44 Knopfzelle
Abschaltfunktion: automatisch nach 10 Minuten
햲 햳
햷 햴
Impressum
Diese Bedienungsanleitung ist eine Publikation der Conrad Electronic SE, Klaus-Conrad-Str. 1, D-92240 Hirschau (www.conrad.com).
Alle Rechte einschließlich Übersetzung vorbehalten. Reproduktionen jeder Art, z. B. Fotokopie, Mikroverfilmung, oder die Erfassung in elektro-
nischen Datenverarbeitungsanlagen, bedürfen der schriftlichen Genehmigung des Herausgebers. Nachdruck, auch auszugsweise, verboten.
Diese Bedienungsanleitung entspricht dem technischen Stand bei Drucklegung. Änderung in Technik und Ausstattung vorbehalten.
© Copyright 2014 by Conrad Electronic SE.
O P E R A T I N G I N S T R U C T I O N S °
Version 03/14
Electronic Puncture Thermometer DET3R
Item-No. 123320
1. Functions
Present temperature, MAX/MIN/HOLD
T 90 Measuring time approx. 8 s
Automatic shutdown with permanent measuring function
Puncture probe 105 mm watertight, can be calibrated For home, profession and hobby,
also for food according to HACCP • With plastic casing and clip • Battery provided
2. Keys
1 ON/OFF button
2 MAX/MIN/HOLD button
3 °C/°F button
3. Housing
4 Battery compartment
5 Plastic casing
6 Clip
4. Operation
Remove the protection foil from the display.
Open the battery compartment by turning the lid counter clockwise using a coin (direction of
arrow: OPEN).
Insert the button cell battery (LR 44) with the „+“ pole up.
Close the battery compartment. (Direction of arrow: CLOSE).
All segments are shown briefly.
The device is now ready for use.
The display shows the actual measured temperature.
The sensor is at the tip of the probe.
Press the button in normal mode.MAX/MIN/HOLD
HOLD will appear on the display.
The measured temperature is being stored.
Press the button three times to return to the normal operating mode.MAX/MIN/HOLD
4.1 MAX/MIN function
Press the button twice in the normal mode and the maximum temperatureMAX/MIN/HOLD
measured since the last reset (MAX) is shown.
Press the button again and the minimum temperature measured since theMAX/MIN/HOLD
last reset (MIN) is shown.
Press the button again to return to the normal operating mode.MAX/MIN/HOLD
If the temperature is rising or falling in Max./Min.-operating mode respectively deviating from
the shown value a dynamic update will occur.
To delete the stored values of maximum and minimum temperature, you have to hold the but-
ton for 3 seconds in the respective mode, while MAX or MIN is displayed.MAX/MIN/HOLD
„—-“ will appear on the display.
Press the button to return to the normal operating mode.MAX/MIN/HOLD
4.2 Shutdown
Press the key for 2 seconds.ON/OFF
OFF flashes on the display.
The device switches off.
If not in use, the device turns off after approx. 10 minutes.
4.3 Conversion switch °C/°F
Use a pointy item to press the gray button in the opening on the back of the device in order
to change between °C (Celsius) and °F (Fahrenheit) as measuring unit for the temperature.
4.4 Long term measurements
Press the button in normal mode for 3 seconds.MAX/MIN/HOLD
X appears in the display.
The automatic shutdown function is deactivated.
If you press the button the automatic shutdown function will be reactivated.MAX/MIN/HOLD
5. Calibration
Press the key.ON/OFF
Insert the measuring probe of the device for about 3 minutes into a vessel with ice water until
the temperature no longer changes (±2°C).
Production of ice water: Fill a thermos flask completely with crushed ice. Afterwards, fill up the
thermos flask with cold water in such a way that no air is trapped. After approx. 30 minutes,
the ice water temperature reaches 0°C (+0.1°C) in the thermos flask. Depending on the qual-
ity of thermos flask, the temperature will remain constant for up to 24 hours.
Observe the probe to be immersed by at least two third of its length.
Keep pressing the button °C/°F (approx. 3 s) in order to open the calibration mode.
CAL will appear on the display.
Wait until the temperature displayed shows 0°C (±0,5°C).
Keep pressing the button °C/°F until 0°C appears on the display.
The device is now calibrated.
By releasing the °C/°F button, you return to the normal mode.
6. Replacing the battery
• Replace the battery if the battery symbol appears.
• Use alkaline batteries. Ensure that the batteries to be inserted have the correct polarity. Weak
batteries should be replaced as soon as possible in order to avoid leaking of the battery.
Batteries contain harmful acids. When handling leaked batteries, use protective gloves and
goggles!
7. Maintenance
Store the device in a dry place.
Do not expose the product to high temperature and strong vibrations.
The device should only be cleaned with a soft, slightly damp cloth. Do not use an abrasive
agent or solvents!
If the device does not work faultlessly, replace the battery.
8. Intended Use
The device is not a toy. Keep it out of the reach of children.
This device is not intended to be used for medical purpose or for public information.
The technical data of this device can be altered without prior notice.
Improper handling or unauthorised opening of the device will void the warranty.
9. Disposal
a) In general
Please dispose of the device when it is no longer of use, according to the current
statutory requirements.
b) Batteries and rechargeable batteries
As a consumer, you are required to responsibly dispose of all used bat-(Battery Ordinance)
teries and rechargeable batteries; it is forbidden to throw them away in household waste!
Contaminated batteries/rechargeable batteries are labelled with these symbols to
indicate that disposal in household waste is forbidden. The designations for the
heavy metals involved are: = Cadmium, = Mercury, = Lead. Cd Hg Pb
You can return used batteries, rechargeable batteries and button cells free of
charge to any authorised disposal station in your area, in our stores or in any oth-
er store where batteries/rechargeable batteries/button cells are sold!
Thus, you fulfil the legal requirements and contribute to protecting the environment!
10. Technical Data
Measuring range: -40°C to +250°C (-40°F to 482° F)
Operating temperature: -20°C to +50°C (-4°F to 122° F)
Accuracy : ±0,5°C at -10°C…100°C (14°F…212°F),otherwise ±1,0°C
Battery: LR 44 button cell
Shutdown function: automatically after 10 minutes
Legal notice
These operating instructions are a publication by Conrad Electronic SE, Klaus-Conrad-Str. 1, D-92240 Hirschau (www.conrad.com).
All rights including translation reserved. Reproduction by any method, e.g. photocopy, microfilming, or the capture in electronic data processing
systems require the prior written approval by the editor. Reprinting, also in part, is prohibited.
These operating instructions represent the technical status at the time of printing. Changes in technology and equipment reserved.
© Copyright 2014 by Conrad Electronic SE.
햲 햳
햷 햴


Produkt Specifikationer

Mærke: Voltcraft
Kategori: Termometer
Model: DET3R

Har du brug for hjælp?

Hvis du har brug for hjælp til Voltcraft DET3R stil et spørgsmål nedenfor, og andre brugere vil svare dig


Termometer Voltcraft Manualer

Termometer Manualer

Nyeste Termometer Manualer

CDN

CDN DTL572 Manual

14 Juni 2025
CDN

CDN TCF400 Manual

14 Juni 2025
CDN

CDN IN1022 Manual

14 Juni 2025
CDN

CDN IN482 Manual

14 Juni 2025
CDN

CDN DTC450 Manual

14 Juni 2025
Comark

Comark N9002 Manual

13 Juni 2025
CDN

CDN TCG400 Manual

13 Juni 2025
CDN

CDN TCH130 Manual

13 Juni 2025