Transmit frequency Baby unit: 2412 - 2472 MHz
Parent unit: 2412 - 2472 MHz
Nominal effective range Maximum power allowed by FCC and IC. Actual operating range may
vary according to environmental conditions at the time of use.
Power requirement Baby unit power adapter: Output: 5V DC, 1.5A
Parent unit power adapter: Output: 5V DC, 2A
Parent unit battery: 3.7V 5000mAh, 18.5Wh Lithium-ion battery
Specifications are subject to change without notice.
© 2023 VTech Technologies Canada Ltd.
All rights reserved. 03/23. VC2105_CA_QSG_V1
are trademarks of Google Inc.
App Store is a trademark of Apple Inc., registered in the U.S. and other countries.
IOS is a trademark or registered trademark of Cisco in the U.S. and other countries and is used under license.
on purchasing your new VTech product.
Before using this baby monitor, please read the Important safety instructions.
Over-the-Crib Mount Monitor
What does HD Video Monitor do?
VTech 5” Smart Nursery Over-the-Crib Mount Monitor allows you to stay close to your
baby when you are on the move or away. This monitor is Wi-Fi enabled, using your home
wireless network to stream live video and audio through the 1080p baby unit and 5-inch
color screen parent unit. It allows you to maintain a constant connection to your baby.
You can also monitor from your smartphone or mobile tablet.
VTech 5” Smart Wi-Fi 1080p Video Monitor uses MyVTech Baby Plus app to let you
instantly see and hear what’s happening with your baby from anywhere in the world. The
app can be downloaded from the App Store or the Google Play
Go to www.vtechcanada.com for
the latest VTech product news.
Our products are NOT medical devices. They are not intended for use as medical devices or to replace
medical devices. They shall not be relied upon for any type of clinical monitoring. They are not designed
to and are not intended to diagnose, treat, cure, mitigate, alleviate or prevent any disease or other condi-
tion, including but not limited to, sudden infant death syndrome (SIDS).
Our products are only intended to assist you in tracking your baby’s general sleep patterns. False positive
or false negative readings about your baby’s sleep patterns are a potential risk of our products. Our prod-
ucts are not a substitute for medical consultation and treatment or adult supervision and care.
The applied nameplate is located at the bottom of the baby unit’s base.
When using your equipment, basic safety precautions should
always be followed to reduce the risk of fire, electric shock and
injury, including the following:
1. Follow all warnings and instructions marked on the product.
2. Adult setup is required.
3. CAUTION: Do not install the baby unit at a height above 6.5
4. This product is intended as an aid. It is not a substitute for
responsible and proper adult supervision and should not be
5. This product is not intended for use as a medical monitor.
6. Do not use this product near water, for example, near to a
bath, sink, swimming pool or shower.
7. CAUTION: Use only the battery provided. There may be a risk
of explosion if a wrong type of battery is used for the parent
unit. The battery cannot be subjected to high or low extreme
temperature and low air pressure at high altitude during
use, storage or transportation. Disposal of battery in fire or
a hot oven, mechanically crushing or cutting the battery can
result in an explosion. Leaving the battery in an extremely
high temperature surrounding environment can result in an
explosion or the leakage of flammable liquid of gas. Battery
subjected to extremely low air pressure may result in an
explosion or the leakage of flammable liquid or gas. Dispose
of used battery according to the information in . The RBRC seal
8. Use only the power adapters included with this product.
Incorrect power adapter polarity or voltage can seriously
Power adapter information:
Baby Unit Output: 5V DC 1.5A
VTech Telecommunications Ltd.
Parent Unit Output: 5V DC 2A
VTech Telecommunications Ltd.
Rechargeable battery information:
3.7V 5000mAh, 18.5Wh Lithium-ion battery
Zhuhai Great Power Energy Co., Ltd.
Model: GSP806090-5Ah-3.7V-1S1P
9. The power adapter is intended to be correctly oriented in a
vertical or floor mount position. The prongs are not designed
to hold the plug in place if it is plugged into a ceiling, under-
the-table or cabinet outlet.
10. For pluggable equipment, the socket-outlet (power adapter)
should be installed near the equipment and should be easily
11. Unplug this product from the wall outlet before cleaning.
Do not use liquid or aerosol cleaners. Use a damp cloth for
12. Do not modify the power adapters or replace with other
adapters, as this causes a hazardous situation.
13. Do not allow anything to rest on the power cords. Do not
install this product where the cords may be walked on or
14. This product should be operated only from the type of power
source indicated on the marking label. If you are not sure of
the type of power supply in your home, consult your dealer or
electricity supply provider.
15. Do not overload wall outlets or use an extension cord.
16. Do not place this product on an unstable table, shelf, stand or
17. This product should not be placed in any area where proper
ventilation is not provided. Slots and openings in the back or
bottom of this product are provided for ventilation. To protect
them from overheating, these openings must not be blocked
by placing the product on a soft surface such as a bed, sofa
or rug. This product should never be placed near or over a
18. Never push objects of any kind into this product through the slots
because they may touch dangerous voltage points or create a
short circuit. Never spill liquid of any kind on the product.
19. To reduce the risk of electric shock, do not disassemble
this product, but take it to an authorized service facility.
Disassembling or removing parts of the product other than
via the battery door may expose you to dangerous voltages
or other risks. Incorrect reassembling can cause electric shock
when the product is subsequently used.
20. You should test the sound reception every time you turn on
the units or move one of the components.
21. Periodically examine all components for damage.
22. There is a very low risk of privacy loss when using certain
electronic devices, such as baby monitors, cordless
telephones, etc. To protect your privacy, make sure the
product has never been used before purchase, reset the baby
monitor periodically by powering off and then powering
on the units, and power off the baby monitor if you are not
intending to use it for some time.
23. Children should be supervised to ensure that they do not play
24. The small parts of this monitor can be swallowed by babies or
small children. Keep these parts out of reach of children.
25. The product is not intended for use by persons (including
children) with reduced physical, sensory or mental capabilities,
or lack of experience and knowledge, unless they have
been given supervision or instruction concerning use of the
appliance by a person responsible for their safety.
• Use and store the product at a temperature between 32
• Mishandling batteries can cause burn, fire or explosion
• Batteries should not be exposed to excessive heat such as
• Do not expose the product to extreme cold, heat or direct
sunlight. Do not put the product close to a heating source.
• Warning—Strangulation Hazard—Children
have STRANGLED in cords. Keep this cord out of
the reach of children (more than 3 ft (0.9m) away).
Do not remove warning label on the adapter cord.
• Never place the camera unit(s) inside the baby’s crib or
playpen. Never cover the camera unit(s) or parent unit with
anything such as a towel or a blanket.
• Other electronic products may cause interference with your
camera unit. Try installing your camera unit as far away from
these electronic devices as possible: wireless routers, radios,
cellular telephones, intercoms, room monitors, televisions,
personal computers, kitchen appliances and cordless
Precautions for users of implanted cardiac pacemakers
Cardiac pacemakers (applies only to digital cordless devices):
Wireless Technology Research, LLC (WTR), an independent
research entity, led a multidisciplinary evaluation of the
interference between portable wireless devices and implanted
cardiac pacemakers. Supported by the U.S. Food and Drug
Administration, WTR recommends to physicians that:
• Should keep wireless devices at least six inches from the
• Should NOT place wireless devices directly over the
pacemaker, such as in a breast pocket, when it is turned ON.
WTR’s evaluation did not identify any risk to bystanders with
pacemakers from other persons using wireless devices.
Electromagnetic elds (EMF)
This VTech product complies with all standards regarding
electromagnetic fields (EMF). If handled properly and according
to the instructions in this user’s manual, the product is safe to be
used based on scientific evidence available today.
Important safety instructions
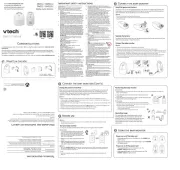
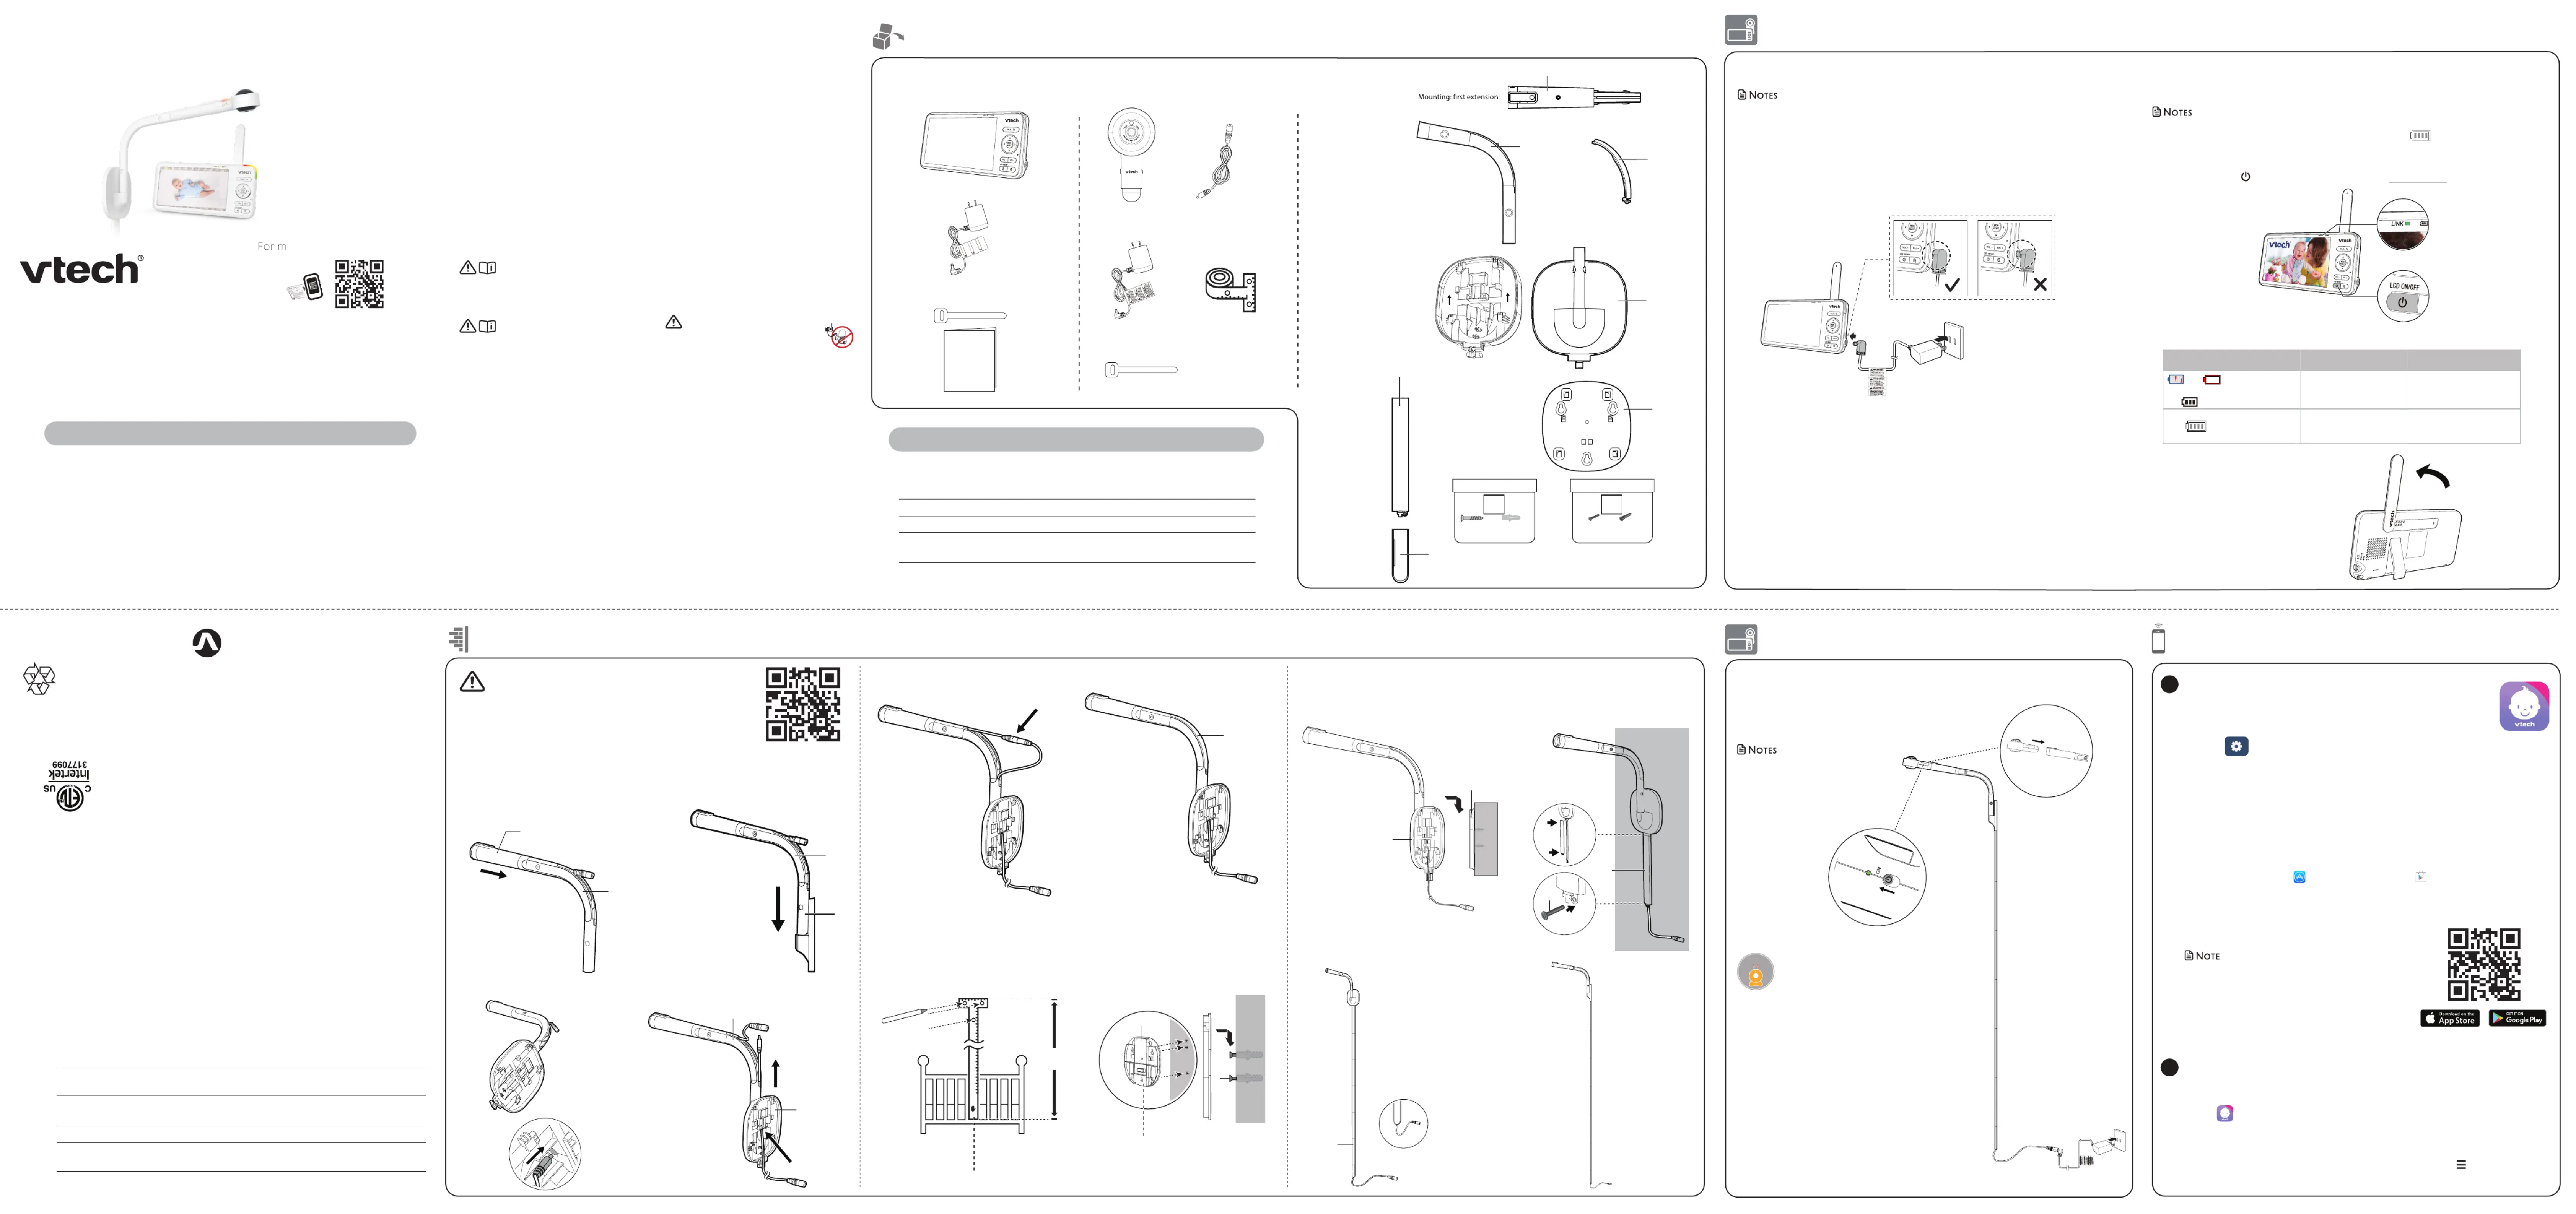
Your baby monitor package contains the following items. Save your sales receipt and original
packaging in the event warranty service is necessary.
MyVTech Baby Plus mobile app
Wi-Fi router 2.4GHz 802.11 b/g/n
1.5 Mbps @ 720p or 2.5 Mbps @1080p upload
Strangulation
Hazard
Keep this cord out of reach of children.
The cord needs to be at least three feet
away from the child at all times. Do not
use with an extension cord. Do not
remove this tag.
Éloignez ce cordon des enfants. Le
cordon doit se trouver à au moins trois
pieds d’un enfant et ce, en tout temps.
N’utilisez pas de rallonge. Ne retirez pas
cette étiquette.
Mantenga este cable fuera de la alcance
de los niños. Este cable debe estar por
lo menos tres pies fuera de la alcance
del niño en todo momento. No lo use
con una extensión inalámbrica. No quite
esta etiqueta.
Risque
d’étranglement
Riesgo de
estrangulación
Install the Baby Unit onto the First extension, and connect the adapter to the end of the cable
and the power supply to power up the Baby Unit.
Install and power on the baby unit
Slide the switch to to power ON
• When powering up, the Baby Unit’s
status LED turns on. It will turn off
after a while and remains off.
• The status LED is set to off by default.
Connect, charge and power on the parent unit
• The rechargeable battery in the parent unit is built-in.
• Use only the power adapters supplied with this product.
• Make sure the parent unit and the baby unit are not connected to the switch controlled electric outlets.
• Connect the power adapters in a vertical or floor mount position only. The adapter prongs are not
designed to hold the weight of the parent unit and the baby unit, so do not connect them to any ceiling,
under-the-table, or cabinet outlets. Otherwise, the adapter may not properly connect to the outlets.
• Make sure the parent unit, the baby unit and the power adapter cords are out of reach of children.
Charge the parent unit battery before use
The parent unit runs on an internal rechargeable battery or AC power. To continuously monitor
your baby, keep the parent unit connected to AC power.
• Before using the baby monitor for the first time, charge the parent unit battery for 12 hours. When the
parent unit battery is fully charged, the battery icon segments are solid .
• The standby time varies depending on your actual use.
The parent unit turns on automatically after connecting to the power socket, and the welcome screen
Power to turn the parent unit on or press and hold to turn it off.
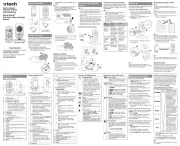
Mounting: second extension
(inside bag with label) (inside bag with label)
1. Insert the First extension (A) onto the Second
extension (B), aligning the slot in between. Make
sure the DC socket is out on opening of the
Second extension and ready for connection.
• Wall mount should be 1m above the bed sheet level or baby, and 1.7m
above the floor. You can use the mounting template (a paper ruler) for
• Wall mount should install on the long side of the bed.
2. Insert the Second extension (B) onto
3. Let the cable jack of the Extension cable pass through from the back of
the Mounting cover (D), to the opening of the Second extension (B).
6. Insert 3 plastic screw anchors (H) into the
pre-drilled holes, then insert the screws
(H) into the wall anchors. Tighten the
screws until only 1/4 inch of the screws are
Then, attach the Mounting bracket (E) onto
4. Connect the cable jack with the DC socket, then secure the cable with the Extension
5. Use Mounting template to measure the
location of the wall mount, and to mark the 3
Then, drill three holes on the wall (7/32 inch
Center of the crib (long side)
8. Install the Cable covers (F) to prevent baby
Utilize the adhesive tape on the back of
the cable cover to stick the covers onto the
wall, or alternatively screw (I) the covers
7. Place the Mounting cover (D) on the Mounting
bracket (E), and then slide it downward until it
9. Install the End cable cover (G to F) at last.
The battery icon indicates the battery status (see the following table).
Battery indicators Battery status Action
The battery has very little
The battery icon segments are
To keep the battery charged,
Install MyVTech Baby Plus mobile app
1. Browse the App Store or the Google Play store .
2. Search for the mobile app with the keyword “myvtech baby plus“.
3. Download and install the MyVTech Baby Plus mobile app to your mobile device.
Scan the QR codes on the right to get the app.
• Make sure your mobile device meets the minimum
requirement for the mobile app.
The mobile app is compatible with:
Download the free MyVTech Baby Plus mobile app and install it to a
mobile device, then use your mobile device and the mobile app to
monitor your baby remotely.
1. Press MENU/SELECT when the parent unit is idle.
2. Go to > Connect Mobile Phone.
3. Scan the QR code in the parent unit to download the app into your
mobile device if you have not installed the app yet.
4. Follow the instructions in the mobile app to set up and pair your baby
Alternatively, you can download the mobile app from the App Store or
Download app for mobile access
After installing the mobile app, follow the instructions in the mobile app and parent
unit to set up and pair your baby unit.
to run the mobile app in your mobile device, and then create a user account.
2. We recommend that you use common webmail services, such as Google Gmail for
registration of your user account. Check your email (and Spam folder), and activate
your new camera account via the email link, then sign in to your account.
3. Follow the instructions in the mobile app to pair the camera. Tap , then Add Camera
in the mobile app to get started.