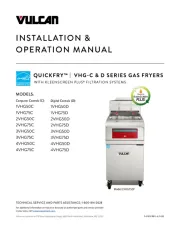
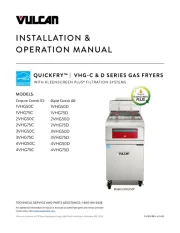
Vulcan 4VHG50CF Manual

Vulcan Fryser 4VHG50CF

Læs gratis den danske manual til Vulcan 4VHG50CF (78 sider) i kategorien Fryser. Denne vejledning er vurderet som hjælpsom af 8 personer og har en gennemsnitlig bedømmelse på 5.0 stjerner ud af 4.5 anmeldelser. Har du et spørgsmål om Vulcan 4VHG50CF, eller vil du spørge andre brugere om produktet?

Side 1/78
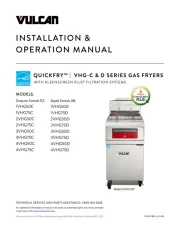
INSTALLATION &
OPERATION MANUAL
QUICKFRY™ | VHG-C & D SERIES GAS FRYERS
MODELS:
Computer Controls (C):
1VHG50C
1VHG75C
2VHG50C
2VHG75C
3VHG50C
3VHG75C
4VHG50C
4VHG75C
F-47678 REV. A (3-20)Vulcan is a division of ITW Food Equipment Group | 3600 North Point Blvd., Baltimore, MD 21222
TECHNICAL SERVICE AND PARTS ASSISTANCE: 1-800-814-2028
Model 1VHG75CF
filtered by
For additional information on Vulcan or to locate an authorized parts and service provider
in your area, visit vulcanequipment.com.
WITH KLEENSCREEN PLUS
®
FILTRATION SYSTEMS
Digital Controls (D):
1VHG50D
1VHG75D
2VHG50D
2VHG75D
3VHG50D
3VHG75D
4VHG50D
4VHG75D
VHG SERIES GAS FRYERS
VULCAN F-47678 Rev. A (3-20)
-2-
IMPORTANT FOR YOUR SAFETY
THIS MANUAL HAS BEEN PREPARED FOR PERSONNEL QUALIFIED TO INSTALL
GAS EQUIPMENT, WHO SHOULD PERFORM THE INITIAL FIELD START-UP AND
ADJUSTMENTS OF THE EQUIPMENT COVERED BY THIS MANUAL.
POST IN A PROMINENT LOCATION THE INSTRUCTIONS TO BE FOLLOWED IN THE
EVENT THE SMELL OF GAS IS DETECTED. THIS INFORMATION CAN BE
OBTAINED FROM THE LOCAL GAS SUPPLIER.
IMPORTANT
IN THE EVENT A GAS ODOR IS DETECTED, SHUT DOWN UNITS AT THE MAIN
SHUTOFF VALVE AND CONTACT THE LOCAL GAS COMPANY OR GAS SUPPLIER
FOR SERVICE.
FOR YOUR SAFETY
DO NOT STORE OR USE GASOLINE OR OTHER FLAMMABLE VAPORS AND
LIQUIDS IN THE VICINITY OF THIS OR ANY OTHER APPLIANCE.
Improper installation, adjustment, alteration, service or
maintenance can cause property damage, injury or death.
Read the installation, operating and maintenance instructions
thoroughly before installing or servicing this equipment.
IMPORTANT
IN THE EVENT OF A POWER FAILURE, DO NOT ATTEMPT TO OPERATE THIS
DEVICE
VHG SERIES GAS FRYERS
VULCAN F-47678 Rev. A (3-20)
-3-
TABLE OF CONTENTS
IMPORTANT FOR YOUR SAFETY………………………………………. 2
INTRODUCTION……………………………………………………………. 4
GENERAL…………………………………………………………….. 4
ORDERING PARTS…………….………………………………… 4
UNPACKING…………………….…………………………………… 4
INSTALLATION……………………………….………………………………. 5
Clearances…………………….………………………….... 5
Location ………………..……….…………………….…. 5
CODES AND STANDARDS…………….………………………….. 6
ASSEMBLY …………..……………………………………………… 7
FLUE CONNECTION……………………….…….…………………. 7
ELECTRICAL CONNECTION………………...………………. 7
GAS CONNECTION…………………………………………………. 8
GAS PRESSURE......................................................................... 8
TEST GAS SUPPLY……………………………….………………… 8
FRYERS WITH CASTERS………………………………………….. 8
Quick-Disconnect for Units on Casters…………………… 9
LEVELING THE FRYER…………………………………………….. 9
OPERATION…………………………………………………………………… 10
FRYER CAPACITIES..……………………………………………… 10
OVER-TEMPERATURE SHUTDOWN…………………………….. 10
BEFORE FIRST USE………………………………………………... 10
Cleaning……………………………………………………... 10
FILLING TANK WITH SHORTENING……………………………….11
BASIC FRYING INSTRUCTIONS………………………………….. 11
Fry Basket Guidelines…………………………………… 12
Fry Basket Capacity………………………………………... 12
EXTENDING SHORTENING LIFE………………………………….. 12
TURNING ON THE FRYER ……………………………………………….. 12
Turning On Solid State Digital (D) Control…………. ……..….…13
Turning On Computer (C) Control ……………….…………………. 14
PROGRAMMING THE SOLID STATE (D) CONTROL………………….…. 15
Solid State Digital (D) Control Timer Operation……..….…………. 16
PROGRAMMING THE COMPUTER (C) CONTROL……………………. 17
Computer (C) Control Timer Operation…………….….………… 21
TURNING OFF THE FRYER ………..……………………………………….. 22
DRAINING THE TANK FREE STANDING FRYERS………..…………… 22
BOIL OUT PROCEDURE FREE STANDING FRYERS. …………...... 22
CLEANING…………..…………………………………………………………. 23
Daily………………………………………………………….. 23
EXTENDED SHUTDOWN……………………………………………………. 24
KLEENSCREEN PLUS® INSTALLATION & OPERATION …………........ 24
General ……………………………………………….………………. 24
Assembly…………………………………………………………… 24
Fine Mesh Steel Filter Screen Assembly………………… 25
Micro-Filtration Fabric Envelope Assembly………………..27
REMOVE & REPLACE KLEENSCREEN PLUS® FILTER ENVELOPE… 28
FILTERING PROCEDURE……………………………………….................. 29
FILTERING SOLID STATE (D) CONTROLS………………………………. 29
Flush/Rinse And Discard Oil………………………………………… 30
FILTERING COMPUTER (C) CONTROLS……………………………… 31
Flush/Rinse And Discard Oil………………………………………… 32
REMOVING EXCESS DEBRIS FROM THE FILTER……………………… 33
Filtering Tip……………………………………………………………. 33
BOIL OUT PROCEDURE……………………………………………………… 34
THERMAL OVERLOAD PROTECTION RESET BUTTON…………………35
MAINTENANCE……………………………………………………………….. 35
FLUE VENT INSPECTION……………………………………………………. 35
VHG SERIES GAS FRYERS
VULCAN F-47678 Rev. A (3-20)
-4-
Service in the US and Canada…………………………………...... 35
ALARMS AND ERROR MESSAGES………………………………………... 36
TROUBLESHOOTING………………………………………………………… 37
Troubleshooting Chart……………………………………………….. 37
INTRODUCTION
GENERAL
Vulcan Fryers are produced with quality workmanship and material. Proper installation,
usage and maintenance will result in years of satisfactory performance.
Before installing the fryer, thoroughly read this manual and carefully follow all instruction.
This manual is applicable to models listed on the cover page. Procedures in this manual
will apply to all models unless specified. Pictures and illustrations can be of any model
unless the picture or illustration needs to be model specific.
ORDERING PARTS
Customers may order parts directly from their local authorized service center. If not
known, call Vulcan Technical Support at 800-814-2028.
To speed up your order, provide the model number, serial number, gas type, part needed,
item part number (if known) and quantity needed.
UNPACKING
This fryer was carefully inspected before leaving the factory. The carrier assumes full
responsibility for the safe delivery upon acceptance of the shipment. Check for possible
shipping damage immediately after receipt.
If the fryer is found to be damaged, complete the following steps:
1. Carrier must be notified within 5 business days of receipt.
2. Carrier’s local terminal must be notified immediately upon discovery (note time,
date, and who was spoken to), and follow up and confirm with written or electronic
communication.
3. All original packing materials must be kept for inspection purposes.
4. The fryer cannot have been moved, installed, or modified.
5. Notify Vulcan Customer Service immediately at 800-814-2028.
Check that the following have been included:
Crumb Rack(s)
Basket Hanger(s)
Tank Brush for Boil Out Procedure Only
Adjustable Casters (4) two locking, two non-locking for freestanding fryers. Fryer
Batteries with the KleenScreen PLUS® Filtration System have casters installed from
the factory.
Drain Pipe Extension for freestanding fryers only.
VHG SERIES GAS FRYERS
VULCAN F-47678 Rev. A (3-20)
-5-
Twin Fry Baskets (2) per fry tank
Cleanout Rod
Fryer Batteries with the KleenScreen PLUS® Filtration System
Filter Pan
Suction Tube
Screen Assembly
High temperature discard hose
Crumb Basket
Manual, Quick Start Guide(s), and Warranty-Keep in safe place for reference
INSTALLATION
Do not use the door or its handle to lift the fryer.
Before installing the fryer, verify that the type of gas (natural or propane) agrees with the
specifications on the fryer data plate, which is located on the inside of the door panel.
Make sure the fryer is configured for the proper elevation.
Record your fryer model, device, and serial numbers for future reference in the space
provided below. This information can be found on the fryer data plate.
Fryer Model No: ___________________________
Device: ___________________________________
Serial No: ________________________________
Clearances
Minimum clearance from combustible construction:
6” (15 cm) from the sides of the fryer
6” (15 cm) from the back of the fryer
The fryer may be installed on combustible floors
Minimum clearance from noncombustible construction:
0” from the sides of the fryer
0” from the back of the fryer
Between the fryer and any open-top flame units:
16” (41 cm)
Allow space for servicing and operation.
Some service procedures will require removal of side panels or access to rear of the
unit.
VHG SERIES GAS FRYERS
VULCAN F-47678 Rev. A (3-20)
-6-
Location
Install fryer in an area with sufficient air supply for gas combustion.
Do not obstruct the flow of combustion and ventilation air.
Provide adequate clearance for air openings into the combustion chamber.
Do not permit fans to blow directly onto fryer.
Keep the fryer area free and clear from combustibles.
Avoid wall-type fans, which create cross-currents within a room. Avoid
open windows next to sides or back.
CODES AND STANDARDS
The fryer must be installed in accordance with:
In the United States:
State and local codes, or in the absence of local codes, with:
National Fuel Gas Code, ANSI-Z223.1/NFPA #54 (latest edition). Copies may be
obtained from The American Gas Association Accredited Standards Committee
Z223, @ 400 N. Capital St. NW, Washington, DC 20001 or the Secretary Standards
Council, NFPA, 1 Batterymarch Park Quincy, MA 02169-7471.
NFPA Standard #96 Vapor Removal from Cooking Equipment, latest edition,
available from the National Fire Protection Association, Batterymarch Park, Quincy,
MA. 02169-7471.
National Electrical Code, ANSI/NFPA-70 (latest edition). Copies may be obtained
from The National Fire Protection Association, Batterymarch Park, Quincy, MA.
02169-7471.
In the commonwealth of Massachusetts all gas appliances vented through a
ventilation hood or exhaust system with a damper or with a power means of
exhaust shall comply with 248 CMR.
In Canada:
Local codes
CAN/CSA-B149.1 Natural Gas and Propane Installation Code (latest
edition),available from the Canadian Standards Association, 155 Queen Street,
Suite 1300, Ottawa, Ontario Canada K1P 6L1.
CSA C22.1 Canadian Electric Code (latest edition), available from the Canadian
Standards Association, 155 Queen Street, Suite 1300, Ottawa, Ontario Canada
K1P 6L1.
VHG SERIES GAS FRYERS
VULCAN F-47678 Rev. A (3-20)
-7-
ASSEMBLY
The fryer must be restrained to prevent tipping and the splashing of hot liquid. The means
of restraint may be the manner of installation, such as connection to a battery of
appliances, installing the fryer in an alcove, or by separate means such as adequate ties.
FLUE CONNECTION
Make the flue connection as follows:
Comply with Vapor Removal from Cooking Equipment, ANSI-NFPA
Standard #96 (latest edition), available from the National Fire Protection
Association, Batterymarch Park, Quincy, MA 02269.
Locate the fryer under a hood with adequate connection to an exhaust
duct. The hood must extend 6” (15 cm) beyond fryer on both sides.
Clearance above the fryer should be adequate for combustion byproducts
to be removed efficiently.
An 18” (46 cm) minimum clearance should be maintained between the flue
vent and the filters of the hood venting system.
Never make flue connections directly to the fryer.
Do not obstruct the flow of the gases from the appliance. Proper air
balance should be maintained in the room.
Ensure that your ventilation system does not cause a down draft at the fryer’s flue
opening. Down drafts will not allow the fryer to exhaust properly and will cause
overheating which may cause permanent damage. Damage caused by down drafts
will not be covered under equipment warranty. NEVER allow anything to obstruct
the flue of combustibles or ventilation exiting from the fryer flue. DO NOT put
anything on top of flue area.
ELECTRICAL CONNECTION
Electrical Grounding Instructions:
This appliance is equipped with a three prong (grounding) plug for your protection
against shock hazard and should be plugged directly into a properly grounded
three-prong receptacle. Do not cut or remove the grounding prong from this plug.
Fryer must be electrically grounded in accordance with local codes, or in the
absence of local codes, with the National Electrical Code, ANSI/NFPA 70, or the
Canadian Electrical Code, CSA C22.2, as applicable.
Electrical diagram located on inside of door.
VHG SERIES GAS FRYERS
VULCAN F-47678 Rev. A (3-20)
-8-
GAS CONNECTION
All gas supply connections and any pipe joint compound must be
resistant to the action of propane gases.
The gas inlet is located on the lower rear of the fryer. Codes require that a gas shutoff
valve be installed in the gas line ahead of the fryer.
The gas supply line must be at least the equivalent of ½” (12.7 mm) iron pipe for single
units and 1-1/4” (31.75 mm) for batteries. If using the optional quick-disconnect flex hose,
¾” (19 mm) iron pipe for single units and 1-1/4” (31.75 cm) iron pipe for batteries.
Make sure the pipes are clean and free of obstructions, dirt, and piping compound. A
battery requires one or two connections of appropriate size for the gas requirement.
Prior to lighting, check all joints in the gas supply line for leaks.
Use soap and water solution. Do not use an open flame.
After piping has been checked for leaks, fully purge gas pipes to remove air.
GAS PRESSURES (ALL MODELS):
The gas measured exiting the gas valve should be set at 3.5” W.C. (Water Column)
(0.87kPa) for natural gas and 10 W.C. (2.49 kPa) for propane gas. The supply pressure
should be 7-9” W.C. for natural gas and 11-12” W.C. for propane gas. If incoming pressure
exceeds 14” WC psig -3.45 kPa), a step-down pressure regulator must be installed.
TESTING THE GAS SUPPLY PIPING SYSTEM:
When test pressures exceed ½ psig (3.45 kPa), the fryer and its individual shutoff valve
must be disconnected from the gas supply piping system.
When test pressures are ½ psig (3.45 kPa) or less, the fryer must be isolated from the gas
supply piping system by closing its individual shutoff valve.
Fryers with Casters:
Separate instructions for installing casters are included with the casters:
The installation shall be made with a connector that complies with the
Standard for Connectors for Movable Gas Appliances, ANSI Z21.69, CAN/CGA-
6.16, and a quick-disconnect device that complies with the Standard for Quick-
Disconnect Devices for Use with Gas Fuel, ANSI z21.41.CSA 6.9 or Quick-
Disconnect Devices for Use with Gas Fuel.
VHG SERIES GAS FRYERS
VULCAN F-47678 Rev. A (3-20)
-9-
When installing a quick disconnect you must also install a means for limiting the
movement of the fryer. This device will prevent the gas line or quick disconnect
from being strained. The restraining device should be attached to the cutout on the
back panel. See illustration for location.
The fryer must be installed with a connector (not supplied by Vulcan) complying with
the above codes.
The fryer must be installed with restraining means to guard against
transmission of strain to the connector. See illustration.
The fryer must be installed with the casters provided.
If the restraint is ever to be disconnected, first turn the gas supply off. If
disconnection of the restraint is necessary, reconnect this restraint after the fryer
has been returned to its originally installed position.
LEVELING THE FRYER
Check the level of the fryer by placing a level on top of the fryer after gas connections have
been made.
Ensure that the fryer is level front-to-back and side-to-side in the final installed position.
If using casters, lock the wheels after unit is level.
A Rear Of Fryer
B Strain Relief Chan Connection
(Chain supplied by others)
A
B
VHG SERIES GAS FRYERS
VULCAN F-47678 Rev. A (3-20)
-10-
OPERATION
Hot oil and parts can cause burns. Use care when operating,
cleaning and servicing the fryer.
Spilling hot frying compound can cause severe burns. Do not move
fryer without draining all frying compound from the tank.
Fryer is not to be used during a power outage.
FRYER CAPACITIES(PER FRY TANK)
MODEL
# OF
BURNERS
BTU/HR
NATURAL GAS
BTU/HR
PROPANE GAS
WIDTH
INCH(CM)
SHORTENING
LBS(KG)
VHG50
4
80,000
75,000
13-1/2(34.3)
45-50(20.4 - 22.7)
VHG75
6
110,000
100,000
18(45.7)
70(31.8)
OVER-TEMPERATURE SHUTDOWN
If the shortening becomes overheated, a high-temperature shutoff device will turn the gas
valve off. The shutoff device will automatically reset after the shortening cools down.
If the fryer shuts down due to overheating, DO NOT power up the fryer until the shortening
temperature is below 300°F (149°C).
If an overheating situation persists, contact your local Vulcan authorized service office.
BEFORE FIRST USE
Cleaning
New units are wiped down at the factory to remove any visible signs of dirt, oil, grease, etc.
remaining from the manufacturing process.
Before any food preparation, thoroughly wash the protective oil from all surface parts and
the tank interior with hot soapy water to remove any film residue and dust or debris.
Do not use chlorine or sulfate/sulfide cleaners.
Wash any accessories shipped with unit.
Rinse fryer and accessories thoroughly and drain the fryer.
Wipe tank completely dry with a soft, clean cloth.
Close the drain valve.
Fill the fryer tank with liquid shortening.
VHG SERIES GAS FRYERS
VULCAN F-47678 Rev. A (3-20)
-12-
Fry Basket Guidelines
Do not overfill baskets. (See table for recommended basket capacities
below) .Carefully lower basket into oil.
When frying doughnuts and fritters, turn product only once during frying.
When cooking French fries or onion rings, shake the basket several times.
Batter covered foods should be dropped carefully, one by one, into shortening or
basket. If you use the basket, first dip the basket into the shortening to
reduce batter-build up on basket surfaces.
When frying is completed, remove basket or product. Hang basket on rear hanger.
Fry Basket Capacity:
VHG50: Recommended pounds per basket are 2.5 lbs. (1.1 kg).
VHG75: Recommended pounds per basket are 3.5 lbs. (1.6 kg).
EXTENDING SHORTENING LIFE
Shortening life can be extended by the following guidelines:
Do not salt foods over the fryer.
Use good-quality shortening.
Filter shortening daily (at a minimum).
Replace shortening if it becomes poorly flavored.
Keep equipment and surrounding clean. Use tank covers when not in use.
(accessory).
Set thermostat correctly.
Remove excess moisture and particles from food products before placing on fryer.
TURNING ON THE FRYER
To prevent possible ignition of the shortening on start up, the melt
mode must be set to solid mode when using a solid shortening.
The fry tank must be filled with frying oil or water before turning the burners
on. The fry tank can be damaged if the burners are turned on while empty and will void
your warranty. Do not by-pass the dry fire test until proper oil or water level is confirmed.
Wait 5 minutes with power switch in the off position before starting to allow any gas that
may have accumulated in the burner compartment to escape.
VHG SERIES GAS FRYERS
VULCAN F-47678 Rev. A (3-20)
-13-
Turning On Solid State Digital Control
1. Open the bottom fryer door and press the power
switch to the ON position.
The controller will power on and begin the dry fire
test.
The display will cycle through showing, VATFULL?
PUSH V,TEST and VAT(timer countdown).
during the dry fire test.
If dry fire test fails, the display will cycle,
VATFULL? PUSH V.
The dry fire test can be by-passed by visually
confirming the oil level is correct, then press the
V button.
2. After the dry fire test is either passed or manually
by-passed, the melt cycle will begin and the fryer will
heat off and on until the vat temperature exceeds
135° F.
The display will show the current melt cycle setting.
The correct melt mode must be set to match the
shortening type used. Select L(liquid), S(solid) or OFF(
no melt cycle)
Once temperature exceeds 135°F(or if set to MELT
OFF), the fryer will heat continuously until the
controller set point is reached.
3. Once the temperature reaches setpoint, the
display will show READY.
Pressing the TEMP button will display the
actual temperature for 3 seconds.
VHG SERIES GAS FRYERS
VULCAN F-47678 Rev. A (3-20)
-14-
Turning On Computer Control
1. Open the bottom fryer door and press the power
switch to the ON position.
The controller will power on and begin the dry fire
test.
The display will cycle through showing,
VATFULL?,PUSH CONFIRM and TESTING
VAT(timer countdown) during the dry fire test.
If the dry fire test fails, the display will cycle through
showing, VATFULL?,PUSH CONFIRM.
The dry fire test can be by-passed by visually
confirming the oil level is correct then press the
CONFIRM button.
2. After the dry fire test is either passed or manually
by-passed, The melt cycle will begin and the fryer will
heat off and on until the vat temperature exceeds
135° F.
The display will show the current melt cycle setting.
The correct melt mode must be set to match the
shortening type used.
Once temperatue exceeds 135°F(or if melt type is set
to NONE),the fryer will heat continuously until the
controller set point is reached.
3. Once the temperature set point is reached, the
display will show READYand the temperature
setpoint.
Pressing the TEMP button will display the set
temperature and the actual temperature for 3
seconds.
VHG SERIES GAS FRYERS
VULCAN F-47678 Rev. A (3-20)
-15-
PROGRAMMING
Programming Solid State Digital Control
If LOCKED, press
To UNLOCK
1. Press the PROGRAM button. If LOCKED is displayed, quickly press the
LEFT TIMER button twice then the RIGHT TIMER button twice to
unlock and begin programming.
2. Press the PROGRAM button, the
left timer displays. Press UP on the
PROGRAM button to increase time
and DOWN on the PROGRAM
button to decrease time.
3. Press the PROGRAM button, the
right timer displays. Press UP on the
PROGRAM button to increase time
and DOWN on the PROGRAM
button to decrease time.
4. Press the PROGRAM button, the
compensating time displays. Press
UP or DOWN on the PROGRAM
button to change from Y(on) or N
(off).
5. Press the PROGRAM button, the
temperature setting displays. Press
UP on the PROGRAM button to
increase temperature and DOWN on
the PROGRAM button to decrease.
6. Press the PROGRAM button, the
melt mode displays. Press UP or
DOWN on the PROGRAM button
to select L(liquid), S(solid) or OFF(no
melt cycle).
7. Press the PROGRAM button, the
beep volume level displays. Press UP
or DOWN on the PROGRAM
button to adjust the level from 0-3.
8. Press the PROGRAM button, the
language mode displays. Press UP or
DOWN on the PROGRAM button to
select ENG(English) SPA(Spanish) or
FRE(French). Spanish and French are
currently unavailable.
To prevent possible ignition of the shortening on start up, the melt mode must be set to solid
mode when using a solid shortening.
VHG SERIES GAS FRYERS
VULCAN F-47678 Rev. A (3-20)
-16-
9. Press the PROGRAM button, the
dry fire test mode displays. Press
UP or DOWN on the PROGRAM
button to change from Y(on) or N
(off).
10. Press the PROGRAM button,
the locked mode displays. Press UP
or DOWN on the PROGRAM
button to change from locked or
unlocked.
The dry fire test function is an important feature intended to prevent the fryer burners from turning
on with no liquid in the fry tank. It is recommended to be left in the on(Y) position. The fry tank can
be damaged if the burners are turned on while empty and will void your warranty.
11. Press the PROGRAM button one more time to exit the program mode
and resume operations. The controller will display one of the following.
MELT If a melt cycle has been selected and the temperature is below 135°F.
HEATING If melt selection is OFF or temperature is above 135°F and below
the setpoint.
READY When fryer is ready to cook.
Solid State Digital Control Timer Operation
1. Press the desired timer button(s)
2. The timer light will flash and the
timer will begin countdown.
3. Press timer button to silence
alarm when time completes.
4. Press and hold desired timer button for 3 seconds to cancel a cook timer.
Note : The timer with the least amount of remaining time will display when two timers are running simultaneously.
The light for the timer with the least amount of remaining time will flash faster.
Note : The timer will only activate when the display says READY. If the temperature is too low, the control displays
HEATING and will display READY once back up to temperature.
VHG SERIES GAS FRYERS
VULCAN F-47678 Rev. A (3-20)
-17-
Programming Computer Control
To enter programming mode, press buttons in sequence
1. Center of PROGRAM button
2. LEFT arrow button
3. RIGHT arrow button
If LOCKED, press
To UNLOCK
If LOCKED displays, press the far left 1,2,3,4 buttons in
sequence to unlock.
ADV USER SETTING will show on display. The red lights
will illuminate over buttons that contain control
parameter settings. There will be no response from the
buttons that are not illuminated.
Advanced User Setting Button Legend
Left Button Set-Basket Timer
Right Button Set-Basket Timer
1. Temperature
2. USB Option
2. Melt Type
4. Serial
3. Product Library
9. Load Factory Defaults
4. Recipe Editor
5. Passcode
6. Beep Volume
7. Language
8. Setback
9. Dry Fire Test
1. Press the 1 button, SET TEMP displays and the
current temperature setpoint flashes. Press numbers on
left keypad to set desired temperature. Press the
CONFIRM button to save and exit or the CANCEL
button to exit without saving.
2. Press the 2 button, MELT TYPE displays. Press UP
or DOWN on the PROGRAM button to select
LIQUID, NONE OR SOLID. Press the CONFIRM button
to save and exit or the CANCEL button to exit without
saving.
To prevent possible ignition of the shortening on start up, the melt mode must be set to solid
mode when using a solid shortening.
VHG SERIES GAS FRYERS
VULCAN F-47678 Rev. A (3-20)
-18-
3. Press the 3 button, PRODUCT LIBRARY displays. Press UP or DOWN on the PROGRAM button to cycle
through selections(ADD,EDIT,DELETE or EXIT).
a. To add a product, select ADD and press the CONFIRM button. NAME? will display.
b. Type in the name of the product using the numbered buttons.
Use subscript characters shown at the bottom right of each numbered button circle. EXAMPLE: The subscript 2
button on the right button set timer pad is pressed three times to display the letter C in CHIPS.
c. Press LEFT AND RIGHT on the PROGRAM button to move the cursor in the display window.
d. Press the CONFIRM button to save and exit or the CANCEL button to exit without saving.
e. WORKING will display while the new product is saved.
f. To delete a product, select DELETE by pressing UP and DOWN on the PROGRAM button when PRODUCT
LIBRARY DISPLAYS again and then press the CONFIRM button.
g. Press UP and DOWN on the PROGRAM button to select the product to be deleted.
h. Press the CONFIRM button, ARE YOU SURE ? will show on the display.
i. Press UP and DOWN on the PROGRAM button to select YES or NO.
j. Press the CONFIRM button to save and exit or the CANCEL button to exit without saving.
k. WORKING will display while the new product is deleted.
l. To edit a product, select EDIT by pressing UP and DOWN on the PROGRAM button when PRODUCT LIBRARY
DISPLAYS again and then press the CONFIRM button.
m. Press UP and DOWN on the PROGRAM button to select the product to be edited.
n. Press the CONFIRM button.
o. Use subscript characters shown at the bottom right of each numbered button circle. EXAMPLE: The 5 button
on the right button set timer pad is pressed four times to display the letter P in PICKLES.
p. Press LEFT AND RIGHT on the PROGRAM button to move the cursor in the display window to edit characters.
q. To delete a letter, move the cursor to the letter and press the 9 button on the right button set timer pad
with the “˽ subscript character.
r. Press the CONFIRM button to save and exit or the CANCEL button to exit without saving.
s. WORKING will display while the new product is saved.
VHG SERIES GAS FRYERS
VULCAN F-47678 Rev. A (3-20)
-19-
4. Press the 4 button, RECIPE EDITOR displays. Press UP or DOWN on the PROGRAM button to select EDIT or
EXIT.
a. To edit a recipe/timer, select EDIT and press the CONFIRM button. SET RECIPE will display. Eighteen
different recipes/timers can be programmed.
b. Press the lit numbered button of the recipe/timer you want to edit. The name of the recipe will display. If you
want to change the recipe name, press UP and DOWN on the PROGRAM button to select a different name
from the product library. Press the CONFIRM button to keep the current name or the newly selected name.
c. SET COOK TIME displays. Press the numbered buttons to set to desired time(00:01 to 99:59). Press the CONFIRM
button to enter the new time or keep the original time.
d. ASSIGN ACTION? displays. Press UP and DOWN on the PROGRAM button to select Y(YES) or N(NO). Select
Y to activate and set a sub timer action(SHAKE,TURN or STIR) to alarm during the cook time. The action timers
start at the same time as the cook timer when the recipe button is pressed.
e. Press UP and DOWN on the PROGRAM button to select the sub timer to be programmed and press the
CONFIRM button.
f. SHAKE timer is shown in the example.Press the numbered buttons to set the desired time. Press the CONFIRM
button to enter the new time. ASSIGN NEXT ACTION? will display, select Y(YES) to set up a total of three action
timers or N(NO) to move on to next set of recipe options.
g. ASSIGN HOLD TIME? displays. Press UP and DOWN on the PROGRAM button to select Y(YES) or N(NO).
Select Y and press CONFIRM button to activate and set the hold timer(00:01 to 99:59) or N to leave inactive.
h. COMPENSATING TIME? Will show next on the display. Press UP and DOWN on the PROGRAM button to
select Y(YES) to activate or N(NO) to leave inactive. Press the CONFIRM button.
Note: There will not be an actual time entered for the compensating time function. If set to Y(YES), compensating
time makes small time adjustments to improve fried product cook consistency during periods of heavy cooking.
VHG SERIES GAS FRYERS
VULCAN F-47678 Rev. A (3-20)
-20-
RECIPE EDITOR(CONT.)
i. PROG ADDL RECIPE KEYS? displays. Press UP and
DOWN on the PROGRAM button to select
Y(YES) or N(NO). Select Y to begin programming
another recipe or N to exit and return to ADV USER
SETTING. Press CONFIRM button.
5. Press the 5 button PASSCODE displays. Press UP
and DOWN on the PROGRAM button to select
LOCKED or UNLOCKED. Setting to LOCKED will prevent
unauthorized changes in the ADV USER SETTING mode.
Press CONFIRM button.
6. Press the 6 button, BEEP VOLUME displays. Press
UP and DOWN on the PROGRAM button to select
The Volume level. 0 is off and 3 is loudest. Press
CONFIRM button.
7. Press the 7 button, LANGUAGE displays. Press UP
and DOWN on the PROGRAM button to select the
controller language(ENGLISH,FRENCH or SPANISH). Press
CONFIRM button. Spanish and French are currently
unavailable.
8. Press the 8 button, IDLE SETBACK? displays. Press UP and DOWN on the PROGRAM button to select Y(YES)
or N(NO). Select Y and press CONFIRM button to activate and set timer or N to leave inactive.
a. If Y, is selected,IDLE SETBACK TIME displays. Set the desired time(10:00 to 99:59)and press CONFIRM button.
SETBACK(CONT.)
b. SETBACK TEMP displays. Set the desired setback
temperature(200F - 300F OR 93C - 149C)and press
the CONFIRM button.
Note: IDLE will be displayed and the temperature will
reset to the lower setback temperature setting if no
button is pressed before the idle setback timer runs out.
9. Press the 9 button, DRY FIRE TEST displays. Press
UP and DOWN on the PROGRAM button to select
YES or NO. Select YES and press CONFIRM button
to activate or NO to leave inactive.
The dry fire test function is an important feature intended to prevent the fryer burners from turning on
with no liquid in the fry tank. It is recommended to be left in the on(Y) position. The fry tank can be damaged if the
burners are turned on while empty and will void your warranty.
VHG SERIES GAS FRYERS
VULCAN F-47678 Rev. A (3-20)
-21-
10. Press the 2 button on the right button set timer keypad, USB OPTION displays. Press UP and DOWN on the
PROGRAM button to select COPY FROM(to download a recipe menu from a drive), select COPY TO(to upload a
recipe menu to a drive) or EXIT. Press CONFIRM button.
a. Display will show COPY RECIPE FROM(or TO) USB?. Press the CONFIRM button to copy a menu.
11. Press the 4 button on the right button set timer
pad, SERIAL displays. This is the controller serial number
and is not a programmable parameter.
12. Press the 9 button on the right button set timer
pad, LOAD FACTORY DEFAULTS? displays. Press UP and
DOWN on the PROGRAM button to select Y(YES) or
N(NO). Select Y and press CONFIRM button to reset
the controller to the factory setpoints or N to leave
inactive.
Computer Control Timer Operation
1. Press the desired numbered timer button(s) to
activate.
2. The timer light will flash and the timer will begin
countdown.
3. Press and release timer button to briefly display the
corresponding recipe name.
4. Press and hold desired timer button for 3 seconds to
cancel a cook timer.
5. Press timer button to silence alarm when time
completes.
6. Timers with time remaining will continue to run.
Note : The two timers with the least amount of remaining time will display when more than two timers are running
simultaneously.The light for the timer with the least amount of remaining time will flash faster.
Note : The timer will only activate when the control displays READY. If the temperature is too low, the control displays
HEATING and will display READY again once back up to temperature.
VHG SERIES GAS FRYERS
VULCAN F-47678 Rev. A (3-20)
-22-
TURNING OFF THE FRYER
1. Open the bottom fryer door and press the power switch to the off position.
Spilling hot frying compound can cause severe burns. Do not move
fryer without draining all frying compound from the tank.
DRAINING THE TANK
Freestanding Models Without A Filter System Only:
1. Turn off fryer.
2. Insert the drain extension into the drain valve. Tighten only hand tight.
3. Direct the drain spout into the container that you want to drain the shortening into.
4. Open the drain valve. The oil will drain into the container. When the container is
full or the fryer tank is empty, close the drain valve. Repeat this step until the fryer
is empty. Remove the drain extension and place it back into the provided holder.
5. It is recommended to now boil out your fry tank. Follow the Boil Out procedure.
Then perform the weekly clean-out as described under CLEANING.
6. Once tank is completely empty, boiled out and cleaned, close the drain valve and
add new shortening. Follow the FILLING TANK WITH SHORTENING procedure in
this manual.
7. Turn on the power switch and follow the Turning On procedure for the control type
to begin heating the oil to desired temperature.
BOIL OUT PROCEDURE
Weekly or when oil is replaced:
Freestanding Models Without A Filter System Only:
1. Drain the tank as described under DRAINING THE OIL.
2. Close the drain valve and fill tank with water. Use a boil out solid degreaser which can
be ordered from your local dealer. Follow the instructions on the side of the package.
Do not use chlorine or sulfate/sulfide cleaners.
3. Solution level must be between the MIN and MAX lines on the back of the fryer tank.
4. Turn the power switch to the on position, follow the Turning On procedure for the
control type. For solid state digital models (D) and computer models (C) models, the
temperature will automatically set for 195-200°F. The water will not achieve an active
boil.
5. Use the tank brush; clean the sides, bottom and heat exchanger tubes.
VHG SERIES GAS FRYERS
VULCAN F-47678 Rev. A (3-20)
-23-
6. Screw the drain extension in the drain valve and hand tighten only. Drain the cleaning
solution from the tank into a container.
7. Close the drain valve and refill the tank with water. Add 1 cup (1/4 L) of vinegar to
neutralize alkaline left by the cleaner. Solution level must be between the MIN and
MAX line on the back of the fryer tank. Press the PROGRAM button for (D) and
CONFIRM button for (C) models, to allow the solution to heat up. Allow solution to
stand for a few minutes.
8. Drain the tank according to DRAINING THE TANK procedure. Rinse thoroughly with
clear, hot water. All traces of cleaner must be removed. Dry the tank thoroughly.
9. Close the drain valve and add shortening. Follow the FILLING TANK WITH
SHORTENING procedure in this manual.
10. The fryer is now ready for use. Turn on the power switch and follow the Turning On
procedure for the control type to begin heating the oil to desired temperature.
CLEANING
Hot oil and hot parts can cause burns. Use care when operating,
cleaning, and servicing the fryer.
Daily
Clean your fryer regularly with the tank brush along with a damp cloth, and polish with a
soft dry cloth. If regular cleaning is neglected, grease will be burned on and discolorations
may form.
Fingerprints are sometimes a problem on highly polished surfaces of stainless steel. They
can be minimized by applying a cleaner that will leave a thin oily or waxy film.
Clean all exterior surfaces of your fryer at least once daily.
Use a damp cloth with warm water and a mild soap or detergent.
Do not use chlorine or sulfate/sulfide cleaners.
Rinse thoroughly, and then dry with a soft dry cloth.
Keep the fryer exterior clean and free of accumulated grease to prevent
stubborn stains from forming. If regular cleaning is neglected, grease will be burned
on and discolorations may form.
Remove discolorations by washing with any detergent or soap and water.
Use a self-soaping, non-metallic scouring pad for particularly stubborn
discolorations.
Always rub with the grain of the stainless steel.
Do not use a metallic scoring pad or harsh cleaners.
VHG SERIES GAS FRYERS
VULCAN F-47678 Rev. A (3-20)
-24-
EXTENDED SHUTDOWN
1. Thoroughly drain the fryer. Refer to DRAINING THE FRYER.
2. Clean the fryer according to CLEANING.
3. Push Power switch to the off position
4. Turn off the main gas shutoff valve.
KLEENSCREEN PLUS® FILTRATION SYSTEM
General
The KleenScreen PLUS® filtration system filters the oil as it is pumped back into its’ respective
tank(s). Only one tank can be drained and filtered at a time. Under no circumstances should
more than one tank be drained at the same time.
Assembly
After unpacking, wash the filter pan, crumb basket, suction tube and filter screen assembly.
Make sure you remove the insert located inside the filter screen. Use dishwashing detergent
and warm water, (parts are dishwasher safe). Rinse the filter pan, crumb basket and filter
screen components completely and wipe all parts dry with a clean cloth.
Pull out the filter pan all the way and remove to wash.
The filter pan slides can be removed for washing by pushing the slides back into the fryer.
Then rotate the bottom of the slide toward the center of the fryer and lift out. Reverse the
procedure to install.
Slide the filter pan back into the drawer slides. Position the filter screen assembly into the
suction tube clip in the filter pan positioning the filter screen assembly flat on the bottom of
the filter pan.
Carefully line up the suction tube so that it mates with the oil receptacle block mounted on the
frame of the fryer battery. Close the filter pan drawer. See Figures 1 and 2.
Fig.1 Fig.2
OIL RECEPTACLE BLOCK
FILTER SCREEN LAYS FLAT ON
BOTTOM OF THE FILTER PAN
OIL RECEPTACLE BLOCK
SUCTION TUBE
SUCTION TUBE
CLIP
FILTER SCREEN LAYS FLAT ON
BOTTOM OF THE FILTER PAN
VHG SERIES GAS FRYERS
VULCAN F-47678 Rev. A (3-20)
-25-
Fine Mesh Steel Filter Screen Assembly
1. Slide the filter screen insert
into the filter screen and align
the center holes. Close the end
latch to secure into place.
2. Insert suction tube into the
filter screen hole. Align the
threads of the top handle with
the filter screen threads. Gently
turn clockwise until tightened.
Do not use tools.
Hand tighten only.
SUCTION TUBE
FILTER SCREEN INSERT
FILTER SCREEN
VHG SERIES GAS FRYERS
VULCAN F-47678 Rev. A (3-20)
-27-
Micro-Filtration Fabric Envelope Accessory Assembly
Fig.4
Slide the fabric envelope insert into the envelope and align the center holes. Fold over the
open end of the envelope and place closing clip on hinge over and firmly press clip all the
way down to secure and seal filter assembly. Make sure that the folded end of the envelope
is face down.
Attach suction tube in same manner as the screen assembly shown on previous page.
Dissassemble the fabric envelope assmebly assembly by reversing steps.
Do not use tools. Hand tighten only.
Remove the fabric envelope assembly from the filter pan and clean daily(or more frequently
as required by your operation). Scrape debris and sludge from envelope surfaces with a
spatula.
Do not wash the fabric envelope.
SUCTION TUBE
(SAME AS SCREEN ASSEMBLY)
FABRIC ENVELOPE
FABRIC ENVELOPE INSERT
(DIFFERENT FROM SCREEN ASSEMBLY)
CLOSING CLIP
VHG SERIES GAS FRYERS
VULCAN F-47678 Rev. A (3-20)
-28-
INSTRUCTIONS TO REMOVE & REPLACE KLEENSCREEN PLUS® FILTER ENVELOPE
FOR ABSOLUTE FILTRATION & MAXIMUM FLOW RATE WE RECOMMEND YOU CHANGE YOUR FILTER
ENVELOPES AT EVERY OIL CHANGE (10-14 DAYS DEPENDING ON OIL USAGE).
Hot oil and parts can cause burns. Use care when operating,
cleaning and servicing the fryer.
Step 1
Discard all oil from the filter vessel. When the filter pan is empty, use a spatula
and scrape off all debris left on the filter envelope and in the filter pan.
Step 2
Unscrew the suction tube from filter by first turning the bottom handle fitting
counter clockwise untill completely loosened. Next, turn the top handle fitting
counter clockwise until completely loosened.
Step 3
Remove the closing clip.
Step 4
Remove the envelope insert,wash insert with hot water and dry thoroughly. The
envelope insert is dishwasher safe. Place the insert into a new KleenScreen
PLUS® Filter envelope.
Do not wash the fabric envelope.
Step 5
Slide the envelope insert Insert into the fabric envelope making sure that the
holes line up. Fold over the open end of the envelope and place closing clip on
hinge over and firmly press clip all the way down to secure and seal filter
assembly. Make sure that the folded end is face down. Attach the suction tube
assembly by first tightening the top handle fitting and then tighten the bottom
handle fitting.
Do not use tools. Hand tighten only.
Step 6
Position the filter screen assembly into the suction tube clip in the filter pan,
positioning the filter screen assembly flat on the bottom of the filter pan. Align
the tube so that the end of the tube tube engages the oil receptacle fitting each
time the drawer is opened and closed.
VHG SERIES GAS FRYERS
VULCAN F-47678 Rev. A (3-20)
-29-
FILTERING PROCEDURE KleenScreen PLUS® Models ONLY
Hot oil and parts can cause burns. Use care when operating,
cleaning and servicing the fryer.
Spilling hot frying compound can cause severe burns. Do not move
fryer without draining all frying compound from the tank.
Never run water or boil out solution through filter and motor / pump. Doing so
will void your fryer warranty.
Filter ONLY one fry tank at a time to avoid overflow and spillage.
Do NOT turn off the power to the fryer. Leave power on.
Filtering Solid State Digital Control
Hot oil and parts can cause burns. Use care when operating,cleaning and servicing the fryer. Do not
leave unattended.
Spilling hot frying compound can cause severe burns. Do not move fryer without draining all frying
compound from the tank.
Never run water or boil out solution through filter and motor / pump. Doing so will void your fryer warranty.
Do NOT turn off the power to the fryer. Leave power on.
Filter ONLY one fry tank at a time to avoid overflow and spillage .
1. Do NOT turn off the power to the
fryer. Leave power on. Vulcan
recommends adding an oil treatment
media to the oil prior to filtering.
Always filter the oil when hot at 300°F
- 350°F.
2. Make sure that the filter drawer is
closed completely and that the suction
tube and receptacle block are in the
correct position.
3.Slowly open the drain valve to allow
oil to flow from The fry tank to the filter
pan. Then open the drain valve all the
way. The fryer will automatically stop
heating.
RECEPTACLE BLOCK
SUCTION TUBE
VHG SERIES GAS FRYERS
VULCAN F-47678 Rev. A (3-20)
-30-
4.The display will indicate DRAINING.
When The fry tank is empty, turn on the
filter pump by pressing the FILTER
button for 3-4 seconds. Allow the pump
to filter the oil for a couple of minutes
before closing the drain valve.
5. Close the drain valve. Fill tank with
new shortening.
6. The display will alternate from
FILLING to PUSH FLT. Fill to between
the MIN and MAX lines on the back of
the fryer tank. Oil will expand as it is
heated. Do not fill the fryer tank past
the MAX line.
7.Press the FILTER button again to
stop the filter pump. The display will
alternate from VATFULL? to PUSH V.
Confirm the oil is at the correct level
and press the PROGRAM(V) button.
8.The fryer will then begin heating the
oil to the desired temperature
setpoint.
FLUSH/RINSE AND DISCARD OIL
1.Follow filtering instructions 1-3, however do not put oil treatment media into the fryer. Drain the fryer oil into
the filter pan.
2.Attach the quick disconnect hose to the discard male quick disconnect fitting.
3.To discard the oil, place the nozzle end of the discard hose into a container that is large enough to retain the
discarded shortening. Press the filter switch behind the door to the “USE HOSE TO DISCARD ONLY” position. This
will allow all of the oil to be pumped through the hose only.
4.For flushing/rinsing the tank with filtered oil to remove the particulates that have accumulated, press the filter
switch behind the door to the “USE HOSE TO RINSE AND FILL” position. This will allow the oil to pass through the
hose and come in from behind the tank at the same time.
Oil will immediately exit out of the nozzle end of the hose any time the hose in plugged in and
the filter pump is engaged.
5.With the power switch still ON; press and hold the filter button for at least 3 seconds and the Motor/Pump will begin
to operate.
6.Once the oil has been discarded completely and the filter pan is empty, press the filter button to turn off the
Motor/ Pump.
The hose connection will be hot due to the temperature of the oil that was discarded and can
cause burns.
VHG SERIES GAS FRYERS
VULCAN F-47678 Rev. A (3-20)
-31-
7.Disconnect the discard hose. Be careful to let the hose drain before putting away. Close the drain valve and fill the
fry tank with new oil.
If discard vessel is not large enough to hold the entire shortening amount, stop the flow by pushing the filter
button to to turn the motor/pumpoff. Empty the container and resume discard operation by pressing the filter holding for 3-4
seconds.
If power is mistakenly turned off during the filtering operation, the corrective action is as follows.
1. Close the drain valve
2. Turn the power switch on
3. Immediately open drain valve
4. Continue filtering operation
FILTERING TIP:
Open the filtering drawer approximately 1” to allow any oil in the return line to run back into the filter pan. This will take about
30 seconds to complete. Then open the drawer completely to clean filter components.
Filtering Computer Control
Hot oil and parts can cause burns. Use care when operating,cleaning and servicing the fryer. Do not
leave unattended.
Spilling hot frying compound can cause severe burns. Do not move fryer without draining all frying
compound from the tank.
Never run water or boil out solution through filter and motor / pump. Doing so will void your fryer warranty.
Do NOT turn off the power to the fryer. Leave power on.
Filter ONLY one fry tank at a time to avoid overflow and spillage.
1. Do NOT turn off the power to the
fryer. Leave power on. Vulcan
recommends adding an oil treatment
media to the oil prior to filtering.
Always filter the oil when hot at 300°F
- 350°F.
2. Make sure that the filter drawer is
closed completely and that the suction
tube and receptacle block are in the
correct position.
3.Slowly open the drain valve to allow
oil to flow from The fry tank to the filter
pan. Then open the drain valve all the
way. The fryer will automatically stop
heating.
RECEPTACLE BLOCK
SUCTION TUBE
VHG SERIES GAS FRYERS
VULCAN F-47678 Rev. A (3-20)
-32-
4.The display will indicate DRAINING.
When The fry tank is empty, turn on the
filter pump by by pressing the FILTER
button for 3-4 seconds. Allow the pump
to filter the oil for a couple of minutes
before closing the drain valve.
5. Close the drain valve. Fill tank with
new shortening.
6. The display will alternate from
FILLING to PRESS FILTER. Fill to
between the MIN and MAX lines on
the back of the fryer tank. Oil will
expand as it is heated. Do not fill the
fryer tank past the MAX line.
7.Press the FILTER icon button again to
stop the filter pump. The display will
indicate VATFULL? PUSH CONFIRM.
Confirm the oil is at the correct level
and press the CONFIRM button.
8.The fryer will then begin heating the
oil to the desired temperature
setpoint.
FLUSH/RINSE AND DISCARD OIL
1.Follow filtering instructions 1-3, however do not put oil treatment media into the fryer. Drain the fryer oil into
the filter pan.
2.Attach the quick disconnect hose to the discard male quick disconnect fitting.
3.To discard the oil, place the nozzle end of the discard hose into a container that is large enough to retain the
discarded shortening. Press the filter switch behind the door to the “USE HOSE TO DISCARD ONLY” position. This
will allow all of the oil to be pumped through the hose only.
4.For flushing/rinsing the tank with filtered oil to remove the particulates that have accumulated, press the filter
switch behind the door to the “USE HOSE TO RINSE AND FILL” position. This will allow the oil to pass through the
hose and come in from behind the tank at the same time.
Oil will immediately exit out of the nozzle end of the hose any time the hose in plugged in and the
filter pump is engaged.
5.With the power switch still ON; press and hold the filter button for at least 3 seconds and the Motor/Pump will begin
to operate.
6.Once the oil has been discarded completely and the filter pan is empty, press the filter button to turn off the
Motor/ Pump.
The hose connection will be hot due to the temperature of the oil that was discarded and can
cause burns.
7.Disconnect the discard hose. Be careful to let the hose drain before putting away. Close the drain valve and fill the
fry tank with new oil.
VHG SERIES GAS FRYERS
VULCAN F-47678 Rev. A (3-20)
-33-
If discard vessel is not large enough to hold the entire shortening amount, stop the flow by pushing the filter
button to to turn the motor/pumpoff. Empty the container and resume discard operation by pressing the filter holding for 3-4
seconds.
If power is mistakenly turned off during the filtering operation, the corrective action is as follows.
1. Close the drain valve
2. Turn the power switch on
3. Immediately open drain valve
4. Continue filtering operation
FILTERING TIP:
Open the filtering drawer approximately 1” to allow any oil in the return line to run back into the filter pan. This will take about
30 seconds to complete. Then open the drawer completely to clean filter components.
REMOVING EXCESS DEBRIS FROM THE SCREEN FILTER:
Hot oil and hot parts can cause burns.
Never run water or boil out solution through filter and motor / pump. Doing so will void
your fryer warranty.
Filter ONLY one fry tank at a time to avoid overflow and spillage.
FILTERING TIP:
Open the filtering drawer approximately 1” to allow any oil in the return line to run back into the filter
pan. This will take about 30 seconds to complete. Then open the drawer completely to clean filter
components.
1. Pull the filter drawer out.
2. Remove the filter screen assembly. Scrape debris from the filter screen. Then remove the
insert by unlatching the latch. Clean all parts thoroughly as mentioned in the assembly
section on page 24.
3. Scrape debris from the bottom of the filter pan and discard in the trash. Clean all parts
thoroughly as mentioned in the Assembly section on page 24.
4. Reassemble all filter components after being dried thoroughly as in the assembly section on
page 24.
VHG SERIES GAS FRYERS
VULCAN F-47678 Rev. A (3-20)
-34-
BOIL OUT PROCEDURE:
Hot oil and hot parts can cause burns.
Never run water or boil out solution through filter and motor / pump. Doing so will void
your fryer warranty.
1. Discard oil as described under FLUSH/RINSE AND DISCARD OIL section
2. Close the drain valve and fill tank with water. Use a boil out solid degreaser which can be
ordered from your local dealer. Follow the instructions on the side of the package.
Do not use chlorine or sulfate /sulfide cleaners.
3. Solution level must be between the MIN and MAX levels on the fryer tank.
4. Turn the power switch to the on position. For solid state digital models (D) and computer
models (C) models, the temperature will automatically set for 195-200°F. The water will not
achieve an active boil.
THERMAL OVERLOAD PROTECTION BUTTON:
5. Use the tank brush; clean the sides, bottom and heat
exchanger tubes.
6. Unthread the Boil Out By-Pass™ drain plug and thread in
the Boil Out By-Pass™ extension tube as shown in in
Fig. 6. The larger thread end screws into the back of the
drain manifold as shown in the cutaway side view in Fig. 7.
7. Do not allow water to run through the motor/pump. Drain
the boil out solution into a bucket or place a high
temperature rated water hose on the end of the drain
extension allowing the other end to flow into a floor drain.
8. Close the drain valve and refill the tank with water. Add 1
cup (1/4 L) of vinegar to neutralize alkaline left by the
cleaner. Solution level must be between the MIN and
MAX level on the fryer tank. Press the START(V) button
on solid state knob control (A), PROGRAM(V) button on
solid state digital(D) and the CONFIRM button on
computer(C) models, to allow the solution to heat up.
Allow solution to stand for a few minutes.
9. Drain the tank by repeating step 7. Rinse thoroughly with
clear, hot water. All traces of cleaner must be removed.
Dry the tank thoroughly.
10.Close the drain valve and add shortening.
Fig. 6
Fig. 7
VHG SERIES GAS FRYERS
VULCAN F-47678 Rev. A (3-20)
-35-
THERMAL OVERLOAD PROTECTION BUTTON
The motor/pump supplied with
the filter system has a thermal
overload protection circuit that
senses when excess heat
occurs. This can occur due to
filtering for long periods of
time or under heavy load prior
to discarding debris buildup. If
the thermal overload
protection is tripped, wait 5
minutes and then reset the
motor by pushing in the red
button. The arrow in Figure 8
shows the location of the reset
button; located on the right
side of the motor / pump.
Fig 8.
The pump may start immediately when the reset button is pushed and
begin circulating hot oil.
MAINTENANCE
Hot oil and hot parts can cause burns. Use care when operating,
cleaning, and servicing the fryer.
Spilling hot fryer compound can cause severe burns. Do not
move fryer without draining all frying compound from the tank.
Disconnect the power supply to the fryer before servicing.
LUBRICATION
There are no parts that require lubrication.
FLUE VENT INSPECTION
When the fryer is cool, inspect annually. Check the flue and clear any obstructions.
ANNUAL INSPECTION
Contact an authorized service contractor for an annual inspection of the fryer.
SERVICE IN THE US AND CANADA
Contact the factory, the factory representative or authorized service contractor in your area to
perform maintenenace and repairs. For a complete listing of Service and Parts depots refer to
www.vulcanequipment.com.
RESET BUTTON
VHG SERIES GAS FRYERS
VULCAN F-47678 Rev. A (3-20)
-36-
ALARMS AND ERROR MESSAGES
PILOT OUT If the pilot is out, the digital control displays the following message:
“D” Solid State – PILOT OUT
“C” Computer – PILOT OUT
NO OR LOW GAS SUPPLY If no action is taken after 90 seconds, an alarm sounds
continuously, the heat demand is disabled and any running cooking cycles are cancelled.
The digital display the following message:
“D” Solid State – IGNITION LOCKOUT
“C” Computer – IGNITION LOCKOUT
The fryer must be turned off, then back on to re-initialize the control and to have normal
functions resumed.
OPEN PROBE If an open probe is detected, the heat demand is disabled and any running
cooking cycles are cancelled. All operator buttons are disabled. The digital control displays
the following message:
“D” Solid State – PROBE OPEN
“C” Computer – PROBE OPEN
SHORTED PROBE If a shorted probe is detected, the heat demand is disabled and any
running cooking cycles are cancelled. All operator buttons are disabled. The digital control
displays the following message:
“D” Solid State – PROBE SHORT
“C” Computer – PROBE SHORT
Hi TEMPERATURE If the temperature is greater than or equal to 415°F (212°C) or 40°F
above the setpoint, the heat demand is disabled and any running cooking cycles are
cancelled. All operator buttons are disabled. The control displays the following message:
“D” Solid State – HI TEMP
“C” Computer – HIGH TEMP
GUIDE DINSTALLATION
ET DUTILISATION
FRITEUSES À GAZ SÉRIE VHG-C, D
AVEC SYSTÈME DE FILTRATION KLEENSCREEN PLUS
MD
F-47678 REV. A (3-20)Vulcan is a division of ITW Food Equipment Group | 3600 North Point Blvd., Baltimore, MD 21222
SERVICE TECHNIQUE ET ASSISTANCE EN PIÈCES - US: 1-800-814-2028 | CANADA: 1-800-444-4764
Pour obtenir des renseignements supplémentaires au sujet de Vulcan ou pour trouver un fournisseur
de pièces et service autorisé dans votre région, veuillez visiter notre site web à vulcanequipment.com.
Modèle 1VHG75CF
MODÈLES:
ordinateur les contrôles (C):
1VHG50C
1VHG75C
2VHG50C
2VHG75C
3VHG50C
3VHG75C
4VHG50C
4VHG75C
numérique les contrôles; (D):
1VHG50D
1VHG75D
2VHG50D
2VHG75D
3VHG50D
3VHG75D
4VHG50D
4VHG75D
filtered by
FRITEUSES À GAZ SÉRIE VHG
VULCAN F-47678 Rév. A (3-20)
-4-
BOUTON DE RÉINITIALISATION DE LA PROTECTION CONTRE LES SURCHARGES
THERMIQUES ......................................................................................................................... 38
ENTRETIEN ............................................................................................................................. 39
INSPECTION DU CONDUIT DE FUMÉE ................................................................................ 39
Service aux États-Unis et au Canada ......................................................................... 39
ALARMES ET MESSAGES D’ERREUR ................................................................................. 39
DÉPANNAGE ........................................................................................................................... 41
Tableau de dépannage ............................................................................................... 41
INTRODUCTION
GÉNÉRALITÉS
Les friteuses Vulcan sont fabriquées avec de la main-d’œuvre qualifiée et des matériaux
de qualité. Une installation, une utilisation et un entretien appropriés favoriseront des
années de performance satisfaisante.
Avant d’installer la friteuse, lisez ce manuel en entier et suivez attentivement toutes les
instructions.
Ce manuel s’applique au modèle figurant sur la page de couverture. Les procédures
décrites dans ce manuel s’appliquent à tous les modèles sauf indication contraire. Les
images et les illustrations peuvent être de n’importe quel modèle sauf si la photo ou
l’illustration doit être spécifique du modèle.
COMMANDE DE PIÈCES
Les clients peuvent commander des pièces directement de leur centre de service autorisé.
Si vous ne le connaissez pas, appelez le Service à la clientèle de Vulcan au 800-814-2028.
Pour accélérer votre commande, indiquez le numéro de modèle, le nuro de série, le type de
gaz, la pièce cessaire, le numéro de férence de l’article (si connu) et la quantité nécessaire.
DÉBALLAGE
Cette friteuse a été inspectée avant de quitter l’usine. En acceptant sa livraison, le
transporteur prend l’entière responsabilité de la livrer en toute sécurité. Immédiatement
après la livraison, vérifiez si elle a effectivement subi des dommages pendant le transport.
S’il s’avère que la friteuse a été endommagée, veuillez suivre les procédures suivantes :
1. Le transporteur doit être averti dans les 5 jours ouvrables suivant la réception.
2. Les gens du terminus local du transporteur doivent être avisés immédiatement lors de
la découverte des dommages (indiquez l’heure, la date et à qui vous avez parlé) et
assurez le suivi en confirmant les faits par écrit ou par communication électronique.
3. Pour fins d’inspection, tout le matériel d’emballage original doit être conservé.
4. La friteuse ne doit pas avoir été déplacée, installée ou modifiée.
5. Avisez le Service à la clientèle de Vulcan immédiatement en faisant le 800-814-2028.
Vérifiez que les éléments suivants ont été inclus :
FRITEUSES À GAZ SÉRIE VHG
VULCAN F-47678 Rév. A (3-20)
-5-
Ramasse-miettes
Support(s) à panier
Brosse à cuve pour procédure d’ébouillantage seulement
Roulettes réglables (4), deux verrouillables et deux non verrouillables pour les
friteuses autostables. Les batteries de friteuse avec système de
filtration KleenScreen PLUS
®
ont des roulettes installées à l’usine.
Rallonge de tuyau de vidange pour les friteuses autostables seulement.
Paniers à friture double (2) par cuve de friture.
Tige de nettoyage
Batteries de friteuse avec système de filtration KleenScreen PLUS
®
Porte-filtre
Tube d’aspiration
Ensemble écran-filtre
Tuyau de vidange haute température
Crépine-panier
Manuel, guide(s) de démarrage rapide et garantie gardez-les dans un
endroit sécuritaire pour consultation ultérieure.
INSTALLATION
N’utilisez pas la porte ou sa poignée pour soulever la friteuse.
Avant l’installation de la friteuse, vérifiez que le type de gaz (naturel ou propane) est
conforme aux spécifications de la plaque signalétique de la friteuse, située à l’intérieur du
panneau de porte. Assurez-vous que la friteuse est configurée pour l’élévation appropriée.
Inscrivez les numéros de modèle, d’appareil et de série de votre friteuse dans l’espace
prévu ci-dessous à des fins de référence ultérieure. Ces renseignements sont inscrits sur
la plaque signalétique de la friteuse.
N° de modèle de la friteuse :
Appareil :
N° de série :
Dégagements
Dégagement minimum de toute construction combustible :
6 po (15 cm) sur les côtés de la friteuse
6 po (15 cm) à l’arrière de la friteuse
La friteuse peut être installée sur des sols constitués de matériaux combustibles
Dégagement minimum de toute construction non combustible :
0 po sur les côtés de la friteuse
0 po à l’arrière de la friteuse
FRITEUSES À GAZ SÉRIE VHG
VULCAN F-47678 Rév. A (3-20)
-6-
Entre la friteuse et toute flamme découverte :
16 po (41 cm)
Laissez de l’espace pour l’entretien et l’utilisation.
Certaines procédures d’entretien requièrent de retirer les panneaux latéraux ou
d’accéder à l’arrière de l’appareil.
Emplacement
Installez la friteuse dans une zone disposant d’une alimentation en air suffisante pour
la combustion des gaz.
N’obstruez pas la circulation de l’air de combustion et d’aération.
Un dégagement approprié des ouvertures d’air dans la chambre de combustion doit
être fourni.
Ne laissez jamais un ventilateur souffler directement sur la friteuse.
Gardez la friteuse dans une zone libre de substances combustibles.
Évitez les ventilateurs muraux qui produisent des contre-courants d’air dans la pièce.
Évitez d’ouvrir des fenêtres à proximité de la friteuse.
CODES ET NORMES
La friteuse doit être installée conformément aux codes et normes suivants :
Aux États-Unis :
Codes d’État et codes locaux, ou en l’absence de codes locaux :
National Fuel Gas Code, ANSI-Z223.1/NFPA 54 (plus cente édition). Des
exemplaires sont disponibles auprès de The American Gas Association Accredited
Standards Committee Z223, @ 400 N. Capital St. NW, Washington, DC 20001 ou du
Secretary Standards Council, NFPA, 1 Batterymarch Park Quincy, MA 02169-7471.
NFPA Standard n° 96 Vapor Removal from Cooking Equipment, plus récente édition,
disponible auprès de National Fire Protection Association, Batterymarch Park,
Quincy, MA. 02169-7471.
National Electrical Code, ANSI/NFPA-70 (plus récente édition). Vous pouvez en obtenir
des exemplaires auprès de la National Fire Protection Association, Batterymarch Park,
Quincy, MA. 02169-7471.
Dans le Commonwealth du Massachusetts, tous les appareils fonctionnant au gaz
et ayant une hotte de ventilation ou un système d’échappement avec un registre ou
des dispositifs motorisés d’échappement doivent être conformes à la CMR 248.
FRITEUSES À GAZ SÉRIE VHG
VULCAN F-47678 Rév. A (3-20)
-7-
Au Canada :
Codes locaux
CAN/CSA-B149.1 Code d’installation du gaz naturel et du propane (plus récente
édition), disponible auprès de l’Association canadienne de normalisation, 155 rue
Queen, bureau 1300, Ottawa, Ontario Canada K1P 6L1.
CSA-C22.1 Code canadien de l’électricité (plus récente édition), disponible auprès
de l’Association canadienne de normalisation, 155 rue Queen, bureau 1300,
Ottawa, Ontario Canada K1P 6L1.
MONTAGE
La friteuse doit être retenue pour empêcher le basculement et la projection de liquide
chaud. Le moyen de retenue peut être la méthode d’installation, telle que la connexion à
une batterie d’appareils ménagers, l’installation de la friteuse dans une alcôve ou par des
moyens distincts, tels que des liens.
RACCORDEMENT DU CONDUIT DE FUMÉE
Effectuez le raccordement du conduit de fumée comme suit :
Se conformer à la norme ANSI-NFPA n° 96 Vapor Removal from Cooking
Equipment (plus récente édition) disponible auprès de la National Fire Protection
Association, Batterymarch Park, Quincy, MA 02269.
Placez la friteuse sous une hotte adéquatement raccordée à un conduit dévacuation.
La hotte doit dépasser de 6 po (15 cm) au-dessus des deux côtés de la friteuse.
Le gagement au-dessus de la friteuse doit être adéquat pour que les sous-produits
de combustion soient éliminés efficacement.
Un dégagement minimum de 18 po (46 cm) doit être maintenu entre le conduit de
fumée et les filtres du système d’évacuation de la hotte.
Ne raccordez jamais directement le conduit de fumée à la friteuse.
N’obstruez pas le débit du gaz de l’appareil. Un bon équilibre de l’air doit être
maintenu dans la pièce.
Veillez à ce que votre système de ventilation ne cause pas un courant descendant
à l’ouverture du conduit de fumée de la friteuse. Un courant descendant ne permet
pas l’évacuation adéquate des émissions de la friteuse et entraîne une surchauffe,
ce qui peut causer des dommages permanents. Les dommages causés par un
courant descendant ne sont pas couverts par la garantie de l’appareil. Ne laissez
JAMAIS quoi que ce soit obstruer le conduit de fumée de combustible ou la
ventilation sortant du conduit de fumée de la friteuse. Ne placez RIEN sur le dessus
de conduit de fumée.
FRITEUSES À GAZ SÉRIE VHG
VULCAN F-47678 Rév. A (3-20)
-8-
CONNEXIONS ÉLECTRIQUES
Directives de mise à la terre :
Cet appareil est muni d’une fiche à trois broches de mise à la terre vous procurant
une protection contre les électrocutions et devant être branchée à une prise murale
tripolaire ment mise à la terre. Vous ne devez en aucun cas couper ou enlever la
broche de mise à la terre de la fiche. La friteuse doit être mise à la terre conforment
aux codes locaux ou, en l’absence de tels codes, au Code national de l’électricité, à la
norme ANSI/NFPA 70, ou la norme CSA C22.2 du Code canadien de l’électricité,
suivant le cas.
Le schéma électrique est situé sur le panneau intérieur de la porte.
RACCORDEMENT AU GAZ
Toutes les connexions d’alimentation en gaz et toute pâte à joint doivent être
résistantes à l’action du gaz propane.
L’entrée de gaz se trouve au bas de la face arrière de la friteuse. Les codes exigent qu’un
robinet d’arrêt soit installé dans la conduite de gaz à l’avant de la friteuse.
La conduite d’alimentation en gaz doit être au moins l’équivalent d’un tuyau en fer de ½ po
(12,7 mm) pour les appareils simples et de 1 à 1/4 po (31,75 mm) pour les batteries. Si
vous utilisez le flexible à débranchement rapide (en option), il doit être l’équivalent d’un
tuyau de fer de ¾ po (19 mm) pour les appareils simples et de 1 à 1/4 po (31,75 cm) pour
les batteries.
Assurez-vous que les tuyaux sont propres et libres de toute obstruction, saleté ou pâte à
joint. Une batterie de réservoirs nécessite une ou deux connexions de taille correspondant
à l’exigence du gaz.
Avant l’allumage, vérifiez tous les raccords de la conduite
d’alimentation de gaz pour vous assurer qu’il n’y a pas de fuite. Utilisez une solution
de savon et d’eau. N’utilisez pas une flamme nue.
Après avoir vérifié l’absence de fuites dans la tuyauterie, purgez entièrement les tuyaux de
gaz afin de supprimer l’air.
PRESSIONS DE GAZ (TOUS LES MODÈLES) :
Le volume de gaz mesuré à la sortie du robinet doit être réglé à 4 po CE (Colonne d’eau)
ou 0,8 kPa pour le gaz naturel et à 10 po CE (2,75 kPa) pour le gaz propane. La pression
d’arrivée doit se situer entre 7 et 9 CE pour le gaz naturel et entre 11 et 12 po CE pour le
gaz propane. Si la pression d’arrivée est plus forte que 14 po CE (½ psi ou 3,45 kPa), il
faut installer un régulateur abaisseur de pression.
FRITEUSES À GAZ SÉRIE VHG
VULCAN F-47678 Rév. A (3-20)
-9-
TEST DES CONDUITES D’ALIMENTATION DE GAZ :
Lorsque la pression d’épreuve excède ½ psig (3,45 kPa), la friteuse et son robinet d’arrêt
individuel doivent être débranchés du système de conduite d’alimentation de gaz.
Lorsque la pression d’essai est de ½ psig (3,45 kPa) ou moins, la friteuse doit être isolée
du système d’alimentation de gaz en fermant le robinet d’arrêt manuel individuel.
Friteuses avec roulettes :
Des instructions distinctes pour l’installation des roulettes sont incluses avec les roulettes :
L’installation doit être effectuée au moyen d’un raccord qui est conforme à la norme
Connectors for Movable Gas Appliances, ANSI Z21.69, CAN/CGA-6.16 et d’un
dispositif de déconnexion rapide conforme à la norme Standard for Quick-
Disconnect Devices for Use with Gas Fuel, ANSI z21.41.CSA 6.9 ou Quick-Disconnect
Devices for Use with Gas Fuel.
Lors de l’installation d’un raccord rapide, vous devez également installer un dispositif
pour limiter le mouvement de la friteuse. Ce dispositif permettra d’éviter l’imposition
d’une force excessive sur la conduite de gaz ou sur le dispositif à débranchement
rapide. Le dispositif de retenue doit être fixé à la découpe du panneau arrière.
Consultez l’illustration pour l’emplacement.
La friteuse doit être installée à l’aide d’un connecteur (non fourni par Vulcan)
conforme aux codes ci-dessus.
La friteuse doit être installée avec un moyen de retenue afin d’éviter la transmission
de tension au connecteur. Consultez l’illustration.
A Arrière de la friteuse
B Connexion de la chaîne du détendeur
(chaîne fournie par d’autres)
FRITEUSES À GAZ SÉRIE VHG
VULCAN F-47678 Rév. A (3-20)
-12-
Le niveau d’huile doit se situer entre les lignes MIN et MAX de la cuve de la
friteuse.
L’huile prend de l’expansion lorsqu’elle est chauffée. Ne remplissez pas la cuve
de la friteuse au-dessus de la ligne MAX.
Ajoutez de la nouvelle graisse alimentaire ou de l’huile de friture au besoin pour
maintenir le niveau d’huile.
Si vous utilisez de la graisse alimentaire solide, assurez-vous qu’elle est placée
bien étroitement dans la cuve pour éviter les poches d’air. Les poches d’air peuvent provoquer
des points d’allumage et endommager la cuve de friture.
DIRECTIVES DE FRITURE DE BASE
Réglez la température souhaitée et laissez chauffer la graisse alimentaire à cette température.
Faites frire des éments qui sont de la même taille afin d’assurer une cuisson
égale.
Égouttez ou essuyez les aliments crus ou humides pour minimiser les
éclaboussures lorsque les aliments sont abaissés dans la graisse chaude.
Ajoutez de la nouvelle graisse alimentaire au besoin.
Directives d’utilisation du panier à friture
Ne remplissez pas trop les paniers. (Voir le tableau ci-dessous au sujet des capacités
recommandées pour les paniers.)posez soigneusement le panier dans l’huile.
Lors de la friture de beignes et de beignets, retournez le produit une seule fois
pendant la cuisson.
Lors de la cuisson de frites ou de rondelles d’oignons, secouez le panier plusieurs
fois.
Les aliments enrobés de pâte doivent être déposés avec précaution, un par un,
dans la graisse ou le panier. Si vous utilisez le panier, trempez d’abord le panier
dans la graisse pour réduire l’accumulation de pâte sur les surfaces du panier.
Lorsque la friture est terminée, retirez le panier ou le produit. Accrochez le panier
au support arrière.
Capacité du panier à friture :
VHG50 : Nombre de livres recommandées par panier : 2,5 lb (1,1 kg).
VHG75 : Nombre de livres recommandées par panier : 3,5 lb (1,6 kg).
FRITEUSES À GAZ SÉRIE VHG
VULCAN F-47678 Rév. A (3-20)
-13-
PROLONGATION DE LA DURÉE DE VIE DE LA GRAISSE ALIMENTAIRE
La durée de vie de la graisse alimentaire peut être prolongée en respectant les directives
suivantes :
Ne salez pas les aliments au-dessus de la friteuse.
Utilisez une graisse alimentaire de bonne qualité.
Filtrez la graisse alimentaire quotidiennement (au minimum).
Remplacez la graisse alimentaire si son odeur devient mauvaise.
Maintenez la propreté de l’appareil et de son environnement. Placez les couvercles
sur les cuves lorsqu’elles ne sont pas utilisées (accessoire).
Réglez le thermostat correctement.
Retirez l’excès d’humidité et les particules des produits alimentaires avant de les
mettre dans la friteuse.
ALLUMAGE DE LA FRITEUSE
Pour emcher tout risque que la graisse alimentaire prenne
feu lors de la mise en marche, le mode de fusion de la graisse doit être glé sur
« solide » lors de l’utilisation de graisse solide.
La cuve de friture doit être remplie d’huile de friture ou d’eau avant lallumage
des brûleurs. L’allumage des brûleurs lorsque la cuve de friture est vide peut endommager
cette dernière et annulera votre garantie. Ne contournez pas le test à vide tant que le
niveau approprié d’huile ou d’eau n’est pas confirmé.
Attendez 5 minutes avec l’interrupteur d’alimentation en position « OFF » avant de
démarrer, afin de laisser s’échapper le gaz qui a pu s’accumuler dans le compartiment
du brûleur.
Mise sous tension avec la commande numérique à semi-conducteurs
1. Ouvrez la porte inférieure de la friteuse et mettez
l’interrupteur d’alimentation en position « ON ».
Le régulateur s’allume et commence le test à vide.
L’afficheur marque en boucle, VATFULL? PUSH
V, TEST et VAT (compte à rebours). Pendant
FRITEUSES À GAZ SÉRIE VHG
VULCAN F-47678 Rév. A (3-20)
-14-
le test à vide.
Si le test à vide échoue, l’afficheur marque en boucle,
VATFULL? PUSH V.
Le test à vide peut être contourné en confirmant
visuellement le niveau d’huile, puis en appuyant sur
le bouton V .
2. Une fois le test à vide réussi ou manuellement
contourné, le cycle de fusion s’enclenche et la
friteuse chauffe par intervalles jusqu’à ce que la
température de la cuve dépasse 135 °F (57 °C).
L’affichage montre le réglage du cycle de fusion
actuel.
Le mode de fusion approprié doit être défini pour
correspondre au type de graisse alimentaire utilisée.
Sélectionnez L (liquide), S (solide) ou OFF (pas de
cycle de fusion)
Une fois que la température dépasse 135 °F (ou si
le réglage MELT OFF est défini), la friteuse chauffe
continuellement jusqu’à atteindre le point de
consigne du régulateur.
3. Une fois que la température se trouve à
35 degrés du point de consigne, l’affichage
marque READY.
Appuyer sur le bouton TEMP affiche la
température réelle pendant 3 secondes.
FRITEUSES À GAZ SÉRIE VHG
VULCAN F-47678 Rév. A (3-20)
-15-
Mise sous tension avec la commande par ordinateur
1. Ouvrez la porte inférieure de la friteuse et mettez
l’interrupteur d’alimentation en position « ON ».
Le régulateur s’allume et commence le test à vide.
L’afficheur marque en boucle, VATFULL? PUSH
CONFIRM et TESTING VAT (compte à rebours)
pendant le test à vide.
Si le test à vide échoue, l’afficheur marque en boucle,
VATFULL? PUSH CONFIRM.
Le test à vide peut être contourné en confirmant le
niveau d’huile, puis en appuyant sur le bouton
confirmation .
2. Une fois le test à vide réussi ou manuellement
contourné, le cycle de fusion s’enclenche et la
friteuse chauffe par intervalles jusqu’à ce que la
température de la cuve dépasse 135 °F (57 °C).
L’affichage montre le réglage du cycle de fusion
actuel.
Le mode de fusion approprié doit être défini pour
correspondre au type de graisse alimentaire utilisée.
Une fois que la température dépasse 135 °F (ou si le
réglage NONE est défini), la friteuse chauffe
continuellement jusqu’à atteindre le point de
consigne du régulateur.
3. Une fois le point de consigne de la température
est atteint, l’affichage marque READY ainsi que le
point de consigne de température.
Appuyer sur le bouton TEMP affiche la
température définie et la température réelle
pendant 3 secondes.
FRITEUSES À GAZ SÉRIE VHG
VULCAN F-47678 Rév. A (3-20)
-18-
11. Appuyez sur le bouton du programme une dernière fois pour quitter
le mode de programme et reprendre l’utilisation. Le régulateur affiche l’un
des éléments suivants :
MELT Si un cycle de fusion a été sélectionné et que la température est en
dessous de 135 °F.
HEATING Si la fusion n’est pas sélectionnée ou si la température dépasse
135 °F et est en dessous du point de consigne.
READY Lorsque la friteuse est prête à cuire.
Fonctionnement de la minuterie de la commande numérique à semi-conducteurs
1. Appuyez sur le ou les boutons
souhaités du minuteur
2. Le témoin lumineux du minuteur
clignote et le minuteur déclenche
le compte à rebours.
3. Appuyez sur le bouton du
minuteur pour couper l’alarme
lorsque le décompte est terminé.
4. Appuyez sur le bouton souhaidu minuteur et maintenez-le enfoncé pendant 3 secondes pour annuler la minuterie.
Remarque : le minuteur avec le moins de temps restant s’affiche lorsque les deux minuteurs s’exécutent simultanément.
Le témoin lumineux du minuteur avec le moins de temps restant clignote plus rapidement.
Remarque : Le minuteur ne s’active que lorsque l’afficheur marque READY. Si la température est trop basse,
l’afficheur affiche HEATING, puis READY une fois la température remontée.
Programmation de la commande par ordinateur
Si défini en LOCKED, appuyez sur
pour DÉVERROUILLER
Pour activer le mode de programmation, appuyez sur
les boutons dans l’ordre.
1. Centre du bouton PROGRAM
2. Bouton fléché LEFT
3. Bouton fléché RIGHT
Si LOCKED s’affiche, appuyez sur les boutons 1, 2, 3, 4
tout à gauche dans l’ordre pour déverrouiller.
FRITEUSES À GAZ SÉRIE VHG
VULCAN F-47678 Rév. A (3-20)
-19-
ADV USER SETTING s’affiche à l’écran. Les voyants
rouges s’allument sur les boutons contenant les réglages
des paramètres de commande. Les boutons non allumés
ne répondront pas.
Légende des boutons de réglage utilisateur avancés
Boutons de gauche minuteur de panier
Boutons de droite minuteur de panier
1. Température
2. Option USB
2. Type de fusion
4. Série
3. Bibliothèque de produits
9. Charger les paramètres d’usine par défaut
4. Éditeur de recette
5. Code d’accès
6. Volume du signal sonore
7. Langue
8. Retour
9. Test à vide
1. Appuyez sur le bouton 1 ; SET TEMP s’affiche et le
point de consigne actuel de la température se met à
clignoter. Appuyez sur les numéros du clavier de
gauche pour définir la température désirée. Appuyez
sur le bouton
de confirmation pour enregistrer et quitter ou sur
le bouton d’annulation pour quitter sans
enregistrer.
2. Appuyez sur le bouton 2 ; MELT TYPE s’affiche.
Appuyez sur UP ou DOWN sur le bouton du
programme pour faire défiler les options LIQUID,
NONE ou SOLID. Appuyez sur le bouton de
confirmation pour enregistrer et quitter ou sur le
bouton d’annulation pour quitter sans enregistrer.
Pour empêcher tout risque que la graisse alimentaire prenne feu lors de la mise en
marche, le mode de fusion de la graisse doit être rég sur « solide » lors de l’utilisation de graisse solide.
3. Appuyez sur le bouton 3 , PRODUCT LIBRARY s’affiche. Appuyez sur UP (haut) ou DOWN (Bas) sur le bouton de
programmation pour faire défiler les options (ADD, EDIT, DELETE ou EXIT).
FRITEUSES À GAZ SÉRIE VHG
VULCAN F-47678 Rév. A (3-20)
-20-
a. Pour ajouter un produit, sélectionnez ADD et appuyez sur le bouton de confirmation . NAME? s’affiche.
b. Saisissez le nom du produit à l’aide des boutons numérotés.
Utilisez les caractères en indice situés en bas à droite de chaque bouton circulaire numéroté. EXEMPLE : Le bouton
en indice numéro 2 du clavier droit du minuteur est enfoncé trois fois pour afficher la lettre C de CHIPS.
c. Appuyez sur LEFT et RIGHT sur le bouton du programme pour déplacer le curseur dans la fenêtre d’affichage.
d. Appuyez sur le bouton de confirmation pour enregistrer et quitter ou sur le bouton d’annulation pour
quitter sans enregistrer.
e. WORKING s’affiche pendant l’enregistrement du nouveau produit.
f. Pour supprimer un produit, sélectionnez DELETE en appuyant sur UP et DOWN sur le bouton de programmation
lorsque PRODUCT
LIBRARY s’affiche à nouveau et appuyez sur le bouton de confirmation .
g. Appuyez sur UP et DOWN sur le bouton du programme pour sélectionner le produit à supprimer.
h. Appuyez sur le bouton de confirmation ; ARE YOU SURE? s’affiche à l’écran.
i. Appuyez sur UP ou DOWN sur le bouton du programme pour faire défiler les options (YES ou NO).
j. Appuyez sur le bouton de confirmation pour enregistrer et quitter ou sur le bouton d’annulation pour
quitter sans enregistrer.
k. WORKING s’affiche lorsque le nouveau produit est supprimé.
l. Pour supprimer un produit, sélectionnez EDIT en appuyant sur UP et DOWN sur le bouton de programmation
lorsque PRODUCT LIBRARY s’affiche à nouveau et appuyez sur le bouton de confirmation .
m. Appuyez sur UP et DOWN sur le bouton du programme pour sélectionner le produit à modifier.
n. Appuyez sur le bouton de confirmation .
o. Utilisez les caractères en indice situés en bas à droite de chaque bouton circulaire numéroté. EXEMPLE : le bouton
numéro 5 du clavier droit du minuteur est enfoncé quatre fois pour afficher la lettre P de PICKLES.
p. Appuyez sur LEFT et RIGHT sur le bouton du programme pour déplacer le curseur dans la fenêtre d’affichage
pour modifier les caractères.
q. Pour effacer une lettre, déplacez le curseur sur la lettre et appuyez sur le bouton numéro 9 du clavier droit du
minuteur avec le caractère en indice « ˽ ».
FRITEUSES À GAZ SÉRIE VHG
VULCAN F-47678 Rév. A (3-20)
-22-
g. ASSIGN HOLD TIME? s’affiche. Appuyez sur UP ou DOWN sur le bouton du programme pour sélectionner Y
(oui) ou N (non). Sélectionnez Y et appuyez sur le bouton de confirmation pour activer et définir la minuterie
(00:01 à 99:59) ou N pour laisser inactif.
h. COMPENSATING TIME? s’affiche ensuite à l’écran. Appuyez sur UP ou DOWN sur le bouton du programme
pour sélectionner Y (oui) pour activer ou N (non) pour laisser inactif. Appuyez sur le bouton de confirmation .
Remarque : un temps réel n’est pas saisi pour la fonction de durée de compensation. Si définie sur Y (oui), la durée
de compensation effectue de petits ajustements de temps pour améliorer la consistance de cuisson des produits frits
pendant les périodes de forte cuisson.
RECIPE EDITOR (suite)
i. PROG ADDL RECIPE KEYS? s’affiche. Appuyez sur UP
ou DOWN sur le bouton du programme pour
sélectionner Y (oui) ou N (non). Sélectionnez Y pour
commencer à programmer une autre recette ou sur N
pour quitter et revenir à ADV USER SETTING.
Appuyez sur le bouton de confirmation .
5. Appuyez sur le bouton 5 ; PASSCODE s’affiche.
Appuyez sur UP ou DOWN sur le bouton du
programme pour sélectionner LOCKED ou
UNLOCKED. L’option LOCKED permet d’éviter les
modifications non autorisées dans le mode ADV USER
SETTING.
Appuyez sur le bouton de confirmation .
6. Appuyez sur le bouton 6 ; BEEP VOLUME
s’affiche. Appuyez sur UP ou DOWN sur le bouton du
programme pour sélectionner le niveau du volume.
0 correspond à « éteint » et 3 correspond au plus fort.
Appuyez sur le bouton de confirmation .
7. Appuyez sur le bouton 7 ; LANGUAGE s’affiche.
Appuyez sur UP et DOWN sur le bouton de
programmation pour sélectionner la langue du
contrôleur (ENGLISH, FRENCH ou SPANISH). Appuyez
sur le bouton de confirmation . Les versions en
espagnol et en français ne sont pas disponibles pour le
moment.
FRITEUSES À GAZ SÉRIE VHG
VULCAN F-47678 Rév. A (3-20)
-23-
8. Appuyez sur le bouton 8 ; IDLE SETBACK? s’affiche. Appuyez sur UP ou DOWN sur le bouton du programme
pour sélectionner Y (oui) ou N (non). Sélectionnez Y et appuyez sur le bouton de confirmation pour activer
et définir la minuterie ou N pour laisser inactif.
a. Si Y est sélectionné, IDLE SETBACK TIME s’affiche. Définissez le temps souhaité(10:00 à 99:59)et appuyez sur le
bouton CONFIRM .
SETBACK (suite)
b. SETBACK TEMP s’affiche. Définissez la température
désirée (200 °F 300 °F OU 93 °C 149 °C) et appuyez
sur le bouton de confirmation .
Remarque : IDLE s’affiche et la température est
réinitialisée au point de consigne le plus bas si aucun
bouton n’est enfoncé avant la fin du retardateur.
9. Appuyez sur le bouton 9 ; DRY FIRE TEST s’affiche.
Appuyez sur
UP ou DOWN sur le bouton du programme pour
sélectionner Y (oui) ou N (non). Sélectionnez Y et
appuyez sur le bouton confirmation pour
activer ou sur N pour le laisser inactif. Il doit être réglé
sur N.
La fonction de test à vide est une fonctionnalité importante qui a pour but d’empêcher les brûleurs de la
friteuse de s’allumer sans aucun liquide dans la cuve de friture. Il est recommandé de garder la position (Y) (oui).
L’allumage des brûleurs lorsque la cuve de friture est vide peut endommager cette dernre et annulera votre garantie.
10. Appuyez sur le bouton 2 sur le clavier de minuterie de droite; USB OPTION s’affiche. Appuyez sur UP et DOWN
sur le bouton de programmation pour sélectionner COPY FROM (pour télécharger un menu de recettes depuis
un lecteur), COPY TO (pour charger un menu de recettes vers un lecteur) ou EXIT. Appuyez sur le bouton de
confirmation .
a. L’écran affiche COPY RECIPE FROM (ou TO) USB?. Appuyez sur le bouton de confirmation pour copier un menu.
FRITEUSES À GAZ SÉRIE VHG
VULCAN F-47678 Rév. A (3-20)
-24-
11. Appuyez sur le bouton 4 sur le clavier de
minuterie de droite; SERIAL s’affiche. Il s’agit du
numéro de série du contrôleur et il ne s’agit pas d’un
paramètre programmable.
12. Appuyez sur le bouton 9 sur le clavier de
minuterie de droite; LOAD FACTORY DEFAULTS?
s’affiche. Appuyez sur UP ou DOWN sur le bouton du
programme pour sélectionner Y (oui) ou N (non).
Sélectionnez Y et appuyez sur le bouton de
confirmation pour réinitialiser le contrôleur au
point de consigne d’usine ou sur N pour le laisser
inactif.
Utilisation de la minuterie à commande par ordinateur
1. Appuyez sur les boutons du minuteur numérotés
désirés pour activer.
2. Le témoin lumineux du minuteur clignote et le
minuteur déclenche le compte à rebours.
3. Appuyez sur le bouton du minuteur et relâchez-le
pour afficher brièvement le nom de recette
correspondant.
4. Appuyez sur le bouton souhaité du minuteur et
maintenez-le enfoncé pendant 3 secondes pour annuler la
minuterie.
5. Appuyez sur le bouton du minuteur pour couper
l’alarme lorsque le décompte est terminé.
6. Les minuteurs pour lesquels il reste du temps
continueront de tourner.
Remarque : les deux minuteurs avec le moins de temps restant s’affichent lorsque plus de deux minuteurs fonctionnent
simultanément. Le voyant du minuteur avec le moins de temps restant clignote plus rapidement.
Remarque : Le minuteur ne s’active que lorsque l’afficheur marque READY. Si la température est trop basse, l’afficheur
affiche HEATING, puis à nouveau READY une fois la température remontée.
FRITEUSES À GAZ SÉRIE VHG
VULCAN F-47678 Rév. A (3-20)
-26-
4. Tournez l’interrupteur d’alimentation sur la position marche, suivez la procédure de
mise en route pour le type de contrôle. Dans le cas des modèles numériques à semi-
conducteurs (D) et informatisés (C), la température se fixera automatiquement
entre 195 et 200 °F. L’eau n’atteindra pas une ébullition active.
5. Utilisez la brosse à cuve; nettoyez les côtés, le fond et les tubes de l’échangeur de
chaleur.
6. Placez la rallonge de vidange dans la soupape de vidange et serrez à la main
uniquement. Vidangez la solution de nettoyage de la cuve dans un récipient.
7. Fermez le robinet de vidange et remplissez de nouveau la cuve d’eau. Ajoutez 1 tasse
(1/4 L) de vinaigre pour neutraliser tout alcali laissé par le nettoyant. Le niveau de la
solution doit se situer entre les lignes MIN et MAX à l’arrière de la cuve de la friteuse.
Appuyez sur le bouton PROGRAM pour les modèles (D) et sur le bouton CONFIRM
pour les modèles (C) pour que la solution se réchauffe. Laissez la solution reposer
quelques minutes.
8. Vidangez la cuve comme décrit sous VIDANGE DE LA CUVE. Rincez minutieusement
à l’eau claire et chaude. Toute trace de nettoyant doit être enlevée. Séchez
soigneusement la cuve.
9. Fermez le robinet de vidange et ajoutez la graisse alimentaire. Suivez la procédure
REMPLISSAGE DU RÉSERVOIR AVEC DE LA GRAISSE ALIMENTAIRE de ce
manuel.
10. La friteuse est désormais prête à être utilisée. Allumez l’interrupteur d’alimentation sur
la position marche et suivez la procédure de mise en route pour le type de contrôle
pour commencer à amener l’huile à la température voulue.
NETTOYAGE
L’huile et les pces chaudes peuvent causer des brûlures. Faites
très attention lors que vous utilisez, nettoyez et entretenez la friteuse.
Quotidien
Nettoyez votre friteuse régulièrement avec la brosse à cuve ainsi qu’avec un chiffon
humide, et polissez avec un chiffon sec et doux. Si le nettoyage régulier est négligé, la
graisse brûlée s’incrustera et une décoloration peut apparaître.
Les empreintes digitales peuvent parfois poser problème sur les surfaces très polies en
acier inoxydable. Elles peuvent être minimisées en appliquant un nettoyant qui laissera un
mince film huileux ou cireux.
Nettoyez toutes les surfaces extérieures de la friteuse au moins une fois par jour.
Utilisez un chiffon humidifié avec de l’eau tiède et un savon ou un détergent doux.
N’utilisez pas d’agent nettoyant à base de chlore ou de sulfate/sulfure.
Rincez soigneusement et séchez avec un chiffon sec et doux.
FRITEUSES À GAZ SÉRIE VHG
VULCAN F-47678 Rév. A (3-20)
-27-
Gardez l’extérieur de la friteuse propre et exempt de graisse accumulée pour éviter
la formation de taches tenaces. Si le nettoyage régulier est négligé, la graisse
brûlée s’incrustera et une décoloration peut apparaître.
Enlevez toute coloration par un lavage avec de l’eau et du détergent ou du savon.
Utilisez un tampon à récurer automoussant non métallique pour les décolorations
particulièrement tenaces.
Frottez toujours dans le sens du grain de l’acier inoxydable.
N’utilisez pas de tampon à récurer métallique ou des nettoyants abrasifs.
ARRÊT PROLONGÉ
1. Vidangez comptement la friteuse. Consultez la section VIDANGE DE LA FRITEUSE.
2. Nettoyez la friteuse comme indiqué dans la section NETTOYAGE.
3. Appuyez sur l’interrupteur d’alimentation pour le mettre à la position d’arrêt.
4. Fermez le robinet d’arrêt de gaz principal.
SYSTÈME DE FILTRATION KLEENSCREEN PLUS
®
Généralités
Le système de filtration KleenScreen PLUS
®
filtre l’huile lorsqu’elle est réacheminée dans sa cuve
respective. Une seule cuve peut être vidangée et filtrée à la fois. Il ne faut en aucun cas vidanger
les deux cuves en même temps.
Montage
Aps le ballage, lavez le porte-filtre, la crépine-panier, le tube daspiration et l’ensemble
écran-filtre. Assurez-vous de retirer la cartouche filtrante située à linrieur de l’écran-filtre.
Utilisez un détergent pour lave-vaisselle et de l’eau chaude (les pces sont lavables au lave-
vaisselle). Rincez comptement le porte-filtre, la crépine-panier et les composants de l’écran-
filtre et essuyez toutes les pièces avec un chiffon propre.
Tirez complètement le porte-filtre et retirez-le pour le nettoyer.
Les tiroirs du porte-filtre peuvent être retirés pour être lavés en repoussant les tiroirs dans la
friteuse. Ensuite, faites tourner le bas du tiroir vers le centre de la friteuse et soulevez-le.
Effectuez la procédure inverse pour réinstaller.
Repositionnez le porte-filtre dans le tiroir. Positionnez l’ensemble écran-filtre dans le collier
du tube d’aspiration dans le porte-filtre en positionnant l’ensemble écran-filtre à plat au fond
du porte-filtre.
Alignez avec soin la buse du tube d’aspiration pour laccoupler avec le bloc-prise d’huile fi au
châssis de la batterie de friteuses. Fermez le tiroir du porte-filtre. Voir les Figures 1, 2 3 et 4.
FRITEUSES À GAZ SÉRIE VHG
VULCAN F-47678 Rév. A (3-20)
-29-
2. Insérer le tube d’aspiration
dans l’orifice de l’écran-filtre.
Alignez les filetages de la
poignée supérieure avec les
filetages de l’écran-filtre.
Tournez doucement dans le
sens des aiguilles d’une montre
jusqu’à ce que le tout soit serré.
N’utilisez pas
d’outils. Serrez à la
main uniquement.
3. Tournez doucement la
poignée inférieure dans le sens
des aiguilles d’une montre
jusqu’à ce que le tout soit serré.
N’utilisez pas
d’outils. Serrez à la
main uniquement.
Fig. 3
Retirez l’ensemble à mailles fines en acier du porte-filtre et nettoyez-le tous les jours (ou plus
fréquemment selon votre utilisation). Démontez l’ensemble écran-filtre en inversant les
étapes 1 à 3 et en retirant la cartouche filtrante située à l’intérieur de l’écran-filtre. Ne
démontez pas le tube d’aspiration. Utilisez un détergent pour lave-vaisselle et de l’eau
chaude (les pièces sont lavables au lave-vaisselle).
FRITEUSES À GAZ SÉRIE VHG
VULCAN F-47678 Rév. A (3-20)
-30-
Montage de l’enveloppe en tissu de microfiltration
Fig. 4
Insérez la cartouche filtrante dans l’enveloppe et alignez les trous centraux. Rabattez
l’extrémité ouverte de l’enveloppe et placez la pince de fermeture par-dessus. Placez la
charnière et appuyez fermement tout le long pour bien fixer et sceller l’ensemble de filtre.
Assurez-vous que l’extrémité pliée de l’enveloppe est face vers le bas.
Fixez le tube d’aspiration de la même façon que l’ensemble de filtre tel que décrit à la page
précédente.
Démontez l’ensemble de l’enveloppe en tissu en inversant les étapes.
N’utilisez pas d’outils. Serrez à la main uniquement.
Retirez l’ensemble de l’enveloppe en tissu du porte-filtre et nettoyez-le tous les jours (ou plus
fréquemment selon votre utilisation). Grattez les débris et les boues des surfaces de
l’enveloppe à l’aide d’une spatule.
Ne lavez pas l’enveloppe en tissu.
TUBE D’ASPIRATION
(IDENTIQUE À CELUI DE
L’ENSEMBLE DE FILTRE)
ENVELOPPE EN TISSU
CARTOUCHE FILTRANTE DE
L’ENVELOPPE EN TISSU
(DIFFÉRENT DE CELUI DE
L’ENSEMBLE DE FILTRE)
PINCE DE
FERMETURE
FRITEUSES À GAZ SÉRIE VHG
VULCAN F-47678 Rév. A (3-20)
-31-
INSTRUCTIONS POUR LE RETRAIT ET LE REMPLACEMENT DE L’ENVELOPPE DU
FILTRE KLEENSCREEN PLUS
®
POUR UNE FILTRATION ABSOLUE ET UN DÉBIT MAXIMUM, NOUS VOUS RECOMMANDONS DE CHANGER
LES ENVELOPPES DE FILTRE À CHAQUE VIDANGE D’HUILE (10 À 14 JOURS SELON L’UTILISATION
DE L’HUILE).
L’huile et les pièces chaudes peuvent causer des
brûlures. Soyez prudent lors de l’utilisation, du nettoyage et de l’entretien
de la friteuse.
Étape 1
Jetez toute l’huile du réservoir de filtre. Lorsque le porte-filtre est vide, utilisez
une spatule et grattez tous les débris laissés sur l’enveloppe du filtre et dans le
porte-filtre.
Étape 2
Dévissez le tube d’aspiration du filtre en tournant le raccord de la poignée
inférieure dans le sens contraire des aiguilles d’une montre. Ensuite, vissez le
raccord de la poignée inférieure dans le sens contraire des aiguilles d’une
montre jusqu’à ce qu’il soit complètement desserré.
Étape 3
Enlevez la pince de fermeture.
Étape 4
Enlevez la cartouche filtrante de l’enveloppe et lavez-la à l’eau chaude puis
séchez-la complètement. La cartouche filtrante de l’écran-filtre est lavable au
lave-vaisselle. Placez la cartouche filtrante dans une nouvelle enveloppe de filtre
KleenScreen PLUS
®
.
Ne lavez pas l’enveloppe en tissu.
Étape 5
Faites glisser la cartouche filtrante de l’enveloppe. Insérez-la dans l’enveloppe
en tissu en veillant à aligner les trous. Rabattez l’extrémité ouverte de
l’enveloppe et placez la pince de fermeture par-dessus. Placez la charnière et
appuyez fermement tout le long pour bien fixer et sceller l’ensemble de filtre.
Assurez-vous que l’extrémité pliée de l’enveloppe soit vers le bas. Fixez
l’ensemble du tube d’aspiration en commençant par serrer le raccord de la
poignée supérieure puis en serrant le raccord de la poignée inférieure.
N’utilisez pas d’outils. Serrez à la main uniquement.
FRITEUSES À GAZ SÉRIE VHG
VULCAN F-47678 Rév. A (3-20)
-32-
Étape 6
Positionnez l’ensemble écran-filtre dans le collier du tube d’aspiration dans le
porte-filtre en positionnant l’ensemble écran-filtre à plat au fond du porte-filtre.
Alignez le tube de sorte que l’extrémité du tube s’engage dans le raccord du
récipient d’huile chaque fois que le tiroir est ouvert et fermé.
PROCÉDURE DE FILTRAGE Modèles KleenScreen PLUS
®
UNIQUEMENT
L’huile et les pièces chaudes peuvent causer des blures. Soyez
prudent lors de l’utilisation, du nettoyage et de l’entretien de la friteuse.
Le déversement de composé de friture chaude peut causer de
graves brûlures. Ne déplacez pas la friteuse sans vidanger tous les composés de
friture de la cuve.
Ne jamais faire couler de l’eau ou une solution d’ébouillantage à travers le filtre
et la pompe-moteur. Cette action annulera la garantie de la friteuse.
Filtrez UNE SEULE cuve de friture à la fois pour éviter les débordements et les
déversements.
N’éteignez pas la friteuse. Laissez-la allumée.
Filtrage avec les commandes à semi-conducteur
L’huile et les pièces chaudes peuvent causer des brûlures.
Faites très attention lors que vous utilisez, nettoyez et entretenez la friteuse. Ne la
laissez pas sans surveillance.
Le déversement de composé de friture chaude peut causer de
graves brûlures. Ne déplacez pas la friteuse sans vidanger tous les composés de
friture de la cuve.
Ne jamais faire couler de l’eau ou une solution d’ébouillantage à travers le filtre
et la pompe-moteur. Cette action annulera la garantie de la friteuse.
N’éteignez pas la friteuse. Laissez-la allumée.
Filtrez UNE SEULE cuve de friture à la fois pour éviter les débordements et
les déversements.
FRITEUSES À GAZ SÉRIE VHG
VULCAN F-47678 Rév. A (3-20)
-33-
1. N’éteignez pas la friteuse. Laissez-la
allumée. Vulcan recommande l’ajout
d’un médium de traitement d’huile à
l’huile avant le filtrage. Filtrez toujours
la graisse lorsque sa température se
situe entre 300 °F et 350 °F.
2. Assurez-vous que le tiroir du filtre
est complètement fermé et que le
tube d’aspiration et le bloc-prise sont
à la position appropriée.
3. Ouvrez lentement le
robinet de vidange et
laissez l’huile s’écouler de
la cuve de friture dans le
porte-filtre. Puis ouvrez
complètement le robinet
de vidange. La friteuse
s’arrête automatiquement
de chauffer.
4. La mention DRAINING s’affiche à
l’écran. Une fois la cuve de friture vide,
mettez la pompe-filtre en marche en
appuyant sur l’icône du filtre
en la maintenant enfoncée pendant 3 à
4 secondes. Laissez la pompe filtrer l’huile
pendant quelques minutes AVANT de
refermer le robinet de vidange.
5. Fermez le robinet de vidange.
Remplissez la cuve de nouvelle graisse
alimentaire.
6. L’écran alterne entre
FILLING et PUSH FLT.
Remplissez jusqu’au
niveau se trouvant entre
les lignes MIN et MAX à
l’arrière de la cuve de la
friteuse. L’huile augmente
de volume lorsqu’elle est
chauffée. Ne remplissez
pas la cuve de la friteuse
au-dessus de la ligne MAX.
BLOC-PRISE
TUBE D’ASPIRATION
FRITEUSES À GAZ SÉRIE VHG
VULCAN F-47678 Rév. A (3-20)
-35-
Filtrage avec les commandes par ordinateur
L’huile et les pièces chaudes peuvent causer des brûlures. Faites très attention lors que vous
utilisez, nettoyez et entretenez la friteuse. Ne la laissez pas sans surveillance.
Le déversement de composé de friture chaude peut causer de graves brûlures. Ne déplacez pas la
friteuse sans vidanger tous les composés de friture de la cuve.
Ne jamais faire couler de l’eau ou une solution d’ébouillantage à travers le filtre et la pompe-moteur. Cette action
annulera la garantie de la friteuse.
N’éteignez pas la friteuse. Laissez-la allumée.
Filtrez UNE SEULE cuve de friture à la fois pour éviter les débordements et les déversements.
1. N’éteignez pas la friteuse. Laissez-la
allumée. Vulcan recommande l’ajout
d’un médium de traitement d’huile à
l’huile avant le filtrage. Filtrez toujours
la graisse lorsque sa température se
situe entre 300 °F et 350 °F.
2. Assurez-vous que le tiroir du filtre
est complètement fermé et que le
tube d’aspiration et le bloc-prise sont
à la position appropriée.
3. Ouvrez lentement le robinet de
vidange et laissez l’huile s’écouler de
la cuve de friture dans le porte-filtre.
Puis ouvrez complètement le robinet
de vidange. La friteuse s’arrête
automatiquement de chauffer.
4. La mention DRAINING s’affiche à
l’écran. Une fois la cuve de friture vide,
mettez la pompe-filtre en marche en
appuyant sur l’icône du filtre pendant 3-
4 secondes. Laissez la pompe filtrer
l’huile pendant quelques minutes AVANT
de refermer le robinet de vidange.
5. Fermez le robinet de vidange.
Remplissez la cuve de nouvelle graisse
alimentaire.
6. L’écran alterne entre FILLING et
PRESS FILTER. Remplissez jusqu’au
niveau se trouvant entre les lignes MIN
et MAX à l’arrière de la cuve de la
friteuse. L’huile augmente de volume
lorsqu’elle est chauffée. Ne remplissez
pas la cuve de la friteuse au-dessus de
la ligne MAX.
BLOC-PRISE
TUBE D’ASPIRATION
FRITEUSES À GAZ SÉRIE VHG
VULCAN F-47678 Rév. A (3-20)
-36-
7. Appuyez de nouveau sur l’icône de
filtre pour arrêter la pompe-filtre. La
mention VATFULL? PUSH CONFIRM
s’affiche à l’écran. Confirmez que
l’huile est au niveau adéquat et
appuyez sur le bouton CONFIRM.
8. La friteuse commence à chauffer
l’huile au point de consigne de
température souhaité.
VIDANGE/RINÇAGE ET MISE AU REBUT DE L’HUILE
1. Suivez les instructions de filtrage du point 1 au point 3, mais ne mettez pas de médium de traitement d’huile dans
la friteuse. Vidangez l’huile de la friteuse dans le porte-filtre.
2. Fixez le tuyau souple à déconnexion rapide au raccord rapide mâle du tuyau de vidange.
3. Pour éliminer l’huile, placez le bec du tuyau souple de mise au rebut dans un récipient suffisamment grand pour
contenir la graisse alimentaire éliminée. Mettez l’interrupteur de filtre situé derrière la porte à la position « USE HOSE
TO DISCARD ONLY ». Cela fera en sorte que l’huile soit pompée uniquement par le tuyau souple.
4. Pour vidanger/rincer la cuve avec de l’huile filtrée afin d’éliminer les particules accumulées, placez l’interrupteur de
filtre derrière la porte à la position « USE HOSE TO RINSE AND FILL ». Cela fera en sorte que l’huile soit acheminée
dans le tuyau flexible tout en étant admise par l’arrière de la cuve.
L’huile sortira immédiatement par l’extrémité de buse du tuyau chaque fois que le
tuyau est branché et que la pompe-filtre est engagée.
5. Alors que l’interrupteur d’alimentation est en position marche, appuyez sur le bouton de filtre et maintenez-le
enfoncé pendant au moins 3 secondes. Cela actionnera la pompe-moteur.
6. Une fois que toute l’huile a été éliminée et que le porte-filtre est vide, appuyez sur le bouton de filtre pour
désactiver le moteur et la pompe.
Le raccord du tuyau est chaud en raison de la température de l’huile éliminée et peut
provoquer des brûlures.
7. Débranchez le tuyau de mise au rebut. Veillez à laisser le tuyau se vider avant de le ranger. Fermez le robinet de
vidange et remplissez la cuve de friture d’huile neuve.
Si le réservoir de mise au rebut n’est pas assez grand pour contenir la totalité de la graisse alimentaire, arrêtez
le flux en appuyant sur le bouton de filtre pour éteindre la pompe-moteur. Videz le conteneur et reprenez
l’opération de mise au rebut en maintenant le bouton de filtre appuyé pendant 3 à 4 secondes.
Si l’alimentation est éteinte par erreur lors de l’opération de filtrage, veuillez effectuer les mesures correctives
suivantes.
1. Fermez le robinet de vidange
2. Activez l’interrupteur d’alimentation
3. Ouvrez immédiatement le robinet de vidange
4. Poursuivez l’opération de filtrage
CONSEIL POUR LE FILTRAGE :
Ouvrez le tiroir de filtrage d’environ 1 po pour permettre à toute l’huile dans la conduite de retour de s’écouler dans le porte-
filtre. Cette opération peut prendre environ 30 secondes. Puis ouvrez complètement le tiroir pour nettoyer les composants du
filtre.
FRITEUSES À GAZ SÉRIE VHG
VULCAN F-47678 Rév. A (3-20)
-39-
Si vous appuyez sur le bouton RESET, la pompe peut démarrer
immédiatement et de l’huile chaude commencera à la traverser.
ENTRETIEN
L’huile et les pièces chaudes peuvent causer des brûlures. Faites
très attention lors que vous utilisez, nettoyez et entretenez la friteuse.
Le déversement de composé de friture chaude peut causer de
graves brûlures. Ne déplacez pas la friteuse sans vidanger tous les composés de
friture de la cuve.
Mettez la friteuse hors tension avant de procéder à son entretien.
LUBRIFICATION
Aucune pièce de la friteuse n’a besoin d’être lubrifiée.
INSPECTION DU CONDUIT DE FUMÉE
Procédez à une vérification une fois par an, lorsque la friteuse est à froid. Contrôlez le
conduit de fumée et retirez toute obstruction.
VÉRIFICATION ANNUELLE
Contactez un prestataire de services qualifié pour qu’il effectue la vérification annuelle de la
friteuse.
SERVICE AUX ÉTATS-UNIS ET AU CANADA
Contactez l’usine, son représentant ou le prestataire de services qualifié local pour qu’il
effectue l’entretien et les réparations de la friteuse. Pour voir la liste exhaustive des bureaux
de service, veuillez consulter le site www.vulcanequipment.com.
ALARMES ET MESSAGES D’ERREUR
FLAMME PILOTE HORS SERVICE Si la flamme pilote ne fonctionne pas, l’écran
numérique affiche le message suivant :
Semi-conducteurs « D » PILOT OUT
Informatisés « C » PILOT OUT
ALIMENTATION EN GAZ FAIBLE OU NULLE Si rien n’est fait après 90 secondes, une
alarme retentit en continu, la demande de chaleur est désactivée et tout cycle de cuisson en
cours est annulé. L’afficheur numérique affiche le message suivant :
Semi-conducteurs « D » IGNITION LOCKOUT


Produkt Specifikationer

Mærke: Vulcan
Kategori: Fryser
Model: 4VHG50CF

Har du brug for hjælp?

Hvis du har brug for hjælp til Vulcan 4VHG50CF stil et spørgsmål nedenfor, og andre brugere vil svare dig