• T r f ar s uct out t et ca ot he impo tant sa egu ds and in tr ions lined in his she nn
cov le c t t that may occur. t st be er all possib ondi ions and situa ions I mu
unde ood hat tain be ol ed. hesrst t caut cerion and care factors ust m f low T e
in ions ided sa high endstruct ar rove p fo yor ur fet we y and ly recomm that a
li ensed, trician in tall his nic tra lecined e s t u t.
• T ur t ount correctl stall sta ard his fixt e is designed o be m ed on a y in ed nd
rou oc o throu r bo ith a e r T bond or tagon b x OR gh a wi ing x w a pl st r f ame. he x
mu be sec oun ed he e he ding. he ossbst urely m t to t st cturru o tf buil T cr ar and
ha pplied sho be used, di ing he herdware su uld rectly mount t fixture to t o
bo ma ke le to correctl t ure.x y ma it impossib y align he fixt
W D CA I SARNINGS AN UT ON
· Make sure is POWER COMPLETELY OFF at the fuse box
· Have your fixture installed by a qualified licensed electrician
· Prepare everything in a clear area
· Wear gloves at all times during this installation
· Read instructions carefully before you start assembly
· Keep this installation sheet for future reference
C DA:ANA 19054 28 - Sur V3Z 6Mth Ave., rey, C B 3
USA: 3035 E L i Rd. V. one Mounta n - Las egas, N 1V 8908
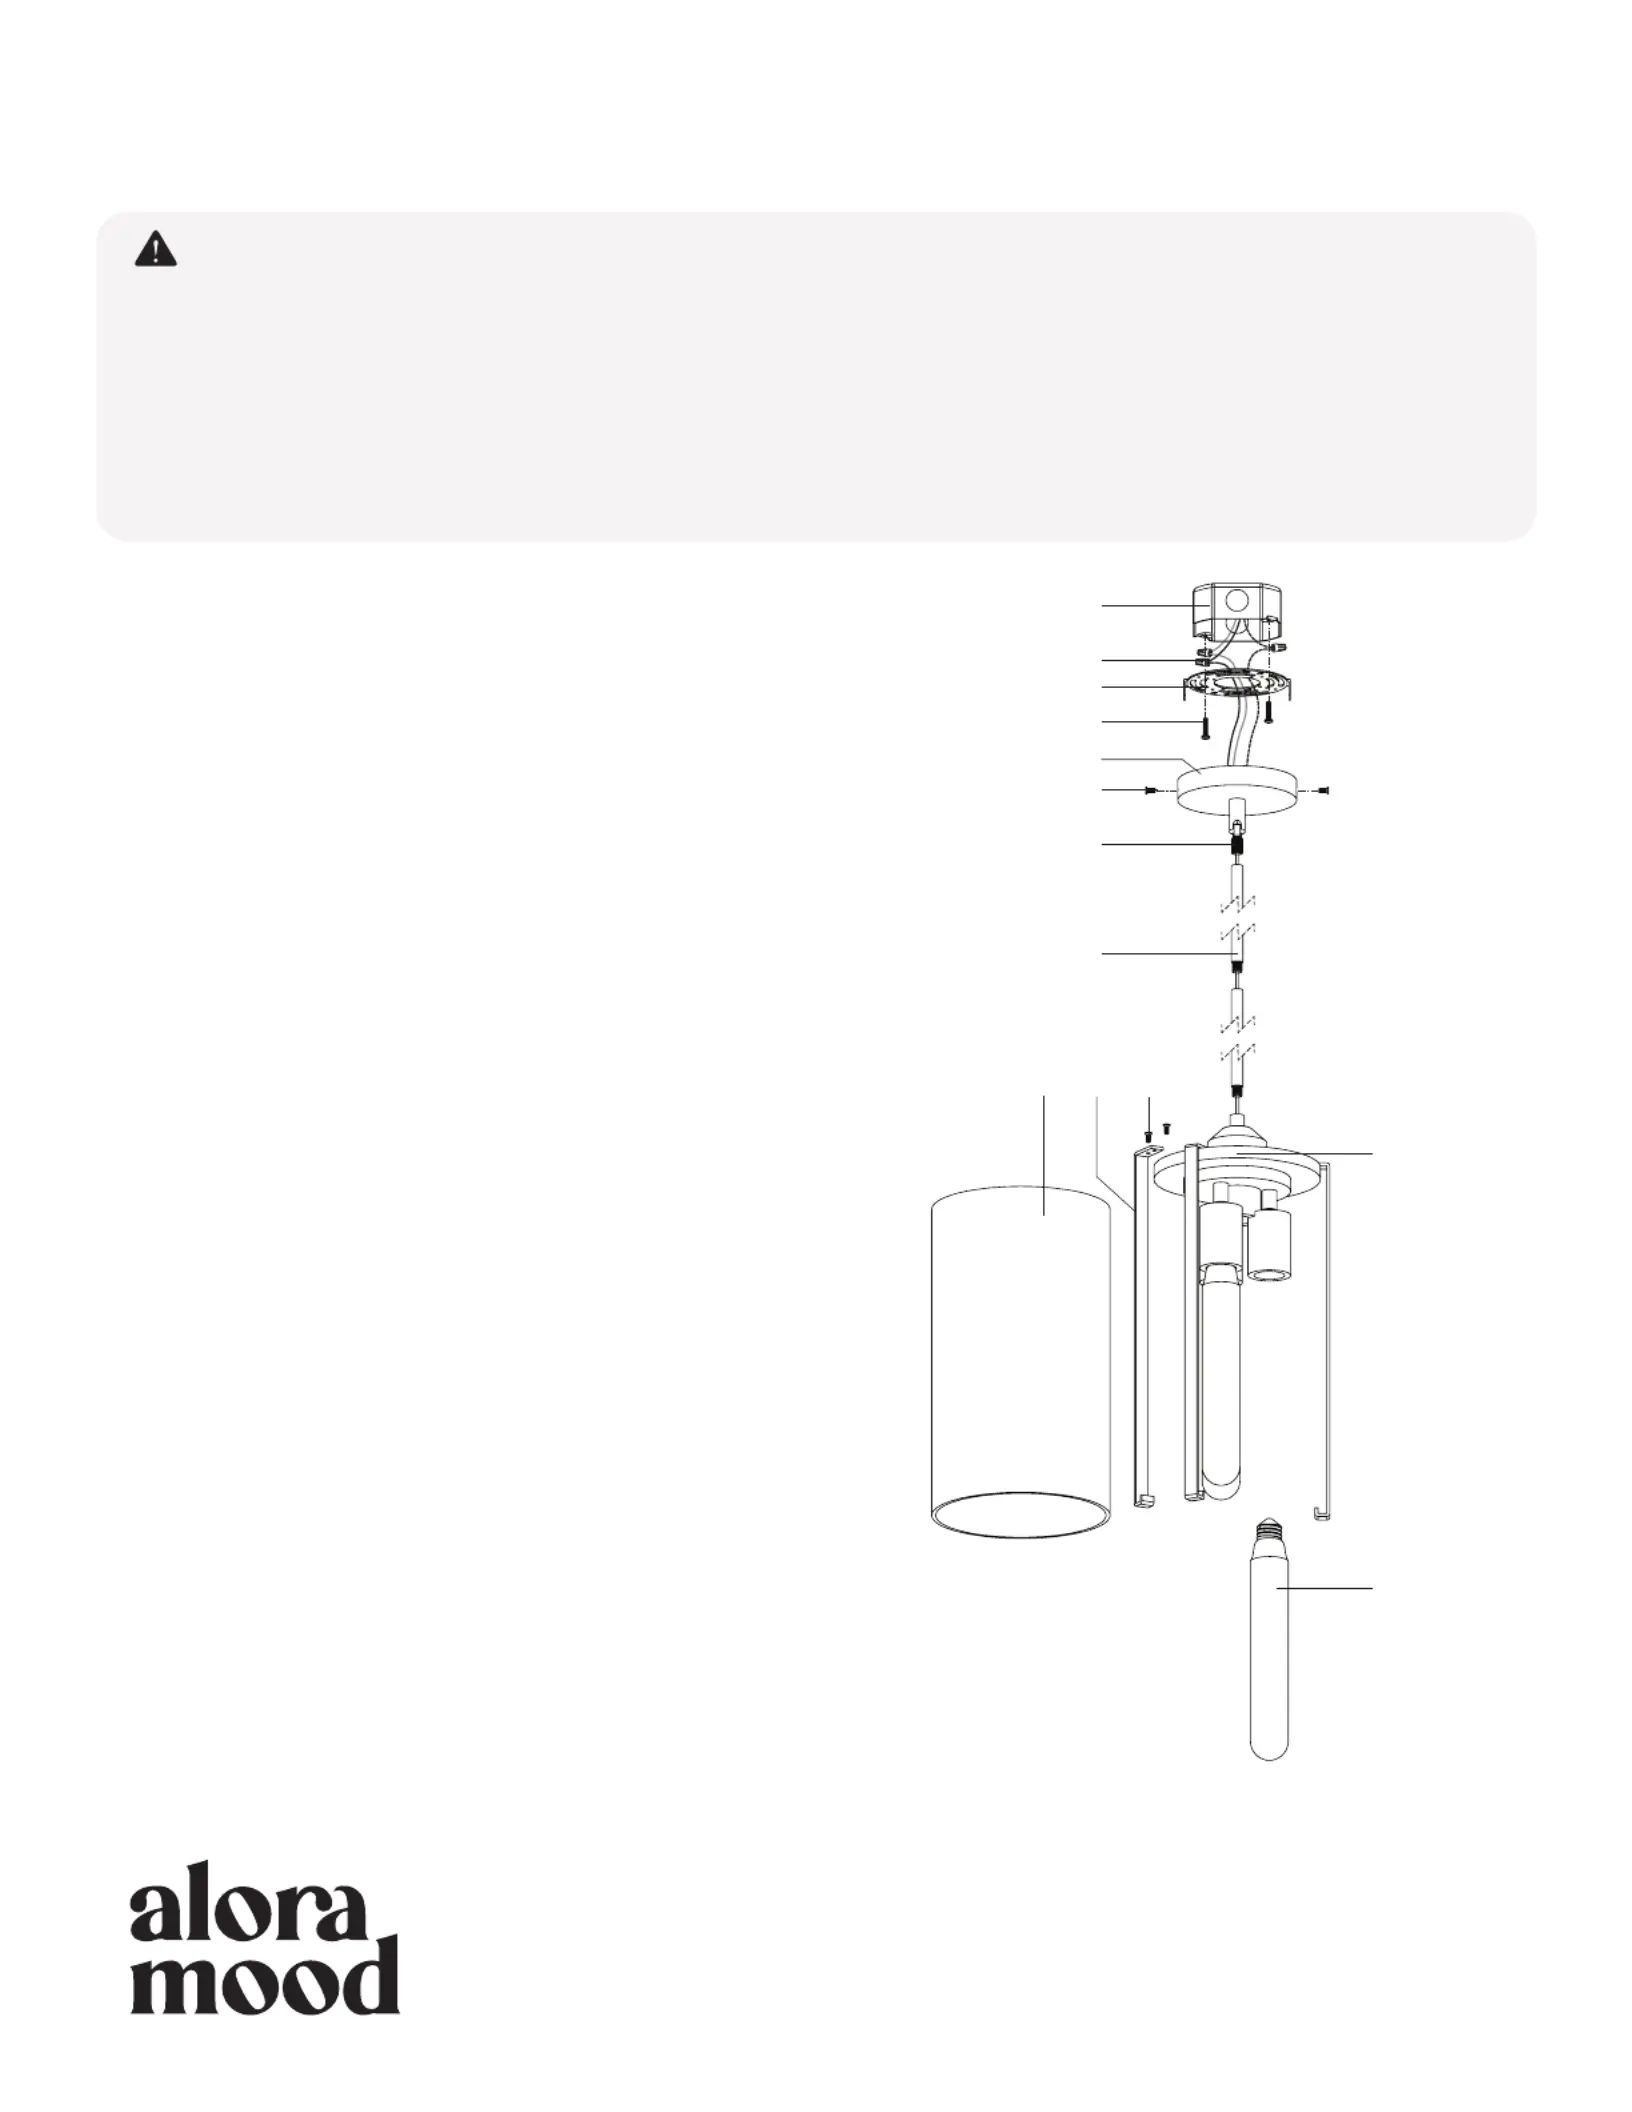
Remove fixture from its original package.
Separate mounting plate (1c) from canopy (2a) by removing canopy
Attach mounting plate (1c) to electrical junction box (1a) using junction
box screws provided (1e) in hardware package.
Determine hanging height of fixture by securing rods (2d) to swivel
(2e) and fixture (3a) after feeding fixture wires through rods.
Make proper electrical connections ( to to black hot white “L”, neutral
“N”, ground to ) with wire nuts (1b) provided in hardware “GND”
Attach two shade holders (3e) onto fixture (3a) with screws (3d),
followed by shade (3c). Secure the last shade holder (3e) on fixture
(3a) and secure with screws (3d).
Attach canopy (2a) to mounting plate (1c) with canopy screws (2b).
Install the recommended lamp (3b) (not provided) (referred on the
socket label for maximum wattage and type) to fixture socket.
You are now ready to enjoy your fixture.
TE CH N I C PO TA L SU P R
t cal pp rt l r .cechni su o@a oalighting om