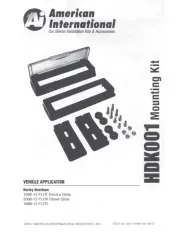
American International HDK001 Manual


Læs gratis den danske manual til American International HDK001 (4 sider) i kategorien Ikke kategoriseret. Denne vejledning er vurderet som hjælpsom af 121 personer og har en gennemsnitlig bedømmelse på 4.8 stjerner ud af 61 anmeldelser. Har du et spørgsmål om American International HDK001, eller vil du spørge andre brugere om produktet?

Side 1/4
Ameri,an
International
Car
Stereo
Installation
Kits
&
Accessories
VEHICLE
APPLICATION
Harley-Davidson
1996-13 FLHT Electra Glide
2006-13 FLHX Street Glide
1998-13
FLTR
....
■-
~
=
C
■-
....
C
=
C,
~
...
=
=
-
1:1
-
©2017 AM
ER
ICAN INTERN
AT
IONAL
IN
DUSTRIES,
IN
C.
TECH Ver 08/17 PR INT
Ver.
09/17
Ameri,an
International
Car
Stereo
Installation
Kits
&
Accessories
VEHICLE
APPLICATION
Harley-Davidson
1996-13 FLHT Electra Glide
2006-13 FLHX Street Glide
1998-13
FLTR
....
■-
~
=
C
■-
....
C
=
C,
~
...
=
=
-
1:1
-
©2017 AM
ER
ICAN INTERN
AT
IONAL
IN
DUSTRIES,
IN
C.
TECH Ver 08/17 PR INT
Ver.
09/17
Ameri,an
International
Car
Stereo
Installation
Kits
&
Accessories
VEHICLE
APPLICATION
Harley-Davidson
1996-13 FLHT Electra Glide
2006-13 FLHX Street Glide
1998-13
FLTR
....
■-
~
=
C
■-
....
C
=
C,
~
...
=
=
-
1:1
-
©2017 AM
ER
ICAN INTERN
AT
IONAL
IN
DUSTRIES,
IN
C.
TECH Ver 08/17 PR INT
Ver.
09/17
American
International
Car Stereo Instaation Kits
&
Accessories
VEHICLE APPLICATION
Harley-Davidson

  


  
Included Parts
HDK001
Aftermarl<et Stereo Dash Kit for
Select Harley-Davidson Motorcycles
This
kit
Includes
everything
you
will
need
to
mount your aftermarket
radio
Into
the
dash
of your
motorcycle.
The
following
parts
have
been
included for your
convenience.
1. Dash Kit
2 Face plates (one Is equipped with a splash guard)
2
Mounting Brackets (one left and one right)
2 Spacers (needed
for
RoadGllde models
only)
4 Stainless bolts (short)
4 Stainless bolts (long -
for
use with spacers)
4 Stainless nuts
2. Rubber Gasket Ring
Tools
Needed
The following
is
a
list
of
tools (not Included) you
will
need
to
complete this Installation.
1. T-25
Tone
driver
2.
T-27
Tone
driver
3.
3/16"
or
5mm
Hex
Socket
4.
1/4"
or
6mm
long
shaft
Hex
Socket
5. 7/16" Socket/ratchet
combo
or
box
wrench (Road Glide
models
only)
Disassembly
2006-2013 FLHX Street Glide & 1996-2013 FLHT Electra Glide Models
Remove the outer fairing and windshield as follows:
1 . Place protective material on top
of
front fender to
protect paint from scratches
or
other damage.
2. Standing at the front of the motorcycle,
l,QQll!l
the three T27 TORX screws (Numbers 1, 2 & 3 in
the
image to the right) just below the windshield.
3. Raise and remove the windshield from between
the inner and outer fairings.
4. Moving to the inner fairing side, remove the two
T27 TORX screws outboard
of
the speakers
(Numbers 4 &5 in the image to the right)
on
the
left and right side.
5. Tum the handlebar to the right and remove the
T-27 TORX screw (Number 6 In the Image to the
right) by reaching in below the left side
of
the fair
ing cap.
6. Tum the handlebar to the left and remove
the T-27 TORX screw (Number 7 in
the
image to
the right) below right side
of
the fairing cap.
CAUTION: On FLHX
models,
be
sure
to
hold
the
out-
er
fairing
in
position
as
the
last
screw
Is
removed
.
Without
auxiliary
lamps
to
hold
It
In
position
, the
outer fairing will drop, possibly resulting In fairing
or
fender damage.
7. Returning to the front
of
the motorcycle, remove
the three screws below the windshield.
8.
Tilting the outer fairing forward, remove head lamp
connector at the back
of
the head lamp assembly.
8. Lift the outer fairing off the motorcycle.
FL
TR
(RoadGHde)
in
structions
on
next
page
AAMP Global I Technical Support 1-800-477-2267 x 5
www
aampgtobal com I
02018
AAMP Global
Page 1

HDK001



































I
Disasse
m
bly
]









































 










FL
(Roal) insUons
 pa


 






Page
1


Produkt Specifikationer

Mærke: American International
Kategori: Ikke kategoriseret
Model: HDK001

Har du brug for hjælp?

Hvis du har brug for hjælp til American International HDK001 stil et spørgsmål nedenfor, og andre brugere vil svare dig