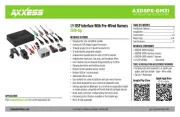
AXESS AXBT-TY1 Manual


Læs gratis den danske manual til AXESS AXBT-TY1 (4 sider) i kategorien Ikke kategoriseret. Denne vejledning er vurderet som hjælpsom af 32 personer og har en gennemsnitlig bedømmelse på 3.7 stjerner ud af 16.5 anmeldelser. Har du et spørgsmål om AXESS AXBT-TY1, eller vil du spørge andre brugere om produktet?

Side 1/4
AXBT-TY1
I N S TA L L A T I O N I N S T R U C T I O N S
AxxessInterfaces.com © COPYRIGHT 2020 METRA ELECTRONICS CORPORATION REV. 10/5/20 INSTAXBT-TY1
Attention! Let the vehicle sit with the key
out of the ignition for a few minutes before
removing the factory radio. When testing the
aftermarket equipment, ensure that all factory
equipment is connected before cycling the
key to ignition.
INTERFACE FEATURES
TOOLS REQUIRED
• Crimping tool and connectors, or solder gun,
solder, and heat shrink • Tape • Wire cutter
• Zip ties
TABLE OF CONTENTS
Connections ............................................................2
Installation .............................................................2
App Instructions .....................................................3
Toyota Camry Data Interface 2018-Up
Wiring harness for installing an
aftermarket radio
Provides power and four speakers
Retains balance and fade
Designed for non-amplified models
Provides NAV outputs (parking brake,
reverse, speed sense)
Retains the factory backup camera
Pre-wired AXSWC harness (AXSWC sold
separately)
Includes an AXCSD-6V 12-to-6V step-
down for the factory camera
Allows retention and adjustment of the
* Personalization Options
Adjust * Personalization Options through
a Bluetooth application
Smartphone application offering full
control from either Android or Apple
mobile devices
Visit AxxessInterfaces.com for more detailed information about the product and up-to-date vehicle specific applications
OPTIONAL ACCESSORIES
(sold separately)
Steering Wheel Control Interface: AXSWC
APPLICATIONS
Toyota
Camry 2018-Up RAV4 2019-Up
INTERFACE COMPONENTS
• AXBT-TY1 harness:
• 10-pin harness
• 28-pin harness
• 30-pin harness
• 12-pin AXSWC harness
• 16-pin AXBT harness
• AXCSD-6V
• AXBT interface
* Actual options available vary per vehicle and per trim.
(Refer to owner’s manual for options available in vehicle.)
2
Connect the wire to the rear left positive speaker output.Green
Connect the wire to the rear left negative speaker output.Green/Black
Connect the wire to the rear right positive speaker output.Purple
Connect the to the rear right negative speaker outputPurple/Black
12-pin AXSWC harness & 3.5mm jack:
This 12-pin harness & 3.5mm jack are to be used with an (sold separately) AXSWC AXSWC
to retain steering wheel audio controls. If the is not being used, disregard this AXSWC
harness and 3.5mm jack. If it is to be used, please refer to the instructions for radio AXSWC
connections and programming. Disregard the harness that comes with the .AXSWC
With the key in the off position:
1. Connect the AXBT-TY1 harness to the AXBT interface.
2. Connect the AXBT-TY1 harness to the wiring harness in the vehicle.
3. If an AXSWC (sold separately) will be used, do not connect it until after the is fully AXBT
functional.
CONNECTIONS
INSTALLATION
From the AXBT-TY1 harness to the aftermarket radio:
Connect the wire, the wire labeled “CAMERA GROUND” and also the wire Black Black , Black
from the AXCSD-6V, to the ground wire.
Connect the Yellow wire to the battery wire.
Connect the wire to the accessory wire.Red
Connect the wire labeled “CAMERA POWER 6V”, to the wire from the Red Blue/Red AXCSD-6V.
Connect the reverse wire from the aftermarket radio to the wire, and also to Green/Purple
the wire from the Blue/White AXCSD-6V.
The following (2) wires are only for a multimedia/navigation radio that requires these wires.
Connect the wire to the VSS/speed sense wireBlue/Pink
Connect the wire to the parking brake wireLight Green
If retaining the factory AUX-IN jack, connect the and RCA jacks to the audio Red White
AUX-IN jacks from the aftermarket radio.
Connect the Yellow RCA jack to the backup camera input.
10-pin harness:
Connect the wire to the front right positive speaker output.Gray
Connect the Gray/Black wire to the front right negative speaker output.
Connect the wire to the front left positive speaker output.White
Connect the wire to the front left negative speaker output.White/Black


Produkt Specifikationer

Mærke: AXESS
Kategori: Ikke kategoriseret
Model: AXBT-TY1

Har du brug for hjælp?

Hvis du har brug for hjælp til AXESS AXBT-TY1 stil et spørgsmål nedenfor, og andre brugere vil svare dig


Ikke kategoriseret AXESS Manualer

AXESS

AXESS AXABH-CH3 Manual

29 Juli 2025
AXESS

AXESS AXDSPX-HK5 Manual

25 Februar 2025
AXESS

AXESS AXAMP-CH8 Manual

25 Februar 2025
AXESS

AXESS AXTC-MZ1 Manual

25 Februar 2025
AXESS

AXESS AXAMP-FD2 Manual

25 Februar 2025
AXESS

AXESS AXAMP-TY1 Manual

25 Februar 2025
AXESS

AXESS AXAMP-TY4 Manual

25 Februar 2025

Ikke kategoriseret Manualer

Nyeste Ikke kategoriseret Manualer