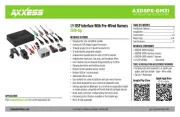
AXESS AXBUCH-MZ6V Manual


Læs gratis den danske manual til AXESS AXBUCH-MZ6V (2 sider) i kategorien Ikke kategoriseret. Denne vejledning er vurderet som hjælpsom af 3 personer og har en gennemsnitlig bedømmelse på 4.6 stjerner ud af 2 anmeldelser. Har du et spørgsmål om AXESS AXBUCH-MZ6V, eller vil du spørge andre brugere om produktet?

Side 1/2
AXBUCH-MZ6V AXBUCH-MZ6V
INSTALL ATION INSTRUCTION S
AXBUCH-MZ6V AXBUCH-MZ6V
INSTALL ATION INSTRUCTION S
REV. 6/18/25 REV. 6/18/25
© COPYRIGHT 2025 METRA ELECTRONICS CORPORATION © COPYRIGHT 2025 METRA ELECTRONICS CORPORATION
Integrate AxxessInterfaces.com Integrate AxxessInterfaces.com
REV. 6/18/25 REV. 6/18/25
© COPYRIGHT 2025 METRA ELECTRONICS CORPORATION © COPYRIGHT 2025 METRA ELECTRONICS CORPORATION
Integrate AxxessInterfaces.com Integrate AxxessInterfaces.com
Arnés Para Conservar o Agregar mara
Compatible con Ciertos Modelos de Mazda
2007-2015
Fits Select Mazda Models
2007-2015
INSTRUCCIONES DE INSTALACIÓN
INTERFACE FEATURES
• Retains the factory backup camera to an aftermarket radio
• Allows an aftermarket camera to be added to the factory screen
• Includes the AXCSD-6V 12-volt to 6-volt converter
INTERFACE FEATURES
• Retains the factory backup camera to an aftermarket radio
• Allows an aftermarket camera to be added to the factory screen
• Includes the AXCSD-6V 12-volt to 6-volt converter
INTERFACE COMPONENTS
• AXBUCH-MZ6V harness • AXCSD-6V 12-volt to 6-volt converter
INTERFACE COMPONENTS
• AXBUCH-MZ6V harness • AXCSD-6V 12-volt to 6-volt converter
Fits Select Mazda Models
2007-2015
• Wire cutter • Crimping tool • Solder gun • Tape
• Connectors (example: butt connectors, bell caps, etc.)
• Wire cutter • Crimping tool • Solder gun • Tape
• Connectors (example: butt connectors, bell caps, etc.)
APPLICATIONS
APPLICATIONS
TOOLS REQUIRED
TOOLS REQUIRED
CAUTION!
All accessories, switches, climate controls panels, and especially air bag indicator lights must
be connected before cycling the ignition. Also, do not remove the factory radio with the key in the on
position, or while the vehicle is running.
CAUTION!
All accessories, switches, climate controls panels, and especially air bag indicator lights must
be connected before cycling the ignition. Also, do not remove the factory radio with the key in the on
position, or while the vehicle is running.
CARACTERÍSTICAS DE LA INTERFASE
• Retiene la cámara de reversa de fábrica para un radio de mercado secundario
• Permite que se añada una cámara de mercado secundario a la pantalla de fábrica
• Incluye el AXCSD-6V de 12 voltios al convertidor de 6 voltios
CARACTERÍSTICAS DE LA INTERFASE
• Retiene la cámara de reversa de fábrica para un radio de mercado secundario
• Permite que se añada una cámara de mercado secundario a la pantalla de fábrica
• Incluye el AXCSD-6V de 12 voltios al convertidor de 6 voltios
COMPONENTES DE LA INTERFASE
• Arnés AXBUCH-MZ6V • AXCSD-6V 12 voltios al convertidor de 6 voltios
COMPONENTES DE LA INTERFASE
• Arnés AXBUCH-MZ6V • AXCSD-6V 12 voltios al convertidor de 6 voltios
Arnés Para Conservar o Agregar mara
Compatible con Ciertos Modelos de Mazda
2007-2015
• Cortacables • Ponchadora • Pistola soldadora • Cinta
• Conectores (ejemplo: conectores de extremo, de campana, etc.)
• Cortacables • Ponchadora • Pistola soldadora • Cinta
• Conectores (ejemplo: conectores de extremo, de campana, etc.)
APLICACIONES
APLICACIONES
HERRAMIENTAS REQUERIDAS
¡PRECAUCIÓN!
Todos los accesorios, interruptores, paneles de controles de clima y especialmente las
luces del indicador de las bolsas de aire deben estar conectados antes ciclar la ignición. Además, no
quite el radio de fábrica con la llave en la posición o de encendido ni con el vehículo funcionando.
MAZDA
CX-5 2013-2015 ..........................................................
CX-7 2007-2012 .........................................................
CX-9 2007-2015 .........................................................
MAZDA 6 2011-2015 ...................................................
MAZDA
CX-5 2013-2015 ..........................................................
CX-7 2007-2012 .........................................................
CX-9 2007-2015 .........................................................
MAZDA 6 2011-2015 ...................................................
MAZDA
CX-5 2013-2015 ..........................................................
CX-7 2007-2012 .........................................................
CX-9 2007-2015 .........................................................
MAZDA 6 2011-2015 ...................................................
MAZDA
CX-5 2013-2015 ..........................................................
CX-7 2007-2012 .........................................................
CX-9 2007-2015 .........................................................
MAZDA 6 2011-2015 ...................................................
AXBUCH-MZ6V AXBUCH-MZ6V
INSTALL ATION INSTRUCTION S
AXBUCH-MZ6V AXBUCH-MZ6V
INSTALL ATION INSTRUCTION S
REV. 6/18/25 REV. 6/18/25
© COPYRIGHT 2025 METRA ELECTRONICS CORPORATION © COPYRIGHT 2025 METRA ELECTRONICS CORPORATION
Integrate AxxessInterfaces.com Integrate AxxessInterfaces.com
REV. 6/18/25 REV. 6/18/25
© COPYRIGHT 2025 METRA ELECTRONICS CORPORATION © COPYRIGHT 2025 METRA ELECTRONICS CORPORATION
Integrate AxxessInterfaces.com Integrate AxxessInterfaces.com
INSTRUCCIONES DE INSTALACIÓN
Metra recommends MECP
certified technicians
Connections to be made
The AXBUCH-MZ6V can be connected two different ways
To retain the factory backup camera to an aftermarket radio:
Connect the wire to chassis ground, and also to the wire of the AXCSD-6V.Black Black
Connect the wire to the wire of the AXCSD-6V.Yellow Blue/Red
Connect the reverse wire from the aftermarket radio, to the reverse signal in the vehicle,
and also to the wire of the AXCSD-6V.Blue/White
Connect the
male
Yellow RCA jack to the rear camera input of the aftermarket radio.
To allow an aftermarket camera to be added to the OEM screen:
Connect the
female
Yellow RCA jack to the aftermarket camera.
The AXCSD-6V 12-volt to 6-volt converter will not be used in this application.
Tape off and disregard the following (2) wires, they will not be used in this application;
Black Yellow,
IMPORTANT
If you are having difficulties with the installation of this product, please call our Tech Support
line at . Before doing so, look over the instructions a second time, and make 386-257-1187
sure the installation was performed exactly as the instructions are stated. Please have the
vehicle apart and ready to perform troubleshooting steps before calling.
Conexiones que se deben hacer
El AXBUCH-MZ6V puede conectarse de dos maneras distintas
Para retener la cámara de reversa de fábrica para un radio de mercado secundario:
Conecte el cable a la tierra del chasis, y también para el cable del AXCSD-6V.negro negro
Conecte el cable al cable del AXCSD-6V.amarillo azul/rojo
Conecte el cable de marcha atrás del radio de mercado secundario, a la señal
de marcha atrás en el vehicle, y también para el cable de la AXCSD-6V.azul/blanco
Conecte el conector RCA
macho
amarillo RCA en la entrada de la cámara de reversa del radio
de mercado secundario.
Para agregar una cámara secundaria a la pantalla original:
Conecte el conector RCA
hembra
amarillo a la mara de mercado secundario.
El AXCSD-6V 12 voltios al convertidor de 6 voltios no se utilizará en esta solicitud.
sla y omite los siguientes dos cables, no se usarán en esta aplicación: Negro, Amarillo
IMPORTANTE
Si tiene dificultades con la instalación de este producto, llame a nuestra línea de soporte
técnico al . Antes de hacerlo, revise las instrucciones por segunda vez y asegúrese 386-257-1187
de que la instalación se haya realizado exactamente como se indica en las instrucciones. Por
favor tenga el vehículo desarmado y listo para ejecutar los pasos de resolución de problemas
antes de llamar.
Conexiones que se deben hacer
El AXBUCH-MZ6V puede conectarse de dos maneras distintas
Para retener la cámara de reversa de fábrica para un radio de mercado secundario:
Conecte el cable a la tierra del chasis, y también para el cable del AXCSD-6V.Negro Negro
Conecte el cable al cable del AXCSD-6V.Amarillo Azul/Rojo
Conecte el cable de marcha atrás del radio de mercado secundario, a la señal
de marcha atrás en el vehicle, y también para el cable de la AXCSD-6V.Azul/Blanco
Conecte el conector RCA
macho
Amarillo RCA en la entrada de la cámara de reversa del radio
de mercado secundario.
Para agregar una cámara secundaria a la pantalla original:
Conecta el conector RCA amarillo hembra a la cámara del mercado secundario.
El convertidor de 12 V a 6 V AXCSD-6V no se usará en esta aplicación.
sla y omite los siguientes dos cables, no se usarán en esta aplicación: Negro, Amarillo
IMPORTANTE
Si tiene dificultades con la instalación de este producto, llame a nuestra línea de soporte
técnico al . Antes de hacerlo, revise las instrucciones por segunda vez y asegúrese 386-257-1187
de que la instalación se haya realizado exactamente como se indica en las instrucciones. Por
favor tenga el vehículo desarmado y listo para ejecutar los pasos de resolución de problemas
antes de llamar.
Metra recomienda técnicos
certificados por MECP
Metra recommends MECP
certified technicians
Metra recomienda técnicos
certificados por MECP


Produkt Specifikationer

Mærke: AXESS
Kategori: Ikke kategoriseret
Model: AXBUCH-MZ6V

Har du brug for hjælp?

Hvis du har brug for hjælp til AXESS AXBUCH-MZ6V stil et spørgsmål nedenfor, og andre brugere vil svare dig


Ikke kategoriseret AXESS Manualer

AXESS

AXESS AXABH-CH3 Manual

29 Juli 2025
AXESS

AXESS AXDSPX-HK5 Manual

25 Februar 2025
AXESS

AXESS AXAMP-CH8 Manual

25 Februar 2025
AXESS

AXESS AXTC-MZ1 Manual

25 Februar 2025
AXESS

AXESS AXAMP-FD2 Manual

25 Februar 2025
AXESS

AXESS AXAMP-TY1 Manual

25 Februar 2025
AXESS

AXESS AXAMP-TY4 Manual

25 Februar 2025

Ikke kategoriseret Manualer

Nyeste Ikke kategoriseret Manualer