AXBUCH-T1 AXBUCH-T1
INSTALL ATION INSTRUCTIONS INSTALL ATION INSTRUCTIONS
REV. 12/12/19 REV. 12/12/19© COPYRIGHT 2019 METRA ELECTRONICS CORPORATION © COPYRIGHT 2019 METRA ELECTRONICS CORPORATION
Integrate • AxxessInterfaces.com Integrate • AxxessInterfaces.com
INTERFACE FEATURES
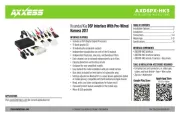
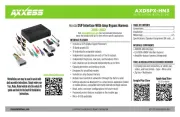
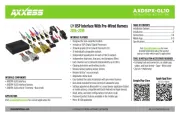
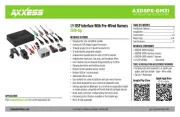
• Retains the factory back-up camera to an aftermarket radio
• Allows an aftermarket camera to be added to the factory screen*
* Display and navigation model radios only
INTERFACE COMPONENTS
• AXBUCH-T1 harness
Toyota Back-Up Camera Retain/Add-On 2012-2015
Scion
FRS 2013-2015
iQ 2014-2015
tC 2014-2015
xB 2014-2015
xD 2014-2014
Toyota
4-Runner
(w/o factory amp) 2012-2013
Avalon 2013-2014
Camry 2012-2013
Highlander 2013
Prius 2012-2015
Prius PHV 2012-2015
Prius V 2012-2014
Rav-4 (before build
date Nov. 2013) 2014
Rav-4 2013
Sequoia 2013
Tacoma (with NAV) 2012-2013
Venza 2013-2014
• Cutting tool • Tape • Crimping tool
• Connectors (example: butt connectors, bell caps, etc.)
APPLICATIONS
TOOLS REQUIRED
Connections to be made
The AXBUCH-T1 can be connected two different ways
To retain the factory back-up camera to an aftermarket radio:
• Connect the wire to chassis ground.Black
• Connect the Yellow wire to accessory power. *
• Connect the male Yellow RCA jack to the rear camera input of the aftermarket radio.
• Connect the reverse wire from the aftermarket radio, to the reverse signal in the vehicle.
• Disregard the loose wire, it will not be used in this application.Green/Purple
* It is highly recommended to use the AXCSD-6V (sold separately) to provide the camera with
the proper voltage.
To allow an aftermarket camera to be added to the OEM screen:
• Connect the
Black
wire to the ground wire of the aftermarket camera.
• Connect the power wire of the aftermarket camera to accessory power.
• Tape off and disregard the
Yellow
wire, it will not be used in this application.
• Connect the female
Yellow
RCA jack to the aftermarket camera.
The following (2) steps are only required if a wire is
not present in the factory harness.
*Except Avalon 2013-2014 and Venza 2013-2014
• If a wire is not present in pin-2 of the 28-pin
connector of the factory radio, unplug the
connector, then insert the metal pin of the
loose wire into it. Connect the Green/Purple
harness back into the radio.
• Connect the other end of the loose Green/
Purple
wire to the reverse wire of the vehicle.
14 13 12 11 10 9 8 7 6 5 3 2 4 1
28 27 26 25 24 23 22 21 20 19 18 17 16 15
This is the wire view of the connector
in the vehicle
28 Pin Harness