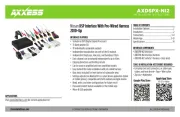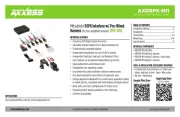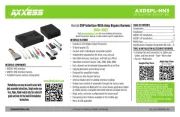
AXDSPL-HN3
INSTALLATION INSTRUCTIONS
AxxessInterfaces.com © COPYRIGHT 2024 METRA ELECTRONICS CORPORATION REV. 3/15/24 INSTAXDSPL-HN3
INTERFACE FEATURES
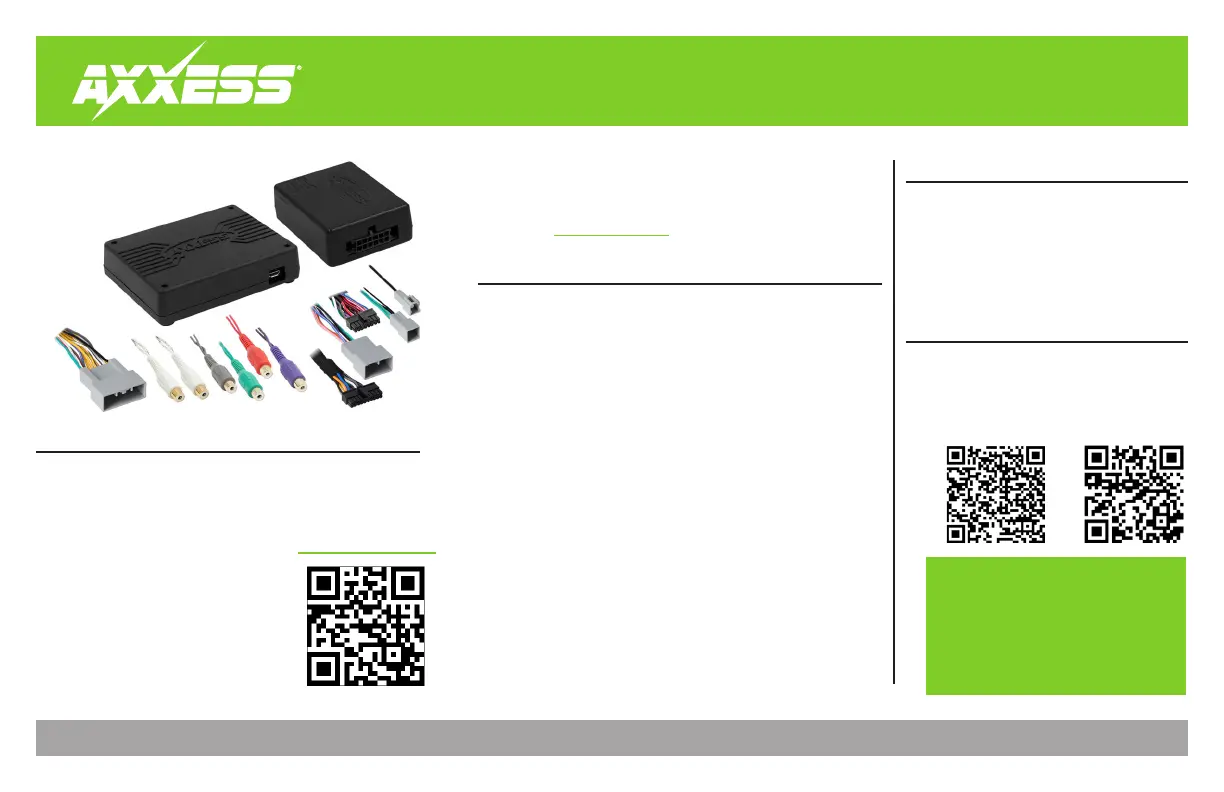
INTERFACE COMPONENTS
TOOLS & INSTALLATION ACCESSORIES REQUIRED
• Crimping tool and connectors, or solder gun,
solder, and heat shrink • Tape • Wire cutter
• Zip ties • Multimeter
TABLE OF CONTENTS
Connections ............................................................2
Installation .............................................................3
AXDSPL-BT Installation...........................................4
AXDSPL-SP Installation...........................................5
Mobile App ......................................................... 6-7
Specifications /Speaker Assignment QR code ....8
Honda DSP Interface With Amp Bypass Harness
2016-2022
• Includes a DSP (Digital Signal Processor)
• 15 Band graphic EQ
• 4 inputs and 6 individually assignable outputs
• Independent equalization for front, rear, and sub
• Selectable low pass, band pass, and high pass filters
• Selectable crossover slopes; 12db, 24db, 36db, 48db
• Each channel can be delayed independently up to 10ms
• Clipping detection and limiting circuits
• Designed for amplified models
• Includes an amp bypass harness
• Internal header port for adding interface modules
• Retains level control of subwoofer through the factory radio
• Settings adjusted via Bluetooth
®
in a smart device application (tablet
or mobile phone), compatible with both Android and Apple devices
• Read, write, and store configurations for future recall
• Password protect feature available in the mobile app
• Micro-B USB updatable
• AXDSPL-HN3 interface
• AXDSPL-HN3 interface harness
• Amplifier bypass harness (integrated)
Visit AxxessInterfaces.com for more detailed information
about the product and up-to-date vehicle specific applications.
www.MetraOnline.com
MetraOnline.com may be used to assist with
dash assembly instructions. Simply enter your
Year, Make, Model vehicle into the vehicle fit
guide and look for the Dash Kit Installation
Instructions.
ATTENTION: With the key out of the
ignition, disconnect the negative battery
terminal before installing this product. Ensure
that all installation connections, especially the
air bag indicator lights, are plugged in before
reconnecting the battery or cycling the ignition
to test this product.
NOTE: Refer also to the instructions included
with the aftermarket radio.
Google Play Store
Apple App Store
iOS 12.1 or higher