AXESS AXLOC-HYKIA3 Manual

AXESS Ikke kategoriseret AXLOC-HYKIA3

Læs gratis den danske manual til AXESS AXLOC-HYKIA3 (8 sider) i kategorien Ikke kategoriseret. Denne vejledning er vurderet som hjælpsom af 29 personer og har en gennemsnitlig bedømmelse på 4.3 stjerner ud af 15 anmeldelser. Har du et spørgsmål om AXESS AXLOC-HYKIA3, eller vil du spørge andre brugere om produktet?

Side 1/8
AXLOC-HYKIA3
I N S T A L L A T I O N I N S T R U C T I O N S
AxxessInterfaces.com © COPYRIGHT 2022 METRA ELECTRONICS CORPORATION REV. 12/15/22 INSTAXLOC-HYKIA3
ATTENTION: With the key out of the ignition,
disconnect the negative battery terminal
before installing this product. Ensure that all
installation connections, especially the air
bag indicator lights, are plugged in before
reconnecting the battery or cycling the
ignition to test this product.
NOTE: Refer also to the instructions included
with the aftermarket accessory before
installing this device.
TOOLS REQUIRED
• Crimping tool and connectors, or solder gun,
solder, and heat shrink
• Tape • Wire cutter • Zip-ties
TABLE OF CONTENTS
Applications............................................................. 1
Installation ............................................................. 2
Diagram .................................................................. 3
APPLICATIONS
KIT COMPONENTS
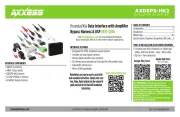
• AXLOC-HYKIA3 Wiring Harness
• Gain Controller
• 12v-500mA Remote Wire
• Auxiliary Cable
Visit AxxessInterfaces.com for more detailed information about the product and up-to-date
vehicle specific applications.
• Designed to provide (2) channels of low-level audio output from the factory system.
• Allows for the installation of an amplifier for speakers or subwoofers.
• Gain Controller included to adjust the overall output.
• 12v-500mA remote wire activated with signal sense.
• 55-watts per channel.
• Designed for non-amplified vehicles.
Note: A single pole double throw (SPDT) relay is recommended when installing multiple amplifiers.
Hyundai/Kia LOC (Line Output Converter)
AXLOC-HYKIA3 (for Non-Amplified Vehicles) 2017-Up
For dash disassembly instructions, refer to metraonline.com. Enter the year, make, and model of the vehicle in the Vehicle Fit Guide Radio Install Kits for .
Hyundai
Accent 2018-Up
Elantra 2017-Up
Elantra GT 2018-Up
IONIQ 2018-Up
Kona 2018-Up
Santa Fe 2019-Up
Santa Fe XL 2019
Sonata 2018-Up
Tucson 2019-Up
Veloster 2019-Up
Kia
Cadenza 2017-Up
Forte 2017-Up
Forte 5 2017-Up
K5 2021-Up
Optima 2019-2020
Sedona 2017-Up
Sorento 2017-Up
Stinger 2018-Up
2
INSTALLATION
1.
Disconnect the harness from the factory
tuner and install the AXLOC-HYKIA3
harness provided with this kit.
2. Mount the gain controller in a suitable
location, and connect the auxiliary cable
to the , then to the Gain BASS KNOB
Connector of the AXLOC harness.
3.
Install the aftermarket amplifier and
run an RCA pair (sold separately) to
the line converter.
4. Connect the remote wire, plug in the
device and secure all connections prior
to testing.
NOTE: If the vehicle is equipped with active
noise cancellation microphones (ANC), it is
recommended that they are disabled to prevent
potential noise when installing subwoofers.


Produkt Specifikationer

Mærke: AXESS
Kategori: Ikke kategoriseret
Model: AXLOC-HYKIA3

Har du brug for hjælp?

Hvis du har brug for hjælp til AXESS AXLOC-HYKIA3 stil et spørgsmål nedenfor, og andre brugere vil svare dig


Ikke kategoriseret AXESS Manualer
AXESS

AXESS AXABH-CH3 Manual

29 Juli 2025
AXESS

AXESS AXDSPX-HK5 Manual

25 Februar 2025
AXESS

AXESS AXAMP-CH8 Manual

25 Februar 2025
AXESS

AXESS AXTC-MZ1 Manual

25 Februar 2025
AXESS

AXESS AXAMP-FD2 Manual

25 Februar 2025
AXESS

AXESS AXAMP-TY1 Manual

25 Februar 2025
AXESS

AXESS AXAMP-TY4 Manual

25 Februar 2025

Ikke kategoriseret Manualer

Nyeste Ikke kategoriseret Manualer