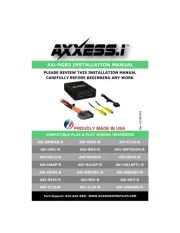
METRA. The World’s best kits.™metraonline.com1-800-221-0932 © COPYRIGHT 2020 METRA ELECTRONICS CORPORATION
Installation Instructions for AXTO-MZ1
REV. 1/21/2020 INSTAXTO-MZ1
(continued on next page)
INTERFACE COMPONENTS
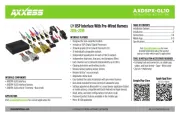
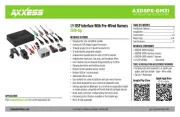
• AXTO-MZ1 interface • 16-pin harness with stripped leads
• 10 to 24-pin “T” harness
TOOLS REQUIRED
• Cutting tool • Tape • Crimping tool
• Connectors (i.e. butt-connectors, bell caps, etc.)
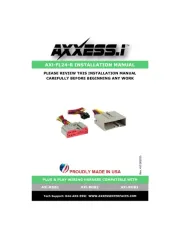
AXTO-MZ1
MAZDA
CX-7 2007-up
CX-9 2007-up
APPLICATIONS
CONNECTIONS TO BE MADE
(to the aftermarket radio)
From the 16-pin harness:
• The Red wires will not be used in this application.
• The Orange/White wire will not be used in this application.
• Connect the wire to the left front positive speaker output.White
• Connect the wire to the left front negative speaker output.White/Black
• Connect the wire to the right front positive speaker output.Gray
• Connect the wire to the right front negative speaker output.Gray/Black
• Connect the wire to the radio’s left rear positive speaker output. Green
• Connect the wire to the radio’s left rear negative speaker output.Green/Black
• Connect the wire to the radio’s right rear positive speaker output.Purple
• Connect the wire to the radio’s right rear negative speaker output.Purple/Black
• Connect the wire to the radio’s amp turn on wire.Blue/White
• The Brown wire will not be used in this application.
• Connect the wire to the parking brake wire (if required).Light Green
• Connect the wire to the VSS or speed sense wire (if required).Blue/Pink
• Connect the wire to the reverse wire (if required). Green/Purple
From the 24-pin “T” harness:
• Connect the wire to the ground wire.Black
• Connect the wire to the ignition wire. Red
• Connect the Yellow wire to the radio’s 12-volt battery or memory wire.
Caution: Metra recommends disconnecting the negative battery terminal before
beginning any installation. All accessories, switches, and especially air bag indicator
lights must be plugged in before reconnecting the battery or cycling the ignition.
*Note: Refer also to the instructions included with the aftermarket radio.
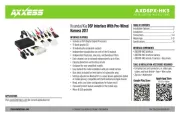
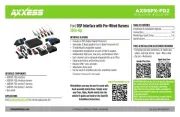
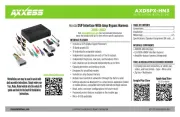
KIT FEATURES
• Provides accessory (12-volt 10-amp)
• Used in amplified models
• Provides NAV outputs (parking brake, reverse, mute, and V.S.S.)
• Prewired AXSWC harness included (AXSWC sold separately)
• Adjustable gain control for overall volume
• High level speaker input
• Micro “B” USB updatable
• Retains balance and fade