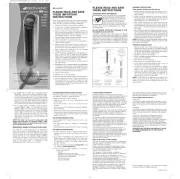
Bionaire BT16 Manual


Læs gratis den danske manual til Bionaire BT16 (2 sider) i kategorien Ventilator. Denne vejledning er vurderet som hjælpsom af 3 personer og har en gennemsnitlig bedømmelse på 4.9 stjerner ud af 2 anmeldelser. Har du et spørgsmål om Bionaire BT16, eller vil du spørge andre brugere om produktet?

Side 1/2
CLEANING AND MAINTENANCE
Always unplug the fan before cleaning or
assembly.
Do not allow water to drip on or into the fan
motor housing.
JCS/THG, LLC reserves the right to change or
modify any specifications without notice.
FITTING A REPLACEMENT PLUG (U.K AND
If the plug is not suitable for the socket outlets in your
home, it can be removed and replaced by a plug of the
correct type. For correct type and correct installation
please refer toinstallation of a plug.
INSTALLATION OF A PLUG Applicable to
U.K. and Ireland.
The wires in this mains lead are coloured as such:
BROWN - Live
BLUE - Neutral
This product is fitted with 13 amp plug. The fuse
should be rated at 3 amps and ASTA approved
to BS1362 standard. However if the plug is not
in accordance with this, please remove and
follow the below installation details:
The BROWN coloured wire must be
connected to the pin terminal, which is
marked with the letter L (Live) or is coloured
RED.
The BLUE coloured wire must be connected
to the pin erminal which is marked with the
letter N (Neutral) or is coloured BLACK.
DO NOT CONNECT either of these wires
to the earth terminal in the plug. The earth
terminal plug is marked with the letter E ( )
or is coloured GREEN, or GREEN&YELLOW.
NOTE: If you are in any doubt about wiring and
the installation of the plug. Please contact a
qualified electrician.
If a 13A 3-pin plug is fitted, it must be an ASTA
approved plug, conforming to the BS1363
standard. Replacement 3 amp fuses must also
be BSI or ASTA approved and complaint with
the BS1362 standard.
GUARANTEE
PLEASE KEEP YOUR RECEIPT AS THIS WILL
BE REQUIRED FOR ANY CLAIMS UNDER THIS
GUARANTEE.
This product is guaranteed for 3 years.
In the unlikely event of breakdown, please
take it back to the place of purchase, with
your till receipt and a copy of this guarantee.
The rights and benefits under this guarantee
are additional to your statutory rights which
are not affected by this guarantee.
Holmes Products Europe undertakes within the
specific period, to repair or replace free of
charge, any part of the appliance found to be
defective provided that:
We are promptly informed of the defect.
• The appliance has not been altered in any
way or subjected to misuse or repair by a
person other than a person authorised by
Holmes Products Europe.
No rights are given under this guarantee to a
person acquiring the appliance second hand
or for commercial or communal uses.
Any repaired or replaced appliance will be
guaranteed on these terms for the remaining
portion of the guarantee.
THIS PRODUCT IS MANUFACTURED TO
COMPLY WITH THE E.E.C. DIRECTIVES
73/23/EEC, 89/336/EEC and 98/37/EEC.
Waste electrical products should
not be disposed of with
Household waste. Please recycle
where facilities exist. Check on
the following website for further
recycling and WEEE information:
www.bionaire.com or e-mail:
info-europe@theholmesgroup.com
3 amp
Holmes Products (Europe) Ltd.
1 Francis Grove
London SW19 4DT
England
Fax: +44 (0)20 8947 8272
Email: info-europe@theholmesgroup.com
Website address: www.bionaire.com
UK - Free phone Customer Service Helpline 0800 052 3615
9100010006906
BT16IUK05EM2
PEDESTAL
Tower Fan
BT16
INSTRUCTION MANUAL
© 2005 JCS/THG, LLC
Bionaire
®
and the Bionaire logo
®
are registered trademarks of JCS/THG, LLC.
BT16IUK05EM2.qxd 12/6/05 14:31 Page 1
BT16
Fig. 1
Fig. 2
Fig. 3
A
D
C
B
Fig. 4
A
B
D
C
Fig. 6
L
K
Fig. 5
E
F
G
M
I
H
J
K
PLEASE READ AND SAVE THESE
INSTRUCTIONS
IMPORTANT INSTRUCTIONS
When using electrical appliances, basic safety
precautions should always be taken including
the following:-
Use the fan only for purposes described in
the instruction manual.
To protect against electrical shock, do not
immerse the fan, plug or cord in water or
spray with liquids.
Close supervision is necessary when any
appliance is used by or near children.
Unplug from the electrical outlet when not in
use, when moving the fan from one location
to another, before putting on or taking off
parts and before cleaning.
Avoid contact with any moving parts.
Do not operate in the presence of explosive
and/or flammable fumes.
Do not place the fan or any parts near an
open flame, cooking or other heating
appliance.
Do not operate any appliance with a damaged
cord, plug, after the appliance malfunctions,
or has been dropped/damaged in any
manner.
The use of attachments not recommended or
sold by the appliance manufacturer may
cause hazards.
Do not use outdoors.
Do not let the cord hang over the edge of a
table or counter, or come into contact with hot
surfaces.
To disconnect from the electrical supply, grip
the plug and pull from the wall outlet. DO
NOT pull on the cord.
Always use on a dry, level surface.
The fan should not be operated without its
column and base fitted.
The fan should not be operated laying on its
side.
This product is intended for household use
ONLY and not for commercial or industrial
applications.
Should the fan stop working, first check the
fuse in the plug (UK only) or fuse/circuit breaker
at the distribution board is operating, before
contacting the manufacturer or service agent.
If the supply cord or plug is damaged, it must
be replaced by the manufacturer or its service
agent or a similarly qualified person in order
to avoid hazard.
Under the environment with electrical fast
transient, the product may malfunction and
require user to reset the product.
DESCRIPTIONS:
A. Power/Speed Control
B. Timer Control
C. Oscillation Button
D. Breeze Modes
E. Front Column
F. Rear Column
G. 4 Screws
H. Rear Base
I. Front Base
J. 4 Screws
K. Power Cord
L. Wiring Clip Slot
M. Fan Housing
MISSING A PART FOR YOUR FAN?
Please call 0800 052 3615 for assistance.
ASSEMBLY INSTRUCTIONS
1. Assemble Column (E, F) to Fan housing (M)
making sure the cord is enclosed between
the Column (E, F). Secure together with 4
screws (G). Refer to Fig. 5.
2. Assemble Base (H, I) to already assembled
Fan housing and Column (E, F, M) making
sure the cord is enclosed between the Base
(H, I). Secure together with 4 screws (J).
Refer to Fig. 5.
3. Secure Power Cord (K) to bottom of base (H,
I).
OPERATING INSTRUCTIONS (See Fig.
2, 3, 4)
Remote Control: Remote Control requires 2
AAA batteries (not included) for operation. There
is a slot on the back of the unit (Refer to Fig. 2)
to store the remote when not using. In case
remote is being discarded, please remove
batteries before discarding.
A. Power/Speed Settings
Press = On, I, II, III, Off
B. Timer Control
Press = Turns Off in 1, 2, 4, 8 hours
C. Oscillation Control
Press = Oscillation On, Off
D. Natural Breeze, Sleep Breeze Modes
Press = Natural Breeze, Sleep Breeze
Natural Breeze Mode will cycle through
the fan speed settings randomly.
Sleep Breeze Mode will cycle through
the fan speed settings in order.
U.K. and IRELAND
BT16IUK05EM2.qxd 12/6/05 14:31 Page 5


Produkt Specifikationer

Mærke: Bionaire
Kategori: Ventilator
Model: BT16

Har du brug for hjælp?

Hvis du har brug for hjælp til Bionaire BT16 stil et spørgsmål nedenfor, og andre brugere vil svare dig


Ventilator Bionaire Manualer
Bionaire

Bionaire BAC015X Manual

25 August 2025
Bionaire

Bionaire BT16 Manual

25 August 2025
Bionaire

Bionaire BW2300 Manual

5 September 2024
Bionaire

Bionaire BT46R Manual

5 September 2024
Bionaire

Bionaire BT90R Manual

5 September 2024
Bionaire

Bionaire BAOF30G Manual

5 September 2024
Bionaire

Bionaire BAC14-I Manual

5 September 2024
Bionaire

Bionaire BASF1016G Manual

5 September 2024
Bionaire

Bionaire BBLF01 Manual

20 August 2024
Bionaire

Bionaire BMT014D Manual

20 August 2024

Ventilator Manualer

Nyeste Ventilator Manualer

Canarm

Canarm P16-4 Manual

25 August 2025
Canarm

Canarm IDB1210150 Manual

25 August 2025
Canarm

Canarm AX16-1M Manual

25 August 2025
Canarm

Canarm P16-1M Manual

25 August 2025
Canarm

Canarm XFS36 Manual

25 August 2025
Prismate

Prismate PR-F005 Manual

25 August 2025
Prismate

Prismate PR-F041 Manual

25 August 2025
Canarm

Canarm P18-4M Manual

25 August 2025
Canarm

Canarm P12-3 Manual

25 August 2025