Bobrick B-820 Manual


Læs gratis den danske manual til Bobrick B-820 (4 sider) i kategorien Sæbedispenser. Denne vejledning er vurderet som hjælpsom af 7 personer og har en gennemsnitlig bedømmelse på 4.4 stjerner ud af 4 anmeldelser. Har du et spørgsmål om Bobrick B-820, eller vil du spørge andre brugere om produktet?

Side 1/4
1
2
3
4
8
9
5
6
1
0
1
1
1
2
7
15
1
3
1
4
16
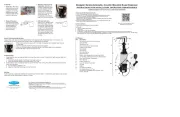
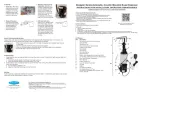
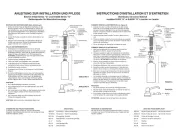
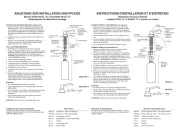
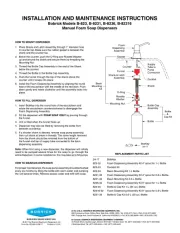
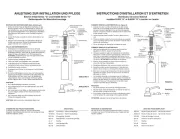
Automatic Multi-Feed Soap Dispensing System
INSTRUCTIONS FOR INSTALLATION, OPERATION, MAINTENANCE & TROUBLESHOOTING
Bobrick B-820-258 (Liquid Soap Dispenser) / B-820-248 (Foam Soap Dispenser)
B-820 (Multi-Feed Soap Reservoir)
Form No. 820-69ii 9-26-22
Clearances and Mounting Requirements:
B-820-258 (Liquid Soap Dispenser) / B-820-248 (Foam Soap Dispenser)
Designed for installation into countertops up to 1.5" (38.1 mm) thick.
Requires 1" (25 mm) diameter mounting hole.
Compatible with sink rims up to 0.39" (10 mm) wide and 0.8" (20 mm) tall.
Recommended spout location is minimum of 1.6” (40 mm) and maximum of 2.7" (70 mm) from inside edge of the
sink rim to the center of the mounting hole, and minimum clearance of 1.18" (30 mm) from the edge of the sink and
rear wall to the center of the mounting hole.
Requires a minimum of 4" (100 mm) and maximum of 18" (450 mm) vertical clearance from the bottom of the
countertop to the mounting screw for the soap pump at the rear wall.
B-820 (Multi-Feed Soap Reservoir)
Designed for installation into countertops up to 1.5" (38.1 mm) thick.
Requires 2.38" (60.3 mm) diameter mounting hole.
Recommended install location for the fill port is at least 5.91" (150 mm) from the center of the mounting hole to the
side and back wall.
The horizontal clearance required between the soap reservoir and side wall is 1" (25mm)
In the United States: BOBRICK WASHROOM EQUIPMENT, INC.
New York: 200 Commerce Drive, Clifton Park, NY 12065-1350 • Tel: (518) 877-7444 • Fax: (518)-877-5029
Los Angeles: 6901 Tujunga Ave, North Hollywood, CA 91605-6213 • Tel: (818) 982-9600 • Fax: (818)-503-9287
or email customerservice@bobrick.com
In Canada: BOBRICK WASHROOM EQUIPMENT COMPANY
45 Rolark Drive, Scarborough, Ontario M1R 3B1 • Eastern Canada: Tel: (877) 423-6555 • Fax: (877) 423-8555
• Western Canada: Tel: (877) 423-6444 • Fax: (877) 423-8444 or email customerservice@bobrick.com
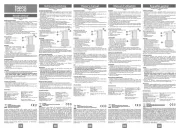
Unit Diagram
B-820-258 (Liquid Soap Dispenser) / B-820-248 (Foam Soap Dispenser) – Spout with Stem Assembly
1. Plate
2. Top Cover
3. Dispenser Spout
4. Elbow Connector
5. O Ring
6. Nozzle with Mesh
7. Nozzle without Mesh
8. Screw
9. Screw Nut
10. CSD Sensor
11. CSD Mounting shaft
12. Rubber Washer (Above Countertop)
13. Rubber Washer (Below Countertop)
14. Nylon Washer
15. Mounting Nut
16. Soap Tube
B-820-258 (Liquid Soap Dispenser) / B-820-248 (Foam Soap Dispenser) – Pump with Electronic Control Box
1. Control Box
2. Base Plate
3. AC Adapter
4. Soap Pump (Liquid)
5. Soap Pump (Foam)
6. Soap Tube Holder (Two included)
7. Soap Tube Valve Switch
8. Soap Tube T Connector
9. Soap Tube (1,200 mm)
B-820 (Multi-Feed Soap Reservoir)
1. Control Box
2. Soap Reservoir Tank
3. Bottom Bracket
4. Fill Port Cap
5. Refilling Assembly
6. Rubber Washer
7. Mounting Nut
8. Bracket
9. Thumb Screws (Four included)
10. Funnel
11. AC Adapter
1
8
T connector
Drain connector
110 cm
45 cm
3 cm
2.5cm
3 cm
Soap tube is leveled.
Soap tube has excessive slack.
A
B
Rubbe asher W r
Nylo ashen W r
Mounting
Nut
Counter
Rubber
Washer
Locking
Nut
Bracket
Recommendation on Tubing Configuration
The soap tube connectors from soap pumps should be
no higher than that of the soap reservoir tank.
Recommended tubing distance between each soap
pump should be no longer than 43.31" (1,100 mm).
The vertical slack of the tubing running from the soap
reservoir tank to the nearest soap pump should be at
least 1.18" (30 mm).
Keep all soap pumps at the same height so that the
soap tubes between units are leveled.
If each soap pump cannot be at the same height,
the soap pump farthest from the soap reservoir tank
should be the lowest in height. For the soap pumps in
between the farthest soap pump and soap reservoir
tank, the closer the soap pump is to the soap reservoir
tank, the higher its installation location should be,
while remaining in the recommended vertical clearance
specified in the Clearances and Mounting Requirements
section.
The soap pump in between the farthest soap pump
and soap reservoir tank should not be lower than the
neighboring soap pumps.
Cut the soap tubing to the shortest length between
units to ensure that it has minimal slack.
Installation for B-820-258 (Liquid Soap Dispenser) /
B-820-248 (Foam Soap Dispenser)
1. Drill 1" diameter mounting hole per recommended
Clearances and Mounting Requirements stated above.
2. Place the above countertop rubber washer over
mounting hole to align with profile of the dispenser.
3. Insert the stem, tube and cable of the top assembly
carefully through the mounting hole.
4. Under the counter, first slide the below counter rubber
washer and nylon washer through the stem, tube and
cable of the top assembly. Then, screw the mounting
nut into the threaded stem to secure the assembly.
5. Use the Wall-Mounting Template to determine the best
installation location on the rear wall based on the reach
of soap tube. The vertical clearance from the bottom
of the countertop to the mounting screw for the soap
pump at the rear wall should be a minimum of 4" (100
mm) and maximum of 18" (450 mm). Then, tape the
Wall-Mounting Template to the wall, drill two 0.28" (7
mm) holes and insert the wall anchors into the holes.
A pack of three (3) 5/32" x 3/4" (4x19 mm) screws and
three 8x25 mm plastic wall anchors are provided per
soap pump unit.
Installation for B-820 (Multi-Feed Soap Reservoir)
1. Drill 2.38" diameter mounting hole per recommended
Clearances and Mounting Requirements stated above.
2. Insert the refilling
assembly carefully
through the mounting
hole.
3. Under the counter, slide the rubber pad and bracket
through the stem of the refilling assembly first. Then,
secure the components together by screwing the
locking nut into the threaded stem of the refilling
assembly.
Note: Before installing the soap reservoir tank,
disconnect the brown and black wire from the
electronic control box. Do not pinch or kink any wires.
4. Slide the soap reservoir tank into the bracket, ensure
the stem of the refilling assembly is aligned with the
top opening of the soap tank, and the tank is pushed
all the way into the plastic fill port to prevent soap from
leaking. Then, slide the lower support bracket below the
soap tank and secure the sides with thumb screws.
6. Thread the screws into the wall anchors and leave a
space of 0.24" (6 mm) from the bottom of the screw
head to the wall to hang the wall-mounting bracket on
the control box.
7. Hang the control box on the wall by sliding the keyhole
slots on wall-mounting bracket at the back of the
control box into the wall screws. Secure both wall
screws afterwards
8. Connect the wires from the dispenser assembly to the
wires on the control box assembly (A). Then connect
the soap tube from the spout assembly into the
connector on the soap pump (B).
3
2


Produkt Specifikationer

Mærke: Bobrick
Kategori: Sæbedispenser
Model: B-820

Har du brug for hjælp?

Hvis du har brug for hjælp til Bobrick B-820 stil et spørgsmål nedenfor, og andre brugere vil svare dig


Sæbedispenser Bobrick Manualer

Bobrick

Bobrick B-822 Manual

22 Juni 2025
Bobrick

Bobrick B-8231 Manual

16 Juni 2025
Bobrick

Bobrick B-8221 Manual

15 Juni 2025
Bobrick

Bobrick B-823 Manual

15 Juni 2025
Bobrick

Bobrick B-820 Manual

15 Juni 2025
Bobrick

Bobrick B-82216 Manual

15 Juni 2025

Sæbedispenser Manualer

Nyeste Sæbedispenser Manualer