Cocraft RL13BMC Manual
Cocraft
Laser pointer
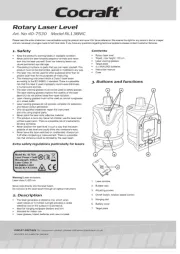
RL13BMC

| Mærke: | Cocraft |
| Kategori: | Laser pointer |
| Model: | RL13BMC |
Har du brug for hjælp?
Hvis du har brug for hjælp til Cocraft RL13BMC stil et spørgsmål nedenfor, og andre brugere vil svare dig
Laser pointer Cocraft Manualer
8 September 2024
15 August 2024
15 August 2024
15 August 2024
7 August 2024
6 August 2024
6 August 2024

6 August 2024
21 Juli 2024
Laser pointer Manualer
- Skil
- Toolcraft
- Vortex
- Hama
- Black And Decker
- Revic
- Panasonic
- Picotronic
- Makita
- Stabila
- Speed-Link
- Melinera
- RIX
- SilverCrest
- Tacklife
Nyeste Laser pointer Manualer
4 November 2025

3 November 2025

31 Oktober 2025
13 Oktober 2025

8 Oktober 2025
7 September 2025
7 September 2025
6 September 2025
3 September 2025
3 September 2025