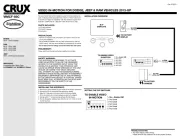
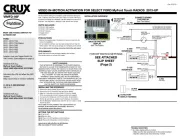
CRUX SOOGM-15V Manual


Læs gratis den danske manual til CRUX SOOGM-15V (4 sider) i kategorien Ikke kategoriseret. Denne vejledning er vurderet som hjælpsom af 32 personer og har en gennemsnitlig bedømmelse på 5.0 stjerner ud af 16.5 anmeldelser. Har du et spørgsmål om CRUX SOOGM-15V, eller vil du spørge andre brugere om produktet?

Side 1/4
Crux Interfacing Solutions • Chatsworth, CA 91311
phone: (818) 609-9299 • fax: (818) 996-8188 • www.cruxinterfacing.com
rev.113020
SOOGM-15V
Radio Replacement with OnStar, SWC Retention and
Video Switcher for GM Class II Vehicles
1 of 4
RAD IO REP LAC EME NT
SWC RE TEN TIO N
R
INTERFACING SOLUTIONS
PRODUCT FEATURES:
- Retains factory features in select GM Class II vehicles while funconing with an aermarket radio.
- Pre-programmed to retain factory Steering Wheel Controls.
- Retains OnStar and chime funcons.
- Adds Forced front and rear aermarket camera inputs while in moon using the SOURCE DOWN or AM/FM buon on the
steering wheel controls on select vehicles.
- Supports Bose, non-Bose and Y-91 audio systems.
- EIA color coded wiring for easy installaon.
1. The Front and Rear fading are not retained on Y-91 Bose System.
2. Chime includes: seat belt, check engine, key in ignion, low fuel, low oil and lights on.
NOTES:
SOOGM-15V Module SOOGM-15V Harness Video Harness Antenna Adaptor SWC Cable
SETTING THE AFTERMARKET RADIO BRAND
With the key in the o posion, set the DIP switches to the corresponding aermarket radio seng:
RADIO BRAND: DIP#: 1 2 3 4
Atoto, Dual, Fahrenheit, Jensen,
Pioneer, Power Acoustik, Soundstream
Blaupunkt, Most o-brand Radio
Alpine
Clarion
Kenwood
JVC
Boss, Old Sony
New Sony
NOTE: For Atoto, Blaupunkt, Dual, Farenheit, Power Acoustik, Soundstream, and most o-brand radios,
check the aftermarket radio’s manual to see if the SWC buttons need to be programmed.
SWC MODULE
DIP SWITCH
1 2 3 4
ON
OFF OFF ON ON
OFF OFF ON ON
OFF OFF ON ON
OFF OFF OFF OFF
OFF ON ON OFF
OFF ON ON ON
OFF ON OFF ON
OFF ON OFF OFF
OFF OFF ON OFF
PARTS INCLUDED:
DIP SWITCH SETTINGS:
3.5MM SWC CABLE
Plug in the SWC cable to the SWC module and the 3.5mm plug to the aermakert radio SWC port or use the Blue/Yellow wire
for JVC and Kenwood.
RED to SWC Key 1
WHITE to SWC Key 2
SHIELD to SWC Ground
For aermarket radios that have wires for SWC connecons, cut o the 3.5mm plug on the Crux SWC Cable (opon B) and
connect the SWC wires as follows:
Note that there are some radios that only have
SWC1 and SWC2, in this case “shield” does not
need to be connected.
Crux Interfacing Solutions • Chatsworth, CA 91311
phone: (818) 609-9299 • fax: (818) 996-8188 • www.cruxinterfacing.com
rev.113020
SOOGM-15V
Radio Replacement with OnStar, SWC Retention and
Video Switcher for GM Class II Vehicles
2 of 4
RAD IO REP LAC EME NT
SWC RE TEN TIO N
R
INTERFACING SOLUTIONS
INSTALLATION DIAGRAM:
AFTERMARKET
RADIO
Reverse Gear Purple/White
Parking Brake Yellow/Black













TO FACTORY
HARNESS
24-Pin
Connector
8-Pin
Connector
BOSE NON
BOSE
10-Pin
Connector
SWC DIP SWC CAM
1 2 3 4
ON
Video Out
Front Camera
Rear Camera
VIDEO HARNESS
Chime Volume
Adjustment
1 2 3
ON
VR Activation
for OnStar (set DIP#1 to ON)
4-Pin
Connector
Cap or insulate if
not being used
3.5MM SWC CABLE
Plug in the 3.5MM SWC cable to the 4-pin port
on the module. See “DIP SWITCH SETTINGS” section.
JVC/Kenwood (Blue / Yellow)
Insulate if not
being used
If the vehicle is equipped with a Bose system, the SOOGM-15V has
a built-in Bose adaptor that allows the proper audio input gain from
the aftermarket radio to the Bose amplier. To use this feature, plug
in the male 8-pin connector on the harness to the GRAY female 8-pin
connector on the SOOGM-15V module. The module is also labeled
Bose and Non Bose to avoid confusion. (see picture below)
If the vehicle is NOT equipped with a Bose system, plug in the male
8-pin connector to the BLACK female 8-pin on the SOOGM-15V
module.
Bose
Connection
Non Bose
Connection
SELECTING THE AUDIO SYSTEM:


Produkt Specifikationer

Mærke: CRUX
Kategori: Ikke kategoriseret
Model: SOOGM-15V

Har du brug for hjælp?

Hvis du har brug for hjælp til CRUX SOOGM-15V stil et spørgsmål nedenfor, og andre brugere vil svare dig


Ikke kategoriseret CRUX Manualer
CRUX

CRUX DKGM-51 Manual

23 August 2025
CRUX

CRUX RVCFD-79F Manual

23 August 2025
CRUX

CRUX ACP-TSL Manual

23 August 2025
CRUX

CRUX RVCCH-75WT Manual

22 August 2025
CRUX

CRUX VIMMB-85N Manual

10 Juli 2025
CRUX

CRUX VIMPR-90P Manual

10 Juli 2025
CRUX

CRUX VIMCF-93C Manual

10 Marts 2025
CRUX

CRUX VIMFD-95F Manual

10 Marts 2025
CRUX

CRUX VIMCF-93 Manual

10 Marts 2025
CRUX

CRUX VIMAD-84 Manual

10 Marts 2025

Ikke kategoriseret Manualer

Nyeste Ikke kategoriseret Manualer

Kimo

Kimo LR 110 Manual

2 September 2025
HMS Premium

HMS Premium LPD02 Manual

2 September 2025
AVer

AVer E1008 Manual

2 September 2025
Biltema

Biltema 17-547 Manual

2 September 2025
Groen

Groen AH/1E Manual

2 September 2025
ACOPower

ACOPower HY-P30 Manual

2 September 2025
Globe

Globe RG30 Manual

2 September 2025
Neutrik

Neutrik NLT4FXX Manual

2 September 2025