CRUX SWRGM-49L Manual


Læs gratis den danske manual til CRUX SWRGM-49L (4 sider) i kategorien Ikke kategoriseret. Denne vejledning er vurderet som hjælpsom af 18 personer og har en gennemsnitlig bedømmelse på 4.6 stjerner ud af 9.5 anmeldelser. Har du et spørgsmål om CRUX SWRGM-49L, eller vil du spørge andre brugere om produktet?

Side 1/4
Crux Interfacing Solutions • Chatsworth, CA 91311
phone: (818) 609-9299 • fax: (818) 996-8188 • www.cruxinterfacing.com
rev.0717201 of 4
RAD IO REP LAC EME NT
SWC RE TEN TIO N
+
R
INTERFACING SOLUTIONS
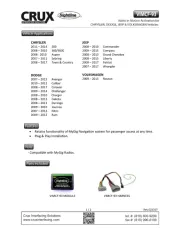
- Retains factory features in select GM LAN V2 (LIN) Bus vehicles while functioning with an aftermarket radio.
- Retains factory Steering Wheel Controls.
- Provides Factory Rear Seat Entertainment activation.
- Retains RAP (Retained Accessory Power).
- Includes factory backup camera connection for the IO3 system. (vehicles with IO4, IO5 & IO6 systems can be hard
wired to retain the OEM camera. See page 2)
PRODUCT FEATURES:
PARTS INCLUDED:
INSTALLATION DIAGRAM:
SWRGM-49L MODULE SWRGM-49L HARNESS SWC CABLE ANTENNA ADAPTER
AFTERMARKET
RADIO
Reverse Red/White













TO FACTORY
HARNESS
16-Pin Black
Connector
16-Pin Green
Connector
20-Pin Gray
Connector
INTERFACING SOLUTIONS
4-Pin
Connector
Cap or insulate if
not being used
Kenwood/JVC (BLUE / YELLOW)
Insulate with tape
if not being used
3.5MM SWC CABLE
Plug in the 3.5MM SWC cable to the 4-pin port
on the module. See “DIP SWITCH SETTINGS” section.
1 2 3 4
ON
AFTERMARKET
RADIO SELECTOR
(See Chart)
1 2 3 4
ON
Audio Input
Rear Camera (IO3)
Chime volume
adjustment
LIN Bus (GREEN)
Antenna Adapter
(Included)
SWRGM-49L
Radio Replacement Interface with Steering Wheel Control
Retention for GM LAN v2 (LIN) Bus Vehicles 2014 -2018
Crux Interfacing Solutions • Chatsworth, CA 91311
phone: (818) 609-9299 • fax: (818) 996-8188 • www.cruxinterfacing.com
rev.071720
SWRGM-49L
Radio Replacement Interface with Steering Wheel Control
Retention for GM LAN v2 (LIN) Bus Vehicles 2014 -2018
2 of 4
RAD IO REP LAC EME NT
SWC RE TEN TIO N
+
R
INTERFACING SOLUTIONS
BOSE AMPLIFIER BYPASS:
For vehicles equipped with a factory Bose amplier, extend the speaker wires of the SWRGM-49L harness and
connect to the Bose amplier output wires. Locate the Bose amplier to nd out how much speaker wires is
neccessary. The Bose amplier is located as follows: (NOTE: Bose ampliers are commonly found in the locaons listed
below but the manufacturer can mount it elsewhere. Installer should verify the locaon before installaon.)
Trucks = Center of the rear wall / SUVs = Center console or in the cargo space / Sedans = Rear deck or Trunk area
Pinout for the 8 and 16 pin OEM Bose amplier connectors:
14
8 5
1
8
9
16
Pin # Wire Color Descrip�on
1 Dark Blue / Grey Subwoofer +
2 Yellow Right Front Speaker +
3 Dark Blue Le� Front Speaker +
4 Red / Yellow Constant +12V
5 Grey / Black Subwoofer -
6 Yellow / Black Right Front Speaker -
7 Brown / Dark Blue Le� Front Speaker -
8 Black Ground
Pin # Wire Color Descrip�on
4 Brown / Light Green Right Front Tweeter +
5 Yellow / Dark Blue Tweeter +Le� Front
6 White Right Rear Speaker +
7 Light Green Le� Rear Speaker +
12 Purple / Brown Right Front Tweeter -
13 Yellow / Grey Tweeter - Le� Front
14 Dark Blue / Black Right Rear Speaker -
15 Light Green / Black Le� Rear Speaker -
The SWRGM-49L is prewired with an RCA connector to retain the OEM camera
on vehicles with a IO3 system. To retain the OEM camera on IO4, IO5 and IO6
systems, you will need connect an RCA cable to the 12-pin connector on the
HMI module found either by the passenger kick panel or behind the glove box.
Connect the RCA as follows:
HMI Connector
PIN 5 = Gray/Yellow to RCA posive
PIN 6 = White/Blue to RCA shield
We recommend soldering and using heat shrink tubing these wires for a secure
connecon.
Pin 6 Pin 5
White/Blue Gray/Yellow
OEM CAMERA RETENTION:
The SWRGM-49L has a potenometer to adjust the chime
volume. It is set at half way by default. To adjust the volume,
simply use a suitable screw driver and turn the potenometer
clockwise to increase the volume and counter-clockwise to
decrease the volume.
Chime
Volume
Adjustment
CHIME VOLUME ADJUSTMENT:


Produkt Specifikationer

Mærke: CRUX
Kategori: Ikke kategoriseret
Model: SWRGM-49L

Har du brug for hjælp?

Hvis du har brug for hjælp til CRUX SWRGM-49L stil et spørgsmål nedenfor, og andre brugere vil svare dig


Ikke kategoriseret CRUX Manualer

CRUX

CRUX DKGM-51 Manual

23 August 2025
CRUX

CRUX RVCFD-79F Manual

23 August 2025
CRUX

CRUX ACP-TSL Manual

23 August 2025
CRUX

CRUX RVCCH-75WT Manual

22 August 2025
CRUX

CRUX VIMMB-85N Manual

10 Juli 2025
CRUX

CRUX VIMPR-90P Manual

10 Juli 2025
CRUX

CRUX VIMCF-93C Manual

10 Marts 2025
CRUX

CRUX VIMFD-95F Manual

10 Marts 2025
CRUX

CRUX VIMCF-93 Manual

10 Marts 2025
CRUX

CRUX VIMAD-84 Manual

10 Marts 2025

Ikke kategoriseret Manualer

Nyeste Ikke kategoriseret Manualer

Kimo

Kimo LR 110 Manual

2 September 2025
HMS Premium

HMS Premium LPD02 Manual

2 September 2025
AVer

AVer E1008 Manual

2 September 2025
Biltema

Biltema 17-547 Manual

2 September 2025
Groen

Groen AH/1E Manual

2 September 2025
ACOPower

ACOPower HY-P30 Manual

2 September 2025
Globe

Globe RG30 Manual

2 September 2025
Neutrik

Neutrik NLT4FXX Manual

2 September 2025