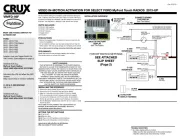
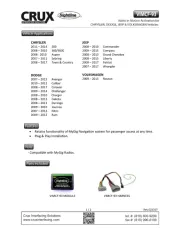
CRUX WVITY-01 Manual


Læs gratis den danske manual til CRUX WVITY-01 (6 sider) i kategorien Ikke kategoriseret. Denne vejledning er vurderet som hjælpsom af 16 personer og har en gennemsnitlig bedømmelse på 4.2 stjerner ud af 8.5 anmeldelser. Har du et spørgsmål om CRUX WVITY-01, eller vil du spørge andre brugere om produktet?

Side 1/6
R
INTERFACING SOLUTIONS
A/V
SERIES
Crux Interfacing Solutions • Chatsworth, CA 91311
phone: (818) 609-9299 • fax: (818) 996-8188 • www.cruxinterfacing.com
rev.031221
WVITY-01
Wi Connectivity Integration
for Select Lexus, Scion and Toyota Vehicles
1 of 6
- Enables wireless (Wi-Fi) Audio/Video mirroring from mobile devices to the OEM screen.
- Provides an audio/video input which can also be used to add a camera.
- Includes a USB input to play audio and video les.
- Provides a virtual remote control via a smartphone wi connection.
- Dual band (5GHz and 2.4GHz) Wi capability for clear connection.
- Includes HMDI output for high quality video.
- Works with Facetime, Maps, Skype, YouTube, and other apps.
PRODUCT FEATURES:
PARTS INCLUDED:
WORKS WITH:
WVITY-01 Vehicle Harness WVI-H Module Power Harness
Dual Antennas WiFi AV Out Harness AV In / Video Out Harness
IR Extension
iOS 7 and Newer OS 4.2 and Newer
Crux Interfacing Solutions • Chatsworth, CA 91311
phone: (818) 609-9299 • fax: (818) 996-8188 • www.cruxinterfacing.com
rev.0312212 of 6
WVITY-01
Wi Connectivity Integration
for Select Lexus, Scion and Toyota Vehicles
Wi-Fi
INTERFACE
SEEK
AUDIO
TRACK
PWR VOL
2-PIN
SWC PLUGS
ORANGE/WHITE
WIRE
GROUND
OPTIONAL SWITCH
(Not Included) This toggle switch option
is for vehicles that do not
have Steering Wheel Controls.
28-PIN
16-PIN
10-PIN
1 2 3
ON
1 2 3
ON
DIP SWITCHES
SHOULD
BE ALL OFF”
HDMI OUTPUT
A/V INPUT
BLUE = A/V TRIGGER*
RED = +12V ACC
BLACK = GROUND
*Connect BLUE A/V Trigger
to +12V to toggle A/V INPUT
A/V Extension
Cable
Video Out
(to extension monitors)
Video Input (or Camera)
Right Audio Input
Left Audio Input
USB Input
INSTALLATION DIAGRAM:
NOTE: The 16-Pin connector is not available on some newer vehicles. You can leave it disconnected if your
vehicle does not have a 16-Pin connector.
INSTALLATION INSTRUCTIONS:
THE AV INTERFACE:
1. Remove the factory radio from the dashboard.
Note: DO NOT disconnect the airbag connector.
2. Remove the factory connectors from behind the factory radio.
3. Mate the T-Harness connecons to the factory connectors. (Make sure all connectors are properly seated
into the interface and into the radio.) (JBL Radios see page 3)
4. Connect the Orange/White wire to your corresponding SWC type. (9-Buon or 5-Buon)
R
INTERFACING SOLUTIONS
A/V
SERIES


Produkt Specifikationer

Mærke: CRUX
Kategori: Ikke kategoriseret
Model: WVITY-01

Har du brug for hjælp?

Hvis du har brug for hjælp til CRUX WVITY-01 stil et spørgsmål nedenfor, og andre brugere vil svare dig


Ikke kategoriseret CRUX Manualer
CRUX

CRUX DKGM-16B Manual

3 Januar 2025
CRUX

CRUX ACPBM-77Y Manual

1 Januar 2025
CRUX

CRUX ACPMB-45W Manual

1 Januar 2025
CRUX

CRUX ACPLX-12XW Manual

1 Januar 2025
CRUX

CRUX ACPBM-77X Manual

1 Januar 2025
CRUX

CRUX ACPAD-01 Manual

1 Januar 2025
CRUX

CRUX ACPAD-81Y Manual

1 Januar 2025
CRUX

CRUX ACPBM-77Z Manual

1 Januar 2025
CRUX

CRUX ACPMB-50W Manual

1 Januar 2025
CRUX

CRUX ACPLR-01 Manual

1 Januar 2025

Ikke kategoriseret Manualer

Nyeste Ikke kategoriseret Manualer