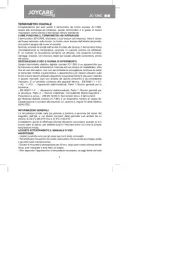
GIMA 25580 Manual


Læs gratis den danske manual til GIMA 25580 (8 sider) i kategorien Termometer. Denne vejledning er vurderet som hjælpsom af 18 personer og har en gennemsnitlig bedømmelse på 4.9 stjerner ud af 9.5 anmeldelser. Har du et spørgsmål om GIMA 25580, eller vil du spørge andre brugere om produktet?

Side 1/8
TERMOMETRO AURICOLARE
IR EAR THERMOMETER
THERMOMETRE AURICOLAIRE
OHRENTHERMOMETER
TERMÓMETRO AURICULAR
TERMÔMETRO AURICULAR
ΘΕΡΜΟΜΕΤΡΟ ΑΥΤΙΟΥ
M25580-M-Rev.3-02.22
PROF E S S I ONAL M EDI CAL PRODU CT S
Gima S.p.A.
Via Marconi, 1 - 20060 Gessate (MI) Italy
gima@gimaitaly.com - export@gimaitaly.com
www.gimaitaly.com
Made in China
25580
0476
IP22
Model: TH889
6
Intended use
The ear thermometer is electronic thermome-
ter using an infrared detector (thermopile de-
tector) to detect body temperature from ear
canal in people of all ages.
Intended operator: Have eight years of edu-
cation, no maximum.
Thank you for purchasing the thermometer.
This thermometer is designed with an ad-
vanced infrared and ambient temperature
compensation technology for instantaneous
self-diagnosis and accurate temperature
measurements. Do not use this device for
Live & Dead decision or Safety related ap-
plications.
Please consult with doctor if you have health
concerns.
Operating Instructions
NOTE: The device must stay in stable ambient (room) temperature for 15 minutes before operating.
1. Gently squeeze the opposite ends of the thermometer to pull off the probe cap. Do not use force to
remove the cap.
2. Always use a new and undamaged probe cover. Make sure the ear canal is clean.
Warning: Choking from swallowing small parts and batteries by children or pets is possible,
please keep small parts and batteries at places where children and pets can’t reach.
3. Install Probe Cover
1) Place a new probe cover on the connection ring. (See Figure 1)
NOTE: Make sure to place the “Adhesive Side” of probe cover “Upward.”
2) Align the probe with the center of probe cover. Insert the probe into the probe cover on the connec-
tion ring. (See Figure 2)
3) Push the connection ring until the “Click” sound. This means the probe cover has been installed
successfully.
NOTE: If the probe cover did not connect rmly, the ” icon will ash on the LCD screen. Please
check the setting of the probe cover again.
Figure 1 Figure 2
Proper installation of the probe cover and using the specic probe cover ensure accurate meas-
urements.
ENGLISH


Produkt Specifikationer

Mærke: GIMA
Kategori: Termometer
Model: 25580

Har du brug for hjælp?

Hvis du har brug for hjælp til GIMA 25580 stil et spørgsmål nedenfor, og andre brugere vil svare dig


Termometer GIMA Manualer

GIMA

GIMA 25580 Manual

30 August 2024
GIMA

GIMA 25560 Manual

30 August 2024
GIMA

GIMA HTD8816C Manual

25 August 2024
GIMA

GIMA TH889 Manual

25 August 2024
GIMA

GIMA A200 Manual

25 August 2024
GIMA

GIMA 25556 Manual

27 November 2022

Termometer Manualer

Nyeste Termometer Manualer

CDN

CDN DTL572 Manual

14 Juni 2025
CDN

CDN TCF400 Manual

14 Juni 2025
CDN

CDN IN1022 Manual

14 Juni 2025
CDN

CDN IN482 Manual

14 Juni 2025
CDN

CDN DTC450 Manual

14 Juni 2025
Comark

Comark N9002 Manual

13 Juni 2025
CDN

CDN TCG400 Manual

13 Juni 2025
CDN

CDN TCH130 Manual

13 Juni 2025