Hinkley Lighting Beckham 12193DZ Manual

Hinkley Lighting Lys Beckham 12193DZ

Læs gratis den danske manual til Hinkley Lighting Beckham 12193DZ (3 sider) i kategorien Lys. Denne vejledning er vurderet som hjælpsom af 38 personer og har en gennemsnitlig bedømmelse på 4.5 stjerner ud af 19.5 anmeldelser. Har du et spørgsmål om Hinkley Lighting Beckham 12193DZ, eller vil du spørge andre brugere om produktet?

Side 1/3
start here commencez ici
empezar aquí
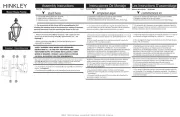
Mounting Instructions
Item No: 12193
Les Instructions D’assemblage
Numéro d’article: 12193
Instrucciones De Montaje
Número del artículo: 12193
English Spanish French
1. Find a clear area in which you can work. r. 1. T r.
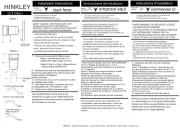
Drawing 2 - Fixture Mounting
B
Drawing 1 - Strap Detail
NOT PROVIDED.
SAFETY WARNING: READ WIRING AND GROUNDING INSTRUCTIONS (I.S. 18)
AND ANY ADDITIONAL DIRECTIONS. TURN POWER SUPPLY OFF DURING
INSTALLATION. IF NEW WIRING IS REQUIRED, CONSULT A QUALIFIED ELECTRI-
CIAN OR LOCAL AUTHORITIES FOR CODE REQUIREMENTS. ADVERTENCIA DE SEGURIDAD: LEA LAS INSTRUCCIONES DE CABLEADO
Y CONEXIÓN A TIERRA (I.S. 18) LAS INSTRUCCIONES ADICIONALES. Y
APAGUE LA ALIMENTACIÓN ELÉCTRICA DURANTE LA INSTALACIÓN. SI SE
REQUIERE UN NUEVO CABLEADO, CONSULTE A UN ELECTRICISTA
CUALIFICADO OA LAS AUTORIDADES LOCALES PARA OBTENER LOS
REQUISITOS DEL CÓDIGO.
AVERTISSEMENT DE SÉCURITÉ: LIRE LES INSTRUCTIONS DE CÂBLAGE ET
DE MISE À LA TERRE (I.S. 18) ET TOUTES LES DIRECTIONS SUPPLÉMEN-
TAIRES. ÉTEINDRE L'ALIMENTATION PENDANT L'INSTALLATION. SI UN
NOUVEAU CÂBLAGE EST REQUIS, CONSULTER UN ÉLECTRICIEN OU DES
AUTORITÉS LOCALES QUALIFIÉES POUR OBTENIR DES EXIGENCES EN
MATIÈRE DE CODE.
E
1.
HINKLEY . m 33000 Pin Oak Parkway, Avon Lake, OH 44012 800.446.5539 / 440.653.5500 hinkley co
H
I
N
K
L
E
Y
start here
commencez ici
empezar aquí
Glass installation Instructions
Item No: 12193
Instructions d'installation du verre
Numé r o d’artic le: 12193
Instrucciones de instalación de vidrio
Número del artículo: 12193
HINKLEY
English Spanish French
H I N K L E Y 3 3 0 00 Pin Oa k Par k w a y, A von Lak e, O H 4 4 01 2 8 0 0 . 44 6 . 5 5 3 9 / 4 4 0 . 65 3 . 55 0 0 h in k ley.c om
1. Find a clear area in which you can work.
2. Unpack fixture and glass from carton.
3. Carefully review instructions prior to assembly.
1. Encontrar un área clara en la que se puede trabajar.
2. Desembale xture fi y el vidrio de la caja.
3. Revise cuidadosamente las instrucciones antes del montaje.
1. Trouvez un endroit clair dans lequel vous pouvez travailler.
2. Déballez fi xture et de verre du carton.
3. Examinez attentivement les instructions avant l'assemblage.
.
4
3
1
2
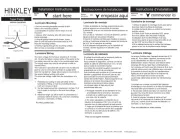
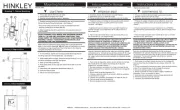
1. To install or replace glass panels (2), slip them up through the open
bottom of the cage (1) - see Drawing 1.
2. Slip bottom of glass panels (2) into channel (3) in bottom of cage (1)
tip top of panel into position, and bend over clips (4) to secure glass in
cage. Repeat procedure for remaining panels of glass.
3. Bulb can now be installed.
Drawing 1 - Glass installation 1. Para instalar los paneles de vidrio (2), deslícelos a través del
fondo abierto de la jaula (1) - vea el Dibujo 1.
2. Deslice la parte inferior de los paneles de vidrio (2) en el canal
(3) en la parte inferior de la jaula (1), ponga la parte superior del
panel en posición y doble los clips (4) para asegurar el vidrio en
la jaula. Repita el procedimiento para los restantes paneles de
vidrio.
3. Ahora se puede instalar la bombilla.
1. Pour installer les panneaux de verre (2), glissez-les à travers le
fond ouvert de la cage (1) - voir Dessin 1.
2. Glissez le fond des panneaux de verre (2) dans le canal (3)
dans le bas de la cage (1), mettez le dessus du panneau en
position et pliez les clips (4) pour fixer le verre dans la cage.
Répéter la procédure pour les autres panneaux de verre.
3. L'ampoule peut maintenant être installée.
detail 1
detalle 1
2
R
détail 1
4
NOTE: Your fixture is provide with rubber stripping (R) that has adhesive
on one side. This stripping is provided to help cushion the glass (2) and
prevent rattling under windy conditions. It is optional and does not have to
be used. By cutting pieces to size and peeling off the paper backing the
stripping and be attached to the bottom of the glass that fits into the
channel and a small pieces can be attached to the glass were the clips are
located - see detail 1 .
NOTA: Su accesorio se proporciona con una tira de goma (R) que
tiene adhesivo en un lado. Este decapado se proporciona para
ayudar a amortiguar el vidrio (2) y evitar el traqueteo en
condiciones de viento. Es opcional y no tiene que usarse. Cortando
las piezas a la medida y despegando el papel que respalda el
decapado y se unen a la parte inferior del vidrio que encaja en el
canal y se pueden unir pequeñas piezas al vidrio donde se
encuentran los clips - ver detalle 1.
REMARQUE: votre luminaire est équipé d'un décapage en
caoutchouc (R) avec adhésif sur un côté. Ce dénudage est prévu
pour aider à amortir le verre (2) et éviter le cliquetis dans des
conditions venteuses. Il est facultatif et ne doit pas être utilisé. En
coupant des morceaux à la taille et en décollant le papier supportant
le décapage et en les fixant au bas du verre qui s'insère dans le
canal, de petits morceaux peuvent être attachés au verre où se
trouvent les clips - voir détail 1.


Produkt Specifikationer

Mærke: Hinkley Lighting
Kategori: Lys
Model: Beckham 12193DZ

Har du brug for hjælp?

Hvis du har brug for hjælp til Hinkley Lighting Beckham 12193DZ stil et spørgsmål nedenfor, og andre brugere vil svare dig